Neon Flux: Visual Risk Engine PRO
Neon Flux: Visual Risk Engine PRO ⚡
Neon Flux PRO is an elite trend-following framework designed for traders who demand absolute precision and a clean, high-tech visual environment. This script goes beyond simple signals; it provides a comprehensive, real-time "Risk Engine" that manages your trades through a sophisticated three-tier exit system.
The Core: Zero-Lag Momentum Engine
Unlike standard moving averages that lag behind price, Neon Flux uses a Zero-Lag Trend Logic based on a smoothed EMA basis and dynamic volatility expansion (Standard Deviation).
Calculation: By processing the HLCC4 price source, the engine filters out market noise, ensuring that signals are only generated when a genuine momentum shift occurs.
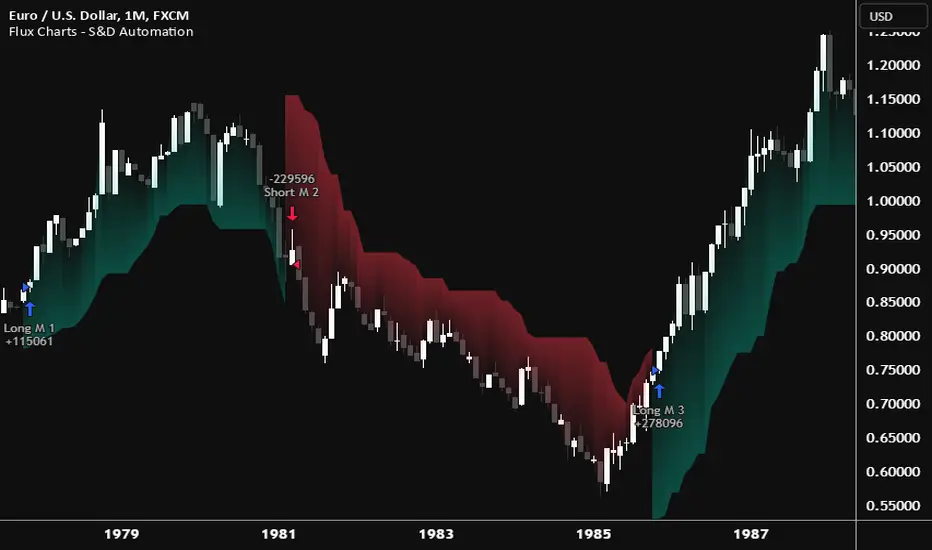
The Channel: The dynamic neon bands (#00ffbb & #ff0055) act as a volatility-adjusted corridor, helping you stay on the right side of the trend.
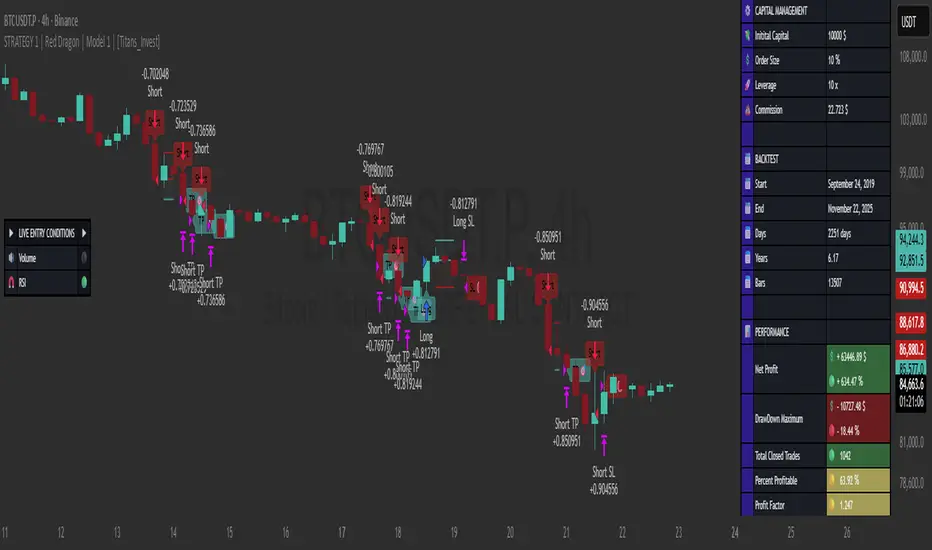
Unique Feature: 3-Tier "Scale-Out" System
The PRO version introduces an automated Triple-Target Framework. Most traders fail because they "all-in/all-out." Neon Flux PRO fixes this by automating your profit-taking:
TP 1 (Initial Gain): Secures 33% of the position to lower risk.
TP 2 (Trend Capture): Secures another 33% as the move develops.
TP 3 (Runner): Holds the remaining position for the maximum possible trend extension.
Next-Gen Visual Interface
The visual feedback is designed for fast-paced markets where every second counts:
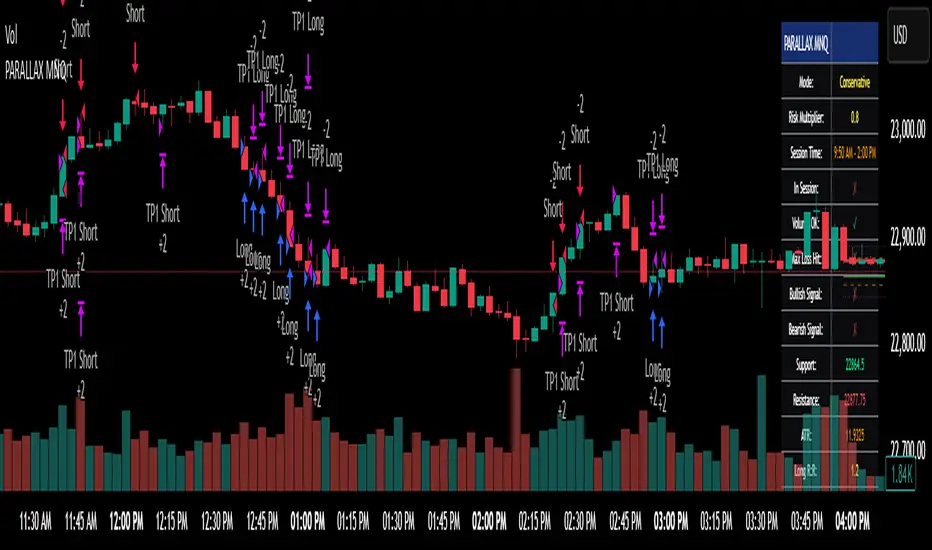
Dynamic Projections: High-contrast risk/reward boxes are drawn instantly upon entry.
Synchronized Labels: Unlike static scripts, all price labels (ENTRY, TP1, TP2, TP3, and SL) move dynamically with the price, remaining at the forefront of your chart for immediate readability.
Real-time Feedback: Visual "TP Hit" notifications appear directly on the chart when targets are reached.
How to Use
The Signal: A color shift to Cyan indicates a bullish regime; Magenta indicates a bearish regime.
The Setup: On a valid signal, the script executes an entry and projects the Risk Engine boxes.
The Execution: Use the synchronized price labels to set your exchange orders or let the strategy backtester simulate the scaling-out process.
Pine Script®策略