Share Size CalcCalculate the share size to be used based on a percentage risk per trade and total capital in the account.
Riskmangement

DRAMA Channel [AiQ PREMIUM]DRAMA Channel Designed by KS
AiQ PREMIUM is not just an indicator; it is a complete, visually immersive trading ecosystem designed for traders who demand precision, aesthetics, and data-driven confidence.
Built upon advanced Fractal Adaptive Moving Average (FRAMA) logic and fused with a proprietary volatility engine, AiQ PREMIUM filters out market noise to reveal high-probability institutional setups.
💎 Core Features
1. DRAMA Volatility Engine (D-FRAMA) Unlike standard Moving Averages, our adaptive algorithm adjusts to market fractal dimensions. It tightens during consolidation to avoid false signals and expands during trends to capture the full move.
2. Multi-Timeframe (MTF) Matrix Stop guessing the trend. The built-in "Trend Matrix" scans M5, M15, M30, H1, and H4 timeframes in real-time. Signals are only generated when there is a confluence of momentum.
3. AiQ Confidence Score & Win Rate The dashboard calculates a dynamic Confidence Score (1-5 Stars) based on historical performance, trend alignment, and volatility strength.
⭐⭐⭐⭐⭐ = Strong Institutional Alignment
⭐ = Risky / Counter-trend
4. Auto-Fibonacci Extensions & Risk Management
Smart Entries: Clear visual signals with glassmorphism UI.
Dynamic Risk: SL/TP are calculated using ATR (Average True Range) to adapt to market volatility.
Auto Targets: Automatically projects TP1, TP2, TP3 (Fib 2.618), and TP4 (Fib 4.236).
5. Premium Visual Experience Choose your trading personality with our Theme Engine:
🏆 Black Gold: Luxury, high-contrast dark mode.
🦄 Cyber Neon: Modern, vibrant aesthetics.
⚪ Clean Quant: Minimalist institutional look.
🛠️ How to Use
Wait for the Signal: Look for the 🚀 LONG SETUP or 🚀 SHORT SETUP badge.
Check the Stars: Ideally, take trades with 3 stars or above on the dashboard.
Confirm with Matrix: Ensure the MTF Matrix (Top Right) shows "BULL" for Longs or "BEAR" for Shorts on higher timeframes (H1/H4).
Manage the Trade:
Secure partial profits at ✅ TP1.
Move SL to Breakeven at ✅ TP2.
Let runners fly to ✅ TP3 and ✅ TP4.
⚠️ Disclaimer - Trading involves high risk. This tool is designed to assist your analysis, not to replace it. Past performance is not indicative of future results. Always use proper risk management.

Futures Risk Manager (Futures)Risk management table for consistency trading.
Auto adjustable for MINI/MICRO based on your account.
can change RR shows SL and TP and amount to enter.
Please take note that you need to update every trade the stop tick and RR ratio.
Good luck in your trading journey.

AlphaStrike: Zen ModeDescription:
1. The Philosophy: Reducing Cognitive Load Modern charts are often cluttered with dozens of noisy lines (Bollinger Bands, Moving Averages, Oscillators) that lead to "Analysis Paralysis." This script is designed with a "Zen" philosophy: P rocess the complexity in the background, but display only the decision.
This is not a simple indicator overlay. It is a Risk-Based Trading Engine that runs multiple validation checks (Momentum, Volatility, and Price Action) simultaneously but hides the underlying calculations to keep the chart clean. It focuses the trader's attention on the two things that matter most: Trend Direction and Position Sizing.
2. The "Invisible" Technical Engine The script operates on a Dual-State Logic system that adapts to market conditions. It uses standard indicators as filters, not just visuals.
A. Trend State (The Backbone) The script calculates a volatility-adjusted Trend Baseline (SuperTrend).
Green State: The market is in a markup phase. The script looks for continuation.
Red State: The market is in a markdown phase. The script looks for defense.
B. The "Confluence" Reversal Logic Instead of cluttering the screen with Bollinger Bands and RSI windows, the script performs these checks internally:
Condition 1 (Volatility): Is price extending beyond the 2.0 Standard Deviation (Bollinger Lower/Upper)?
Condition 2 (Momentum): Is RSI overextended (<35 or >65)?
Condition 3 (Price Action): Is there a specific Pin Bar candle pattern (Long wick rejection)?
Result: Only when all three conditions align does the script print a "Reversal Circle." This filters out weak signals that usually occur in strong trends.
3. The Risk Management Calculator (Key Feature) Most traders fail not because of bad entries, but because of inconsistent sizing. This script features a built-in Dynamic Position Sizing Dashboard located in the bottom right.
Adaptive Stop Loss:
In a Trend: The Stop Loss is automatically set to the Trend Line (SuperTrend).
In a Reversal: The script internally scans for the nearest Swing Low/High (using hidden Pivot calculations) and sets the Stop Loss there.
Position Sizing Math: The dashboard reads your Account Size and Risk % inputs. It instantly calculates the "Max Size" (contract/share amount) allowed for the current trade.
Formula: Position Size = (Account Value * Risk %) / Distance to Stop.
Benefit: This ensures you risk the exact same dollar amount on every trade, whether the stop loss is 1% away or 10% away.
4. How to Read the Signals
Triangles (Breakouts): These represent a shift in the dominant trend direction.
Green Triangle: Bullish Trend Start.
Red Triangle: Bearish Trend Start.
Circles (Mean Reversion): These are high-probability counter-trend plays.
Blue Circle: Buy Reversal (Oversold + Pinbar + Bollinger Support).
Orange Circle: Sell Reversal (Overbought + Pinbar + Bollinger Resistance).
5. Settings
Trend Settings: Adjust the ATR Period and Factor to change the sensitivity of the trend line.
Reversal Settings: Tweak the RSI and Bollinger thresholds to filter out more/less signals.
Risk Management: Input your total Account Size and desired Risk Per Trade (e.g., 1%) to calibrate the Dashboard.
Disclaimer This tool provides algorithmic analysis and risk calculations. It does not guarantee profits or provide financial advice. Always verify position sizes before executing.

Quantum RCI FusionDescription:
Overview: The Quantum Momentum Engine Quantum RCI Fusion is a sophisticated momentum oscillator designed to solve the #1 problem of classic indicators: false signals in sideways markets. At the core of this script is the Rank Correlation Index (RCI), a powerful statistical tool based on Spearman’s correlation. Unlike RSI or Stochastic which only look at price levels, the RCI evaluates the "quality" of a trend by measuring the temporal correlation of price ranks.
This script is not just a line drawing: it is a complete trading ecosystem that fuses three RCI timeframes, volatility filters, and a real-time Risk Management simulation.
🛠 How It Works: The "Fusion" Logic
The strength of this indicator lies in the synergy between its components. It is not a simple mashup, but a filtered logical system:
Triple RCI Engine (Fast, Mid, Slow):
Fast (13) & Mid (18): These generate the Crossover signal for precise entry timing.
Slow (30) - The "Trend Shield": The true innovation. It acts as a directional shield; if the baseline is bullish, the script protects Long positions by ignoring premature exit signals, allowing you to ride the full trend.
HMA Smoothing: Raw price data passes through a Hull Moving Average before the RCI calculation. This drastically reduces market "noise" without sacrificing the responsiveness typical of the RCI.
Intelligent Filters (Anti-Whipsaw):
ADX Integration: Signals are blocked if the ADX is below the threshold (default 20), preventing trading in flat/ranging markets.
Momentum Impulse: Requires a minimum variation (Delta) in the RCI to confirm that the move has real drive and is not just random fluctuation.
🛡 Risk Management & Simulation
Since timing is useless without risk management, Quantum RCI Fusion includes a Dashboard and sophisticated exit logic:
Multiple Exits:
Take Profit / Stop Loss: Based on dynamic ATR multipliers.
Shield Break: Safety exit if the underlying trend (Slow RCI) changes direction.
Emergency: Immediate close if momentum sharply reverses across the zero line.
Live Dashboard: Monitors Win Rate, virtual PnL, and Trade Status (Long/Short/Scanning) in real-time directly on the chart, removing the need for external backtesters.
🚀 How to Use It
Setup: Add the script to a separate pane below your price chart.
Entry Signals:
LONG (Green Triangle): RCI Fast crosses Mid upwards + Oversold Zone (< -80) + ADX > 20 + Bullish Shield.
SHORT (Red Triangle): RCI Fast crosses Mid downwards + Overbought Zone (> 80) + ADX > 20 + Bearish Shield.
Customization:
Scalping: Reduce RCI lengths (e.g., 8/12/20) and disable the "Trend Shield" for quick entries and exits.
Swing Trading: Keep defaults and use the ATR Trailing logic to manage positions on H4 or Daily timeframes.
⚖️ Notes & Credits
Originality: This script enhances the standard RCI by implementing Array-based calculations (optimized for Pine v6), proprietary HMA smoothing, and unique "Trend Shield" logic.
Open Source: The code is released under the MPL 2.0 license. Credits to the Pine community for the foundational mathematical formulas of Spearman's correlation.
Disclaimer: The statistics shown in the dashboard are simulations based on live data and do not guarantee future profits. You are responsible for your own trading decisions.
🖼 Instructions for the Publication Chart (Preview)
To ensure your script gets approved and attracts users, follow these steps for the cover image:
Symbol: Use a volatile and liquid asset, e.g., BTCUSD or XAUUSD (Gold), on a 1H or 4H timeframe.
Clean Layout: Remove all other indicators from the chart (no Moving Averages on price, no Bollinger Bands). The focus must be solely on your script in the bottom pane.
Visualization:
Ensure the Dashboard (stats table) is clearly visible and does not obscure the most recent candle.
The chart should show at least one clear BUY and one clear SELL signal, ideally with the exit icons (the "X" or flags) visible to demonstrate the exit logic.

VIX/VVIX Regime CandlesVIX / VVIX Regime Candles is a volatility regime indicator designed to provide traders and analysts with a clear understanding of market risk conditions. By analyzing both VIX TVC:VIX (implied volatility) and VVIX CBOE:VVIX (volatility of volatility)—including their absolute levels, directional changes, and interactions—the script classifies the market into nine distinct regimes.
Rather than relying solely on absolute volatility values, this indicator incorporates changes over time and divergences between VIX and VVIX, highlighting potential latent risks that may not be immediately apparent from the VIX alone. Falling VIX and VVIX typically indicate improving conditions, while rising levels or divergence can signal emerging stress.
Methodology
VIX / VVIX Regime Candles combines absolute levels, directional changes, and relative behavior of VIX and VVIX to classify market conditions into nine volatility regimes. The methodology includes the following components:
Data Source and Frequency
Uses daily closing prices for CBOE VIX (implied volatility of S&P 500 options) and VVIX volatility of VIX options). Applies these daily values to any chart timeframe, but regime updates occur once per day.
Threshold-Based Regime Classification
VIX thresholds classify absolute market stress: Very Low, Medium Low, Medium High, High
VVIX thresholds classify volatility of volatility: Low, Medium, High
Thresholds are fully configurable by the user to adapt to different market conditions or asset classes.
Momentum / Change Analysis
Calculates percent change over a configurable lookback period for both VIX and VVIX:
VIX Change = (VIX current - VIX lookback) / VIX lookback
VVIX Change = (VVIX current - VVIX lookback) / VVIX lookback
Determines whether VIX and VVIX are rising, falling, or stable relative to configurable percentage thresholds.
Combined Regime Logic
Integrates level-based and momentum-based signals:
High VIX + High VVIX + rising → Panic
Moderate VIX + rising VIX + elevated VVIX → Storm
Low VIX + rising VVIX → Hidden Risk
Falling VIX and VVIX → Low Risk / Settling or Calm
Includes intermediate regimes such as Preparing for Storm and Calm After Storm, providing early warning or recovery context.
Regime Assignment
Assigns a single integer value (1–9) for the current regime.
Detects regime changes to avoid redundant labeling; labels are only created when a new regime begins, minimizing chart clutter.
Visual Encoding
Bar colors correspond to the active regime.
Labels indicate the regime name and are automatically positioned above or below the candle for readability.
Legend table and VIX/VVIX value table provide users with a full reference to interpret the regime directly on the chart.
Parameter Customization
Users can adjust the following parameters to tailor the indicator to their analysis:
VIX and VVIX Thresholds: Modify the levels used to define very low, medium, and high regimes.
Change Thresholds: Adjust the percentage change required to classify VIX or VVIX as rising or falling.
Lookback Period: Change the number of periods over which VIX and VVIX percentage changes are calculated.
Colors: Customize the colors assigned to each regime for candle coloring and labels.
These settings allow users to adapt the indicator for different market conditions, asset classes, or personal trading strategies.
Intended Use
This indicator is intended for risk assessment and contextual analysis rather than as a direct trading signal. It is useful for:
Evaluating risk-on versus risk-off market environments
Informing position sizing and exposure management
Identifying periods when market conditions are unstable
Macro, swing, and portfolio-level analysis
Important Considerations
VIX and VVIX are daily series, so intraday charts will only reflect updates once per day
Thresholds are customizable, and default values reflect commonly observed market behavior
Access to CBOE:VVIX may depend on the TradingView subscription plan
The indicator should be used in conjunction with additional technical or fundamental analysis
This script is provided for educational and informational purposes only and does not constitute financial advice. Users should exercise appropriate risk management when making trading decisions.

Smart Money Confluence Heatmap [PhenLabs]📊 Smart Money Confluence Heatmap
Version: Pine Script™ v6
📌 Description
The Smart Money Confluence Heatmap is a professional‑grade Smart Money Concepts indicator designed to identify high‑probability institutional trading zones. It merges multiple advanced market factors into a single confluence score, allowing traders to focus only on areas that matter. By synthesizing Fair Value Gaps, Order Blocks, Liquidity Sweeps, Volume Strength, and Market Structure, this script removes subjective bias and replaces it with data‑driven confirmation.
🚀 Points of Innovation
Unified confluence scoring system combining five institutional concepts
Adaptive ATR‑based zone sizing for volatility‑adjusted precision
Automatic trend and structure alignment scoring
Volume‑validated Order Blocks and Liquidity Sweeps
Probability‑ranked zones instead of static levels
🔧 Core Components
Fair Value Gap detection with imbalance strength scoring
Order Block identification confirmed by displacement and volume
Liquidity sweep analysis using wick depth and volume expansion
Volume strength modeling for accumulation and distribution phases
Market structure confirmation using BOS and directional bias
🔥 Key Features
Confluence heatmap zones graded by bullish and bearish probability
Minimum score filtering to remove low‑quality setups
Automatic risk‑to‑reward based TP and SL projections
Entry alerts when price taps validated institutional zones
🎨 Visualization
Color‑graded heatmap zones representing probability strength
Percentage score labels with component icons
On‑chart dashboard displaying market bias and structure state
✅ Best Use Cases
Liquidity sweep reversals at key structure levels
Trend‑aligned pullbacks into institutional zones
Intraday and swing trading using confluence confirmation
⚠️ Limitations
Not designed for low‑liquidity or extremely ranging markets
Confluence does not guarantee outcomes and requires risk management
💡 What Makes This Unique
Objective probability scoring instead of subjective SMC interpretation
Multi‑layer institutional confirmation in a single indicator
Built for traders who demand clarity, not chart clutter
💡 Note:
This indicator is for educational purposes only and should always be used alongside proper risk management and higher‑timeframe context.

Easy Risk Calculator with FeesThis Pine Script creates a position sizing calculator for TradingView that helps traders understand the true cost and risk of a trade when accounting for exchange fees. Here's what it does:
Core Purpose
The script calculates the actual position size, costs, and risk for a trade based on a minimum position value in USDT, while factoring in trading fees that affect both entry and exit prices.
Key Calculations
Position Size Determination:
Takes a desired position value in USDT and adjusts for fees
For longs: divides by entry price × (1 + fee) since you pay fees when buying
For shorts: divides by entry price × (1 - fee) since you receive less when shorting
Risk Analysis:
Calculates the reverse risk - determining how much you'd actually lose based on your position size, rather than starting with a target risk amount
Computes effective entry/exit values - the true USDT value after accounting for fees on both sides of the trade
Expected loss shows the actual dollar amount you'd lose if your stop loss is hit
Risk deviation reveals the percentage difference between your expected loss and calculated risk amount
Visual Output
The script displays a table on the chart showing:
Trade direction (LONG/SHORT with color coding)
Entry price and stop loss levels
Fee percentage used
Position size in both USDT and units of the asset
Effective entry and exit values (after fees)
Expected loss if stopped out
Deviation from target risk
Calculated risk amount in USDT
This tool is particularly useful for traders who need to work with minimum position sizes on exchanges and want to understand exactly how fees impact their actual risk exposure.Claude is AI and can make mistakes. Please double-check responses. Sonnet 4.5Claude is AI and can make mistakes. Please double-check responses.

Chart Clues PRIME - Structure Based Trade Management ToolkitChart Clues PRIME is a rule-based trading assistance tool designed to help traders read market structure, manage open positions, and stay aligned with higher-timeframe context.
This indicator does not generate random buy/sell calls or promise profits.
Instead, it focuses on clarity, confirmation, and position awareness, allowing traders to make better decisions based on structure and price behavior.
Chart Clues PRIME is built for traders who already understand basic market concepts and want a clean, structured framework to support their trading process.
Core Philosophy
Markets move in phases — expansion, pause, and reversal.
Chart Clues PRIME highlights where price is, what phase it is likely in, and how existing positions should be managed — without emotional bias.
Key Features
-> Structure-Based Levels
Automatically highlights important bullish and bearish reference levels
Supports multiple swing-based levels
Clearly shows when levels are approached, respected, or triggered
-> Execution Gate Logic
Prevents premature reactions
Helps traders identify when price actually interacts with a level
Designed to reduce false entries and emotional decisions
-> Demand & Supply Zones
Higher-timeframe aware zones
Zones remain stable once formed
Designed for context, not instant entries
-> Market Status Awareness
Displays whether the market is trending or consolidating
Helps traders avoid forcing trades during low-quality conditions
-> Smart Exit Framework (Structure-Based)
Exit logic is only active after a trade is executed
Uses structure, momentum shift, and price behavior
Helps protect profits or reduce unnecessary drawdowns
Does not rely on fixed targets or arbitrary indicators
-> Multi-Timeframe Context
Displays higher-timeframe bias in a clean table format
Displays higher-timeframe bias in a clean table format
Who This Indicator Is For
Traders who already understand basic chart reading
Traders looking for discipline and structure, not signals
Traders looking for discipline and structure, not signals
Who This Indicator Is NOT For
Traders looking for guaranteed profits
Traders expecting instant buy/sell alerts
Beginners with no understanding of market structure
Important Notes (Policy-Safe)
This indicator is not financial advice
No profit guarantees are implied
All trading decisions remain the responsibility of the user
Past visual examples do not represent future performance
Usage Recommendation
Chart Clues PRIME works best when used alongside:
Proper risk management
Consistent position sizing
A clear trading plan
Final Words
Chart Clues PRIME does not try to predict the market.
It helps traders understand where they are, what has changed, and when discipline matters most.

Backtest Pro - The TradingView Backtesting EngineBacktest your indicators — no strategy code required. Backtest Pro is the next-generation backtesting engine for smarter testing. Simply link your signals, set your stops, and start testing.
With its upgraded UI/UX and fundamentally improved stop system, Backtest Pro replaces the legacy PSE (Practical Strategy Engine) and sets a new standard for TradingView backtesting. It delivers more accurate intrabar trailing stops, flexible stop types (Points, ATR Multiplier, %), and a smoother workflow for greater precision and control.
Once loaded on your chart, Backtest Pro appears as BT Pro as the script title and in the Strategy Tester, alerts, and chart labels.
Beyond the core stop and pyramiding logic, Backtest Pro also introduces:
A clearer Data Window for reviewing trade details.
Improved signal labels in the Strategy Tester’s List of Trades for easier log analysis.
Updated chart labels that align better with TradingView’s native style and make signals easy to interpret. Together, these improvements make Backtest Pro the most practical and user-friendly way to backtest indicator-based trading signals in TradingView.
Copyright © 2025 CoinOperator
________________________________________________________________________________
🚀 Why Traders Choose Backtest Pro
Answer in minutes what used to take days of manual testing.
Backtest Pro is a drop-in, ready-to-use backtesting engine that links to your indicator with just a few simple connection lines. It provides more accurate intrabar trailing stops, multiple stop types (Points, ATR Multiplier, %), and a smoother workflow for greater precision and control.
Whether you’re running a quick test or fine-tuning complex strategies, Backtest Pro helps you reach clearer insights faster.
________________________________________________________________________________
👤 Who Backtest Pro Is For
Backtest Pro is designed for traders who already have a trading methodology or entry/exit logic and want professional-grade validation and risk analysis.
Backtest Pro is not a signal service and does not provide discretionary trade recommendations. All entries and exits — including alerts used for automation — are generated solely from user-defined logic.
You bring the logic — Backtest Pro provides the structure, metrics, and discipline.
Backtest Pro helps swing traders, day traders, and strategy developers streamline the backtesting process without sacrificing depth or accuracy. It offers flexible stop management, enhanced Data Window metrics, refined Strategy Tester labeling, and clean on-chart visuals to support consistent evaluation.
Backtest Pro supports trading and backtesting on futures (continuous contracts), forex, crypto, stocks, ETFs, and commodity/index CFDs (tradable if offered by your broker).
________________________________________________________________________________
⚡ Quick Start
Add Backtest Pro to your chart. It appears as BT Pro as the script title and in the Strategy Tester, alerts, and chart labels.
Add a few connector lines to your indicator, then link your custom entry and exit signals.
Adjust position sizing, stops, and pyramiding.
Run the TradingView Strategy Tester for instant results.
________________________________________________________________________________
🔄 From PSE to Backtest Pro
Backtest Pro builds on the foundation of the PSE (Practical Strategy Engine), evolving it into a more refined tool. While PSE introduced flexible stop handling, Backtest Pro enhances the experience with:
More accurate intrabar trailing stops
Expanded stop type options (Points, ATR Multiplier, %)
Upgraded Data Window for easier review
Clearer trade signals in the Strategy Tester
Cleaner, more consistent chart labels
Wash Sale Prevention is Now Optional. If enabled, it only applies to assets of types stock and fund.
🛠 INPUTS TAB SETTING
📅 Trading Window
Enable Trading Window to define the date/time when trading is allowed. Disable to trade the entire market data.
Partition the time when trading is allowed to see if your indicator settings work well across the different ranges. Your resulting metrics should be acceptable across all four (4) ranges: entire range, 1st half, IQR, and 2nd half.
Show Trading Window Lines – Enable to draw vertical lines at the start and end of the trading window for clear visual definition of when trading is allowed.
💰 Position Sizing (Money Management)
Separating the equity risk into initial position and pyramid position allows for greater ability to maximize profits within your acceptable drawdown.
Note : Position sizing is determined on the anticipated fill price which is affected by the maximum of slippage and selected price gap (discussed in the Execution Rules section). Max Equity per Position (%) : This setting applies to each position within a trade group . Limits the position size and will not exceed this amount. Set as desired. Default is 20% for non-leverage trading. For leveraged trading, adjust accordingly. Example: for 3× leverage, enter 300 (3 × 100 = 300).
Max Equity Drawdown Warning (%) : Triggers an alert if the strategy’s equity drawdown exceeds this threshold. Select the method to use for this warning. If BT Pro, then it is based on peak equity at bar-close. If TradingView, then it is based on the built-in variable strategy.max_drawdown_percent. Helps you manage strategy-level risk tolerance.
Scaled Pyramiding : Adjusts position size incrementally for each pyramid entry—either decreasing or increasing exposure relative to the prior entry.
Start Position: The entry number at which scaling begins. For example, 3 means scaling starts on the 2nd pyramid (the 3rd entry overall).
Chg(%): The percentage change applied to each subsequent pyramid entry.
Max(%): The maximum cumulative reduction allowed when scaling downward. Ignored for upward scaling because increases are already capped by Max Equity per Position (%).
⚖️ Execution Rules
Trade Direction : Select either Both , Long Only, or Short Only.
Alert Failed to Trade – Enable to alert you when a trade did not happen due to low equity or low order size. Applicable only for the first position of a trade group.
Cooldown Period : Controls how long the engine waits after an exit before allowing a new trade group. Backtest Pro also applies a small built-in safeguard to prevent unrealistic same-bar flips: ● 1 bar minimum for same-direction entries
● 2 bars minimum for direction changes
Prevent Wash Sales : Enable if you want the Backtest Pro to enforce a minimum cooldown period of 30 days for trade groups that result in a loss. Only applies to assets of types stock and fund.
Pyramid Conditions with Price Gaps : Dwn Gap and Up Gap refer to price gaps. A price gap is the difference between the closing price of the previous candle and the opening price of the current candle, and their value is shown in the Data Window. Selection options include: disabled (the default), median, avg, p80 (for 80th percentile), and p90 (for 90th percentile). The values reflect ~500 most recent bars from the cursor position. Disabled sets the Dwn Gap and Up Gap to zero in the below logic. Pyramids require a tailing stop loss, TSL. The price gaps are used in conditions for pyramids:
To ensure the previous position is protected when opening a pyramid position. A new pyramid position will not open until its trailing stop loss protects the prior position.
To prevent a pyramid position from becoming a loss when too close to a take profit level, TP (if enabled), due to commission cost.
The logic for #1 and #2 is as follows:
For a Long Pyramid: TSL: Stop Price - max(DwnGap, slippage) > LastEntryPrice
TP (if enabled): Long take profit > close + max(UpGap, slippage) AND gain > commission cost
For a Short Pyramid:
TSL: Stop Price + max(UpGap, slippage) < LastEntryPrice
TP (if enabled): Short take profit < close - max(DwnGap, slippage) AND gain > commission cost
Show All Gap Stats in Data Window
Enable to show all price gap statistics in the Data Window to review market conditions.
Disable for the Backtest Pro to run most efficiently.
Note: Statistics selected in Dwn Gap and Up Gap settings are always shown, regardless of this option.
🛑 Exit Strategy (Risk Management)
Backtest Pro supports multiple stop loss styles, giving traders the tools to backtest strategies in TradingView with precision:
The Exit Strategy applies a common protective stop across the entire trade group.
Pyramids require a trailing stop loss. A new pyramid position will not open until its trailing stop loss protects the prior position.
Plot Stop Level : You can plot the stop level either as of bar close (the default) or as of bar open. This only affects the visual plot. The underlying logic does not change. The trades will be the same regardless of the setting.
ATR Length : The ATR Length is used with the ATR multiplier and is common to stop loss, SL, trailing stop loss, TSL, take profit, TP, and the time-based exit option. It is the number of bars (periods) used in ATR calculation.
Price-Based Exits Stop Loss and Trailing Stop Loss options are Points, ATR Multiplier, and %.
The Trailing Stop Loss is activated from entry of the initial position of a trade group.
Take Profit options are Points, ATR Multiplier, %, and R-Multiple. How Trailing Stops Work in the Backtest Pro All trailing stop inputs (Points, ATR Multiplier, or %) are converted at the first entry into a fixed currency offset.
That offset is reactive intrabar and applied as the trailing distance from the most favorable price (highest for longs, lowest for shorts) since the first entry in the trade group.
Even if “%” is selected as the input method, the engine uses the fixed currency offset.
The trailing stop offset (points) is displayed in the Data Window for reference, allowing you to enter that offset directly at your broker if needed.
⚠️ Caution: Always enter a points-based trailing stop at your broker—never a percentage-based trailing stop. Volatility-Based Exit While in a trade, ATR values are accumulated each bar. The position exits once the total exceeds ATR Multiplier × ATR at entry if the Reward/Risk is below the set threshold.
Dividends are not included in reward (i.e., profit).
👉 These flexible stop types solve one of the biggest limitations of the legacy PSE and make Backtest Pro a true TradingView backtesting engine.
📑 Trade Signal Labels in Strategy Tester
Backtest Pro uses standardized trade labels in the Strategy Tester → List of Trades. These labels make it easy to understand the reason behind each entry or exit at a glance. Entry : Standard entry signal when conditions are met.
Stop : Stop-loss exit triggered at your defined stop level.
Pyr-Entry : Pyramid entry, adds to an existing position.
Trail-Stop : Trailing stop exit based on offset logic. Note : If the stop level has been adjusted to equal the trailing stop level, the Strategy Tester may display Stop instead of Trail-Stop. The exit displayed is the one Pine Script evaluates first, but the actual exit behavior remains correct.
Exit : Standard exit signal.
Delay-Exit : One-bar delayed exit, prevents immediate exit when position entry and exit signal occur on the same bar.
TP : Take Profit exit, closes position at your profit target.
RR-Exit : Reward/Risk exit — position closes when ATR accumulation exceeds the set threshold and R/R is below target.
📊 Performance Metrics & Reporting
Include Dividends in Profit
Adjusts ROI, CAGR, Reward/Risk, Avg Invest/Trade-Grp, and Equity.
Assumes dividends are taken as cash (not reinvested). They are applied to Equity on the ex-date instead of the payment date.
Only applies if the security issues dividends and the chart is 1D or lower timeframe; otherwise ignored.
Include Dividends in Profit Factor
Applies only when Include Dividends in Profit is enabled.
Adds dividend income to both gross profits and gross losses when calculating Profit Factor, so PF reflects total return (trading + dividends).
Affects Avg Trade-Grp Loss, Equity Loss from ECL, and Equity Loss from ECL (%).
Show Dividends
Displays the payout in currency/share, as well as the total amount based on the number of shares of the position(s) currently held by the trade group. For long positions you earned the dividends. For short positions you owe the dividends.
Show Metrics Table
The on-chart Metrics Table displays a compact set of key statistics for quick reference and mobile use. Full and expanded metrics are available in the Data Window on desktop or browser. Section groupings may differ between the table and Data Window to optimize readability and presentation in each context.
📊 Data Window
Note : Accessible via a button on the right-hand toolbar of the chart interface. Unlike the Metrics Table, Data Window values update dynamically as you move your cursor across bars. All metrics are based on trade groups.
Trade Information
Enter Price
Stop Price
Favorable Extreme : only shows if trailing stop loss is enabled on Inputs tab. The most favorable price (highest for longs, lowest for shorts) since the first entry in the trade group.
TSL Offset Points : only shows if trailing stop loss is enabled on Inputs tab.
Take Profit : only shows if take profit is enabled on Inputs tab.
Leverage information applies to trade groups.
Fail Pos / Margin (%) : Shows zero if the failed position size was <1, or the margin % that failed to meet the requirement in the Properties tab. A flag appears above the bar where a failed trade occurred. Only applies to the first position of a trade group. Hover over the flag to view the value in the Data Window.
Notional Value : total trade group position size x latest entry price x point value. The equity must be > notional value x margin requirement for a trade to occur.
Current Margin (%) : must be greater than margin requirement set on the Properties tab in order for a trade to occur.
Margin Call Price : when enabled on the Style tab is displayed on both the chart and the Data Window as shown below.
Performance Net Profit (%) : Will include dividends if 'Include Dividends in Profit' is enabled. Only shows in Data Window if 'Include Dividends in Profit' is enabled.
ROI (%) and CAGR (%) : Based on Avg Invest/Trade-Grp. Adjusted for dividends if enabled.
Reward/Risk (profit/risked, expectancy per amount risked): Adjusted for dividends if enabled. Color is green if above breakeven, red if below, and yellow if within ±0.1 tolerance.
Profit Factor (PF) : By default, dividends are not counted in win/loss classification.
Win % : Uses same coloring scheme as Reward/Risk except uses a ±2% tolerance for yellow. Breakeven point is the balance between Reward/Risk and Win %, showing whether the system can be profitable. For example, for a low Win % a high Reward/Risk is needed for the system to be potentially profitable. Equity & Growth
Equity : Your current equity.
Dividend Sum : The amount of total dividends accumulated since entering the market. Only shows in Data Window if 'Include Dividends in Profit' is enabled. Risk & Drawdown
Maximum Drawdown (MDD)
Measures the largest peak-to-trough decline in account equity over the entire backtest.
A new peak is recorded whenever equity reaches a new high; the system then tracks the lowest equity seen until a new peak forms.
This method uses bar-close equity including both realized and unrealized P&L. Therfore, it may not match TradingView’s displayed drawdown values which use a different method.
Maximum Drawdown %
Expresses MDD as a percentage of the equity peak from which the decline occurred.
This normalizes drawdown across different account sizes and assets, making strategy-to-strategy risk comparisons more meaningful.
Maximum Consecutive Losses applies to trade groups.
Equivalent Consecutive Losses (ECL) : Based on Win % and Nbr of Trade-Grp’s.
Simulates a realistic losing streak with intermittent small wins.
Lowered by increasing Win %.
Equity Loss from ECL : Equity drawdown estimated from ECL.
Equity Loss from ECL (%) : Same, expressed as a percentage.
Avg Trade-Grp Loss Trade Structure
Backtesting Years : The trading window in years.
Nbr of Trade-Grp’s : Count of trade groups.
Nbr of Positions : The count of positions shown on the chart.
The TV list of trades in the Strategy Tester may indicate more than what is actually shown on the chart.
Avg Invest/Trade-Grp : Avg money invested per trade group. Adjusted for dividends if enabled.
Avg Trade-Grp Days : The average number of days for trade groups.
Time in Market (%) : The percentage of time in a trade based on the trading window.
Cnt 1st EE Same-Bar is the count of first positions in a trade group that enter and exit on the same bar. Labels appear above for easy reference. Helps assess optimal stop-loss settings.
Cnt Pyr EE Same-Bar is the count of pyramid positions in a trade group that enter and exit on the same bar. Labels appear above for easy reference. Helps assess optimal stop-loss settings. Up Gaps / Dwn Gap (Ticks) ( Show All Gap Stats in Data Window enabled )
Median gap
Avg gap
80 percentile
90 percentile
Price Gap (Ticks) ( Show All Gap Stats in Data Window disabled )
Dwn Gap : Shows selected option if not disabled.
Up Gap : Shows selected option if not disabled.
Data Quality
Tick Resolution measures how many minimum price increments (ticks) fit into the current asset’s price. It is calculated as: Tick Resolution = Price / Minimum Tick Size. This value indicates the precision available for order placement and stop calculations.
Green – High resolution (>= 1000). The strategy’s stop and profit calculations will operate with normal accuracy.
Yellow – Moderate resolution (100-999). Stop levels are still functional but may exhibit minor rounding effects.
Red – Low resolution (< 100). This can distort trailing stops, stop losses, or take profits due to coarse rounding by TradingView’s broker emulator.
⚠️ Caution : When Tick Resolution is in the red zone, results from backtests may differ significantly from live trading because price precision is too low for reliable simulation.
💡 Tip : If low tick resolution is present at the beginning of the chart’s market data (often with very old price history), use the Trading Window to restrict backtesting to later periods where the asset price has risen and tick resolution is higher.
👁 Visualization
Highlight Traded Background
Trade groups are shown in background color of green for long positions and red for short positions. Set as desired.
Show Losing Trade Groups
Losing trade groups are indicated at the exit with label text in the color blue. Used to easily find consecutive losses affecting your strategy’s performance. The dividend payment, if any, is not considered in the calculation of a win or loss.
Show Position Values
Enable to show the currency value of each position in gold color.
Show Max Drawdown (Peak & Trough) Enable to show the peak and trough labels on the price chart. Based on equity at bar close. Use to easily identify the bar associated with the peak and trough of equity.
Select label size for your preference.
Alert on Expiring GTC Orders
Backtest Pro includes an optional alert that warns you when a Good-Til-Canceled (GTC) order is approaching expiration. This feature is designed as a safety net, helping you avoid unprotected trades caused by broker-imposed GTC expirations. This alert is sent a few days before a 60-day time period you’re if still in an open position.
By default, the alert is enabled, offering protection for traders who may not actively monitor order expiry rules.
Professional users who already track expirations can disable the feature in the settings to streamline alerts.
🔌 Signal Connection
Click the dropdown and select the entry and exit signal to establish a connection to your indicator.
Separate Entry and Exit Signal Connections.
Backtest Pro requires separate entry and exit signals. Indicators that already produce distinct events integrate cleanly and make strategies easier to read, debug, and maintain.
If your indicator currently uses a combined signal (e.g., buy = 1, sell = –1, flat = 0), that structure can create overlap or conflicts during backtesting.
Don’t worry — later in this manual, you’ll learn exactly how to adapt your indicator so it outputs clear entry and exit signals compatible with Backtest Pro.
🔌 Configure Your Indicator for Entry and Exit Signals
This section explains how to structure your indicator’s entry and exit signals so they can connect seamlessly with the Backtest Pro engine.
Define your own conditions for when to enter or exit positions using any technical logic you prefer. You can configure exits independently of entries or make them dependent on them—for example, exiting only when the opposite entry condition occurs.
Below are a few examples of how you might define Long and Short Entry Signals before connecting them to Backtest Pro.
________________________________________________________________________________
Examples of Long Entry Signals
ind_sig_long = oscillator > UpperLimit
ind_sig_long = ta.crossover(ta.sma(close, 14), ta.sma(close, 28))
ind_sig_long = MACD_hist > 0 Examples of Short Entry Signals
ind_sig_short = oscillator < LowerLimit
ind_sig_short = ta.crossunder(ta.sma(close, 14), ta.sma(close, 28))
ind_sig_short = MACD_hist < 0 ________________________________________________________________________________
Combining and Refining Your Signals
If your indicator uses multiple internal conditions, you can combine them using logical operators or threshold rules before connecting to the Backtest Pro engine.
1. Combine multiple conditions
Use logical and / or to merge your conditions into one signal:
Entry_Long = ind_sig_long1 and ind_sig_long2 // both must be true
Entry_Short = ind_sig_short1 or ind_sig_short2 // either may be true ________________________________________________________________________________
2. Require a minimum number of confirming conditions
You can also define a threshold for how many entry conditions must be true before triggering a signal. This can help ensure stronger confirmation.
minNbr_Entries = input.int(defval=1, title='Min Number of Entry Conditions')
// Convert boolean signals to numeric form
longCount = (ind_sig_long1 ? 1 : 0) + (ind_sig_long2 ? 1 : 0)
shortCount = (ind_sig_short1 ? 1 : 0) + (ind_sig_short2 ? 1 : 0)
// Require at least minNbr_Entries to confirm signal
Entry_Long = longCount >= minNbr_Entries
Entry_Short = shortCount >= minNbr_Entries
Do likewise for your Exit conditions to ensure consistency in trade confirmation.
________________________________________________________________________________
Defining Exits
Independent of Entries
Exit_Long = ta.crossunder(ta.rsi(close, 14), 70)
Exit_Short = ta.crossover(ta.rsi(close, 14), 30) Dependent on Entries
Exit_Long = Entry_Short // exit longs when short entry triggers
Exit_Short = Entry_Long // exit shorts when long entry triggers ________________________________________________________________________________
Final Signals to Connect to Backtest Pro
entry_signal = Entry_Long ? 1 : Entry_Short ? -1 : 0
exit_signal = Exit_Long ? 1 : Exit_Short ? -1 : 0
plot(entry_signal, title="entry_signal", color = color.blue, display=display.data_window)
plot(exit_signal, title="exit_signal", color = color.red, display=display.data_window) ________________________________________________________________________________
Notes
You can easily expand this structure to handle three or more conditions by adding them to the count expression.
If your indicator already provides a single entry_signal, you can connect it directly to Backtest Pro without modification.
Always ensure your final Entry_Long, Entry_Short, Exit_Long, and Exit_Short variables are boolean (true / false).
🔒 Connecting Closed-Source Indicators
If your indicator is closed-source (meaning you cannot view or modify its internal code), you’ll need to work with the plotted values it provides.
Create a connection indicator that reads those plotted values and converts them into clear entry and exit signals using the logic described above.
This connection indicator acts as a bridge between the closed-source indicator and Backtest Pro, allowing you to translate its behavior into standardized signal logic that the engine can process.
⚙️ PROPERTIES TAB SETTING
Initial Capital : Set as desired.
Base Currency : Leave as Default. The Backtest Pro is designed to use the instrument’s native currency, so changing this is not necessary.
Order Size : Essentially disabled. Position sizing is handled in the Inputs tab and is based on a percentage of equity.
Pyramiding : Set as desired.
Commission : Enter as a percentage of position value. The Backtest Pro is designed to work only with commission expressed this way.
Verify Price for Limit Orders : Set as desired.
Slippage : Set as desired. See the Dwn/Up Gap values in Data Window to get an idea of possible values to use.
Margin (Leverage Trading):
The Backtest Pro supports both leveraged and non-leveraged trading (default is no leverage).
Note : The following two settings apply at the trade group level . For example, to trade with 5× leverage, enter 20 (1 ÷ 5 × 100 = 20).
Margin for Long Positions : Set as desired. Default is 100%.
Margin for Short Positions : Set as desired. Default is 100%.
Recalculate After Order Is Filled (default is enabled)
Enabling this allows the Backtest Pro to function correctly and to recalculate immediately after an order is filled , which makes it possible to:
Enter and exit on the same bar (because the strategy sees the fill instantly).
Trigger alerts immediately after the fill , instead of waiting for the next bar close.
You may see the following Caution! message in the TradingView Strategy Tester:
This warning occurs because the strategy parameter calc_on_order_fills = true . You can safely close the caution message and know the Backtest Pro will produce realistic backtest results.
Recalculate On every tick : Disable.
Fill Orders
Using Bar Magnifier : Recommended if your TradingView plan supports it. Improves intrabar accuracy, but the strategy can still run without it.
On Bar Close : Must remain disabled. Enabling this prevents the Backtest Pro from working as intended.
⚠️ Caution : Enabling On Bar Close forces all orders to be evaluated only at bar close. This disables intrabar logic, prevents same-bar entries and exits, and breaks trailing stop / pyramid behavior. For the Backtest Pro to work as intended, On Bar Close must remain disabled .
Using Standard OHLC : Recommended if running the strategy on Heikin Ashi charts. Otherwise, set as desired. The default is enabled.
📢 Using The Alert Dialog Box Message Field
When setting alerts, include alert() function calls with order fills to allow notifications for drawdown exceeded, Failed to Trade (if enabled), and to be warned of expiring GTC orders (if enabled).
Example Message for Order Fill Alerts
(This is just an example. Consult TV manual for possible placeholders to use.)
Position: Current = {{strategy.market_position}}, Previous = {{strategy.prev_market_position}}
{{strategy.order.action}} {{strategy.order.contracts}} shares at price = {{strategy.order.price}} on {{exchange}}:{{ticker}} (TF: {{interval}})
Equity_Multiplier = {{strategy.order.contracts}} x {{strategy.order.price}} ÷ {{plot("Equity")}}
{{strategy.order.alert_message}}
Note :
Use a known account equity multiplied by Equity_Multiplier to determine the total currency amount required for position sizing—especially when managing multiple accounts with different equity levels.
What {{strategy.order.alert_message}} Includes
This placeholder automatically inserts the additional information generated for each order fill alert (blank for exits):
Stop Price (on first entries is based on bar close prior to order fill bar)
TSL Offset (Pts) distance from Favorable Extreme (for pyramid entries)
TP (on first entries is based on bar close prior to order fill bar)
Price Gap (Pts) based on your gap selection and slippage entered
Example Message for Bot Trading Alerts
(You must consult your specific bot for configuring the alert message. This is just an example.)
"action": "{{strategy.order.action}}",
“price”: {{strategy.order.price}}
"amount": {{strategy.order.contracts}},
"botId": "1234"

Position Avg Line + P/L Table - SightLine LabsPosition Avg – SLL is a lightweight position-tracking indicator designed to display a persistent average price level on the chart along with a real-time position summary table.
This script is non-trading and does not generate signals, entries, or exits. It is intended strictly for position awareness and visual reference.
What this indicator does:
Plots a persistent horizontal average price line (dashed by default)
Displays a live position statistics table showing:
Shares owned
Average price
Current price
Unrealized profit/loss in dollars
Unrealized profit/loss in percent
Updates automatically as price changes
Works across all timeframes
Does not depend on broker integration or strategy logic
Key features:
Average Price Line:
User-defined average price input
Persistent across the entire chart
Adjustable color and width
Visibility toggle
Position Table:
Six selectable table positions:
Top Left, Top Center, Top Right, Bottom Left, Bottom Center, Bottom Right
Adjustable text size (Tiny through Huge)
Optional table background fill
Optional inner grid lines
Optional outer frame border
Independent color control for:
Header background
Header text
Value text
Positive and negative P/L values
Chart Overlay Options:
Optional chart background tint
Does not modify the global chart theme
Inputs overview:
Position Settings:
Shares Owned
Average Price
Visual Settings:
Show or hide average price line
Line color and width
Table Settings:
Table position
Table text size
Color Settings:
Header background and text colors
Value text color
Positive and negative P/L colors
Optional table background, grid, and frame colors
How to use:
Add the indicator to a chart
Open the settings panel
Enter the number of shares and the average price
Adjust table position, size, and colors as desired
Use the average price line and table as a visual reference for trade and risk management
Notes and limitations:
This indicator does not place trades
It does not connect to any broker
All values are manually entered
Unrealized P/L is calculated using the chart’s current price
Commissions, fees, and slippage are not included
Disclaimer:
This script is provided for educational and informational purposes only. It does not constitute financial advice, investment recommendations, or trade signals. All trading decisions are the sole responsibility of the user.
Developed by SightLine Labs.

MARAL Execution WorkflowOverview
MARAL Execution Workflow is a discretionary execution decision-support indicator designed to organize market context into a consistent workflow. It is not an automated trading system, does not place orders, and does not predict outcomes.
Meaning of MARAL: Market Alignment + Risk Awareness + Logic-based execution gating — a structured workflow framework designed to improve clarity and consistency in discretionary execution.
This tool supports discretionary decision-making across three stages: Context → Qualification → Management.
It extends analysis beyond entry by supporting post-entry decisions such as: Should I stay? Should I reduce risk? Should I exit? Or should I wait? These are decision-support questions, not predictions.
Key Features
9-Layer Framework + 3 Boards + EDC
The script uses a 9-layer framework coordinated by a centralized decision-state layer (EDC). Each layer has a defined role:
1. Directional Context (Trend/Bias Layer) — establishes a directional preference using configurable bias filters.
2. Higher-Timeframe Context (HTF Layer) — anchors execution to broader context when enabled.
3. Structure Mapping (Swing/Structure Layer) — identifies structural behavior (highs/lows) to frame decision areas.
4. Location / Proximity Awareness (Obstacle Layer) — evaluates proximity to likely reaction areas for risk awareness.
5. Momentum Quality (Momentum Layer) — distinguishes healthier follow-through vs weakening/choppy conditions.
6. Volatility / Stability Regime (VOL/REGIMI) evaluates volatility using ATR% thresholds and regime support using ADX.
7. Pre-Entry Qualification (Checklist Layer) — confirms whether minimum execution conditions are satisfied before entry.
8. Post-Entry Management Context (Management Layer) — monitors changing conditions after a setup for discretionary management.
9. Liquidity Context (Liquidity Layer) — integrates liquidity-based location context using PDH/PDL proximity, sweep/reclaim behavior, and lookback extreme breaks. When enabled, the script may also plot liquidity reference points for visual mapping.
Liquidity Regime States (Panel Output)
The Liquidity Layer displays a 3-state liquidity regime used for execution risk awareness:
• HIGH — a liquidity event is detected (e.g., sweep/reclaim or lookback extreme break).
• NEUTRAL — no event, but liquidity is nearby (proximity to PDH/PDL within a defined threshold).
• LOW — no event and no nearby liquidity pressure detected.
These are context/risk states used for discretionary gating — not buy/sell signals and not outcome predictions.
Boards
• Context Board — summarizes direction, HTF context, structure, momentum, volatility (ATR%), trend regime (ADX), scores, and liquidity context.
• Qualification Gate — rule-based checklist view to confirm minimum execution conditions before entry.
• Management Desk — post-setup view to monitor risk changes, obstacle proximity, deterioration cues, and management states.
EDC — Execution Decision Core
EDC consolidates outputs from the framework into unified workflow states. It applies rule-based gating to reduce conflict when conditions are mixed.
EDC Unified Output States (Decision-Support Only):
• SETUP: WAIT / LONG / SHORT
• ENTRY PERMISSION: ENTER / WAIT / SKIP
• LIQUIDITY: HIGH / NEUTRAL / LOW
• TRADE STATUS: VALID / RISKY / WEAK / —
• ACTION STATE: HOLD / TIGHT SL / SCALE OUT / EXIT / —
— may appear when a state is not applicable (e.g., no active management window is being tracked).
Panels & Labels (Exact On-Chart Meanings)
1) Context Board (Market Environment Snapshot)
• DIRECTION → Bullish / Bearish / Neutral
• H1 CONTEXT / H4 CONTEXT / DAILY CONTEXT → HTF bias states (when enabled). If HTF is disabled, shows OFF.
• STRUCTURE → Bull Struct / Bear Struct / Neutral Struct
• MOMENTUM → BULL / BEAR / NEUTRAL
• VOLATILITY (ATR%) → ATR as a percentage of price (volatility context)
• TREND STRENGTH → ADX context value
• LONG SCORE / SHORT SCORE → internal workflow alignment scores (0–100) with grade: A++ / A+ / A / B / No-Trade
• ALIGNMENT SCORE → combined alignment score used for gating
• LIQUIDITY CONTEXT → HIGH / NEUTRAL / LOW
Important: Scores are internal workflow scoring for filtering/alignment. They are not performance statistics and do not imply guaranteed probability or outcomes.
2) Qualification Gate (Pre-Entry Checklist)
Gate Legend: OK = passes filter, WARN = mixed/caution, BAD = fails filter (execution gated).
• SETUP → WAIT / LONG / SHORT
• HTF CONTEXT → OK / WARN / BAD / —
• STRUCTURE → OK / WARN / BAD / —
• MOMENTUM → OK / WARN / BAD / —
• VOL/REGIME → OK / WARN / BAD / — (Volatility + regime filter; not volume)
o OK = ATR% within thresholds AND ADX meets regime requirement
o WARN = ATR% within thresholds but regime is mixed (ADX below threshold)
o BAD = ATR% outside thresholds
• LIQUIDITY → HIGH / NEUTRAL / LOW
• ALIGNMENT → shows score vs required minimum threshold
• ENTRY PERMISSION → ENTER / WAIT / SKIP
Purpose: reduce forced entries by requiring minimum execution quality.
3) Management Desk (Post-Setup Decision Support)
The Management Desk operates inside an Active Window measured in bars after the last setup (configurable by input). When the management window is not active, some fields may show —.
• TRADE STATUS → VALID / RISKY / WEAK / —
— appears when no active trade state is being tracked (not applicable).
• MARKET PHASE → RANGE / IMPULSE / PULLBACK / CONTINUATION
Environment classification used for management context (not prediction).
• OBSTACLE AHEAD → YES / NO
Proximity risk context (e.g., near PDH/PDL or near swing levels under the script’s logic).
• EXIT PRESSURE → LOW / RISING / HIGH
Management pressure context based on deterioration cues (not a signal).
• MOMENTUM HEALTH → STRONG / WEAKENING / WEAK / NEUTRAL
Follow-through quality context used for management.
• SCORE TREND → IMPROVING / DETERIORATING / STABLE
Direction of the internal workflow score trend (not P&L, not performance).
• RISK STATE → OVEREXTENDED / NORMAL
Overextension context based on distance from EMA vs ATR.
• TRADE AGE → FRESH / MID / LATE / —
Workflow age based on bars since last setup. — when not applicable.
• SL MODE → BE OK / TIGHT / NORMAL / —
Stop-management context used for discretionary risk control. — when not applicable.
• ACTION STATE → HOLD / TIGHT SL / SCALE OUT / EXIT / —
o HOLD = maintain the current plan under present conditions
o TIGHT SL = discretionary prompt to reduce risk by tightening protection
o SCALE OUT = discretionary prompt to partially reduce exposure (partial exit / trim size), typically when obstacle proximity risk is detected
o EXIT = discretionary prompt that conditions deteriorated and exit may be considered
o — = not applicable
• ACTIVE WINDOW → ON / OFF
Shows whether the post-setup management window is active (bars after the last setup, per the “Active Window” input). When OFF, management/trade states may show —.
Optional Modules (Toggleable)
To keep the chart clean and workflow-focused, optional modules can be enabled/disabled:
A) PDH/PDL Reference (Optional)
• Plots Previous Day High / Previous Day Low as structured reference points (risk awareness only).
B) ATR-Based Planning Guides (Optional)
• Optional visual guides for SL / TP1 / TP2 / TP3 based on ATR.
• Visual planning references only. Does not place orders and does not guarantee outcomes.
C) Visual Color Layer (Optional)
• Optional state-based candle coloring for readability only.
D) State Markers (Optional)
• Optional state markers (e.g., LONG/SHORT confirmations). These are state confirmations only, not trade recommendations.
Display & Layout Options
• Display Mode: Mobile / Medium / Desktop
• Mobile Minimal View: optional minimal mode (EDC-only)
• Panel Positioning: 9 anchor positions
(Top Left / Top Center / Top Right / Middle Left / Middle Center / Middle Right / Bottom Left / Bottom Center / Bottom Right)
Why This Is Not a “Mashup”
This publication is not intended to bundle multiple classic indicators as independent buy/sell tools. While it uses familiar building blocks (trend/bias filtering, volatility/regime context, structure references, liquidity context), each component has a defined role inside a single execution workflow:
• Context Board → Qualification Gate → Management Desk organizes information into a consistent discretionary process.
• EDC consolidates multi-layer conditions into unified states using rule-based gating to reduce conflict and prioritize risk awareness.
This is a decision-support framework designed to improve clarity and consistency in discretionary execution. It does not place orders and does not provide guaranteed outcomes.
How to Use (Recommended Workflow)
1. Set context: Use the Context Board to determine directional preference, volatility/regime stability, and location context.
2. Qualify execution: Use the Qualification Gate as the filter. If alignment is not sufficient, avoid forcing entries.
3. Execute with location awareness: Avoid late entries into nearby obstacles. Treat proximity as increased risk.
4. Manage post-setup: Use the Management Desk to monitor risk changes. If states deteriorate, follow your plan (reduce risk, protect, or exit).
5. Stay consistent: Works best with position sizing rules and disciplined confirmation.
Screenshots / Visual Reference (What each panel shows)
Screenshot 1 — Full Workflow View (Desktop)
Shows the complete workflow layout on one chart: Context Board, Qualification Gate, Management Desk, and the EDC (Execution Decision Core) summary together.
Screenshot 2 — Context Board
Shows directional context, HTF context (if enabled), structure mapping, momentum quality, volatility/stability regime (ATR + ADX), and liquidity context (HIGH/NEUTRAL/LOW). This board is used to understand “market alignment” before considering execution.
Screenshot 3 — Qualification Gate (Pre-Entry)
Shows the rule-based checklist view used for discretionary pre-entry qualification. It summarizes SETUP (WAIT/LONG/SHORT), key confluence checks, liquidity context, and ENTRY PERMISSION (ENTER/WAIT/SKIP). This is a gating view—meant to prevent forced entries when alignment is insufficient.
Screenshot 4 — Management Desk (Post-Entry)
Shows post-entry condition monitoring within the active window after the last setup. It highlights trade status shifts (VALID/RISKY/WEAK), obstacle proximity, exit pressure, momentum health, score trend, risk state, SL mode, and action guidance context.
Screenshot 5 — EDC Panel (Execution Decision Core) — Centralized State
Shows the unified decision-support outputs consolidated from the workflow layers and boards into one compact view:
• SETUP: WAIT / LONG / SHORT
• ENTRY PERMISSION: ENTER / WAIT / SKIP
• LIQUIDITY: HIGH / NEUTRAL / LOW
• TRADE STATUS: VALID / RISKY / WEAK
• ACTION STATE: HOLD / TIGHT SL / SCALE OUT / EXIT
These are rule-based guidance states for discretionary execution and risk awareness — not automated actions.
Screenshot 6 — Example –Execution context
The screenshot shows MARAL Execution Workflow applied to XAUUSD on the 1-hour timeframe. All three boards and the EDC panel are visible:
• Context Board (top-right) – Confirms a fully aligned bullish environment: direction and all HTF contexts are Bullish, structure is “Bull Struct”, momentum is “BULL”, volatility (ATR%) is within normal bounds, and the long-side alignment score is high while the short-side score is in “No-Trade” territory. Liquidity Context is “LOW”, indicating limited immediate liquidity pressure.
• Qualification Gate (top-center) – For the same bar, the checklist produces a LONG setup with HTF CONTEXT, STRUCTURE, MOMENTUM and VOL/REGIME all marked OK. Liquidity is LOW, and ALIGNMENT shows “93 / 65”, meaning the current long-side score (93) is above the user-defined minimum threshold (65). ENTRY PERMISSION = ENTER, signaling that, within this framework, execution conditions are sufficiently aligned to allow a discretionary long entry according to the trader’s own plan.
• Management Desk (left) – Once a trade is active, the post-entry view monitors evolving risk. In this example the trade status is VALID and MARKET PHASE is CONTINUATION, while RISK STATE highlights OVEREXTENDED and TRADE AGE is FRESH. MOMENTUM HEALTH = STRONG, SCORE TREND = STABLE, and ACTION STATE = HOLD. This illustrates how the panel can flag extension or emerging pressure without forcing a decision.
• EDC | Execution Decision Core (bottom-right) – The EDC panel consolidates the key states into one unified view: SETUP = LONG, ENTRY PERMISSION = ENTER, LIQUIDITY = LOW, TRADE STATUS = VALID, ACTION STATE = HOLD. These are rule-based guidelines summarizing the interaction between Context, Qualification, Management and liquidity conditions. They are decision-support outputs only; they do not place orders and do not imply any guaranteed outcome.
Inputs & Customization
Inputs are provided to adapt the workflow to different instruments and timeframes, including:
• bias/trend parameters and smoothing, optional HTF context,
• structure sensitivity and lookback,
• momentum thresholds,
• volatility thresholds (ATR% limits) and regime filter (ADX),
• liquidity sensitivity (lookback / proximity thresholds),
• visuals (show/hide boards, display mode, mobile minimal view, text size, positioning).
Markets & Timeframes
Designed for multiple markets and instruments available on Trading View, including:
• Indices (index charts / index futures where available — not an options-chain or options-pricing tool)
• Crypto
• Forex
• Stocks / ETFs
• Commodities
Timeframe-agnostic: can be applied from lower to higher timeframes based on your trading style. Results vary by instrument, timeframe, and volatility/regime.
Limitations (Important)
• Discretionary analysis tool only; does not place trades.
• Optional markers/labels (if enabled) are state confirmations only, not recommendations.
• HTF values can update as HTF candles develop.
• Structure/obstacle references are informational decision areas and may be exceeded.
• No indicator removes risk; risk management remains essential.
• Provided “as-is.” Outputs may differ across symbols, sessions, spreads, or data feeds.
Risk & Disclaimer
Trading involves risk. Past behavior does not indicate future performance. This script is provided for educational and analytical purposes only. You are responsible for all trading decisions, including entries, exits, position sizing, and risk management. The script does not place trades and does not provide investment advice.

Options SL/TP Price Projection Sim + Day Trading/Scalping Toolwww.tradingview.com
📌 What this indicator does
This indicator projects what your option contract will be worth when the stock reaches your Stop Loss or Take Profit — before price gets there.
Instead of guessing:
“How much will this option be worth if price hits my stop?”
“Is this move actually worth the risk in option dollars?”
You get instant, realistic option price estimates at your exact stock levels.
⚙️ How it works (simple but powerful)
The script uses a local delta + gamma approximation to estimate option price changes:
Delta → linear price sensitivity
Gamma → curvature for fast moves
Optional execution friction → realistic fills
Automatic Call / Put detection via delta sign
Enforced $0.01 minimum option price (real market behavior)
This is not a slow academic options model — it’s a trader-grade approximation designed for speed and clarity.
🚀 Designed specifically for DAY TRADING
This tool is optimized for:
Options scalping
Momentum trades
Breakouts & flushes
0DTE / weekly options
Holding times ~3–15 minutes
Why it excels here:
Delta + gamma dominate option pricing on fast moves
IV and theta usually don’t have time to fully reprice
You get actionable numbers, not theoretical noise
This is exactly the environment most option day traders operate in.
🧠 Key Features
✅ Projects option price at BOTH SL and TP
✅ Works for calls & puts automatically
✅ Enter any two stock levels — script assigns SL/TP correctly
✅ Clean, black HUD table (no clutter, no moving drawings)
✅ Non-draggable, stable price levels
✅ Minimal inputs — no overengineering
✅ Built for speed under pressure
🎯 Why this is effective
Most traders manage risk in stock points , but trade options .
This indicator bridges that gap.
It lets you:
Judge true risk/reward in option dollars
Avoid “looks good on the chart, bad on the premium”
Compare setups objectively
Size trades more intelligently
Make faster, more confident decisions
It’s especially useful when spreads, gamma, and fast tape make intuition unreliable.
🧼 Philosophy: Clean > Complicated
This script intentionally avoids:
Full Black-Scholes modeling
IV forecasting
Overloaded settings
Visual clutter
Instead, it focuses on what matters for day traders:
“If price gets here quickly, what should my option be worth?”
⚠️ Important Notes
Best accuracy for fast, clean moves
Not intended for multi-hour holds or swing trading
Assumes relatively stable IV over short horizons
Execution friction is configurable to match real fills
Used correctly, this becomes a powerful decision-support tool, not a prediction engine.
✅ Who this indicator is for
Options day traders
Scalpers
Momentum traders
Anyone trading options off stock price levels
If you trade options intraday and manage risk using stock levels, this tool was built exactly for you.

Daily Dynamic Grid StrategyHi everyone,
This strategy is built around a dynamic daily grid concept, using an upper and lower daily range that is automatically divided into multiple grid levels.
The idea is to take advantage of daily volatility by executing DCA entries on specific grid levels, based on predefined conditions.
Key points of the strategy & feature:
I recommend using 1H or 2H timeframe for this strategy
Take profit by grid
When DCA is active (>1 entry), the exit condition switches to close above the average price
A hard stop loss is applied
Includes an optional Trailing TP / SL to help maximize profit during strong moves
Like most DCA-based strategies, it tends to have a high win rate, but during strong market dumps, losses can become relatively large
Can also be used for backtest on Forex markets such as Gold, where using the trailing option is generally more effective
And still trial for the webhook, may continue to improve and update this strategy in future versions.

Lot Size Panel Lite Multi (@JP7FX)Lot Size Panel Lite Multi is a fast, no-nonsense risk and position sizing tool built for active traders who need answers immediately.
This indicator removes all chart clutter and focuses on one thing only. Correct lot size based on your stop loss and risk.
It is designed for scalpers, day traders, and funded account traders who do not want complex menus or slow workflows.
What it does
Calculates precise lot size from stop loss and risk
Supports percentage risk or fixed cash risk
Works across Forex, Gold, Crypto, Index/CFD, and Stocks
Displays results in a clean on-chart panel
Supports multiple accounts at once
Key features
Risk first layout. Stop loss and risk inputs are at the top
Multi account support with A1 enabled by default
Per account currency handling with automatic FX conversion
Manual FX fallback option when TradingView rates are unavailable
Customisable panel colours and layout
Movable panel with multiple screen positions
How to use
Select your Asset Type
Enter your Stop Loss in pips
Choose Risk mode
Percent uses account balance
Cash risks a fixed amount
Set your account balance and currency
Read the calculated lot size instantly
Index and CFD users
For Index and Stock instruments, set the “value per pip per 1 lot” to match your broker.
Example:
If 1 lot equals $10 per point, enter 10
Who this is for
Traders who execute fast and want zero friction
Prop firm traders managing multiple accounts
Traders who want correct risk every trade without thinking
This is the Lite version of the JP7FX lot sizing tools.
It strips everything back to speed, clarity, and accuracy.
Trade smart.
JP7FX

Vega Convexity Engine [PRO]ENGINEERED ASYMMETRY.
This is the flagship Stage 2 Specialist Model of the Vega Crypto Strategies ecosystem.
While the free "Regime Filter" tells you when to trade (filtering out chop), the Convexity Engine tells you how to trade. It activates only when the Regime Filter confirms an Impulse, classifying the specific vector of the market move to maximize risk-adjusted returns.
PRO FEATURES
This script visualizes the output of our Hierarchical Machine Learning Engine:
🚀 Directional Classification:
It does not just say "Buy." It classifies volatility into 4 distinct probability classes:
- EXPLOSION: High-confidence, high-velocity upside (Fat-Tail).
- RALLY: Standard trend continuation.
- PULLBACK: Short-term correction opportunity.
- CRASH: High-confidence downside (Long Squeeze Detection).
🛡️ Dynamic Risk Engine (Intraday Stops):
The "+" markers on your chart represent the Vega Institutional Stop Loss . These levels dynamically adjust based on Average True Range (ATR) and Volatility Z-Scores.
Strategy: If price breaches the "+" marker, the hypothesis is invalidated. Exit immediately.
📊 Institutional HUD:
A professional heads-up display showing the current Regime, Vector, and Risk Deployment status in real-time.
THE PHILOSOPHY
"Convexity" means limited downside with unlimited upside. By combining the Regime Filter (sitting in cash during noise) with Dynamic Stops (cutting losers fast), this engine is designed to capture the "fat tails" of the crypto market distribution.
🔒 HOW TO GET ACCESS
This is an Invite-Only script. It is strictly for members of Vega Crypto Strategies .
To unlock access, please visit the link in the Author Profile below or check our signature. Once subscribed via Whop, your TradingView username will be automatically authorized instantly.
Disclaimer: This tool is for educational purposes only. Past performance is not indicative of future results. Trading cryptocurrencies involves significant risk.

Realtime Position CalculatorRisk management is the single most important factor in trading success. This indicator automates the process of position sizing in real-time based on your account risk and a dynamic technical Stop Loss. It eliminates the need for manual calculations and helps you execute trades faster while adhering to strict risk management rules.
How it Works
The indicator visually places a Stop Loss line based on recent market structure (Highs/Lows) and instantly calculates the required position size (Contracts/Lots) to match your defined monetary risk.
1. Dynamic Stop Loss : It identifies the highest high (for Shorts) or lowest low (for Longs) over a user-defined lookback period.
2. Position Calculation : It calculates the distance between the current price and the Stop Loss level.
3. Formula : Contract Size = Risk Amount / (Distance * Point Value)
4. Actual vs. Target Risk : Because of the rounding, the script calculates and displays the Actual Risk (e.g., $95) alongside your Target Risk (e.g., $100), so you know exactly what is at stake.
Key Features
Real-time Calculation : Updates instantly as price moves.
Copy Trading Support : Includes an "Account Multiplier" setting. If you trade 10 accounts via a copy trader, set the multiplier to 10. The indicator will show the total contract size needed across all accounts.
Point Value Support : Works for Stocks/Crypto (Point Value = 1) and Futures (e.g., ES = 50, NQ = 20).
Customizable UI : Toggle specific data on/off in the label (e.g., hide price, show only contracts). Adjustable label offset to keep the chart clean.
Settings Guide
Trade Direction : Toggle between Long and Short setups. Add the indicator two times and set another for Longs and another for Shorts so you can see both direction at the same time.
Risk Amount : Your max risk in currency (e.g., $100).
Lookback : How many bars back to look for the SL pivot (e.g., 10 bars).
Point Value : Crucial for Futures. Use 1.0 for Crypto/Stocks. Use tick value/point value for futures (e.g., 50 for ES).
Account Multiplier : Multiply the position size for multiple accounts.
Label Offset : Move the information label to the right to avoid overlapping with price action.
Disclaimer
This tool is for informational and educational purposes only. Always verify calculations manually before executing trades. Past performance is not indicative of future results.
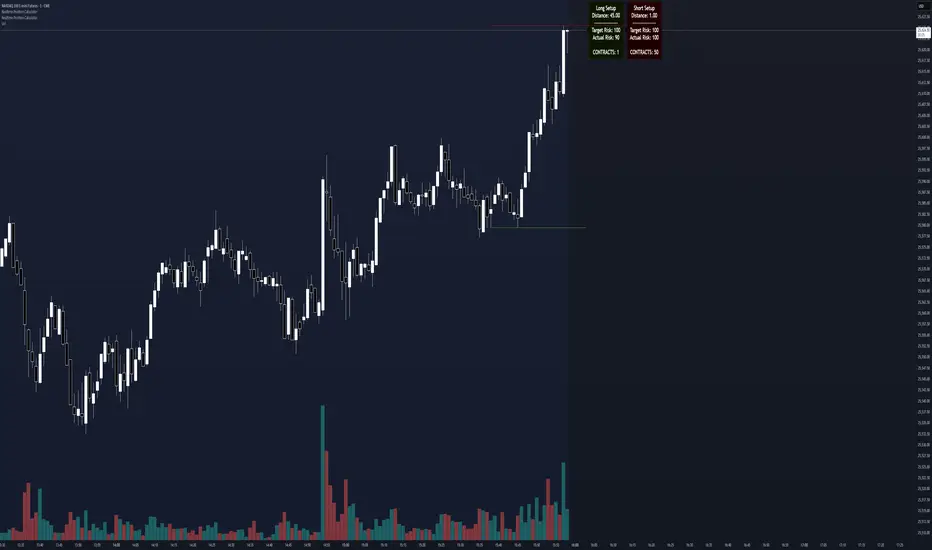
Adaptive Risk Management [sgbpulse]1. Introduction:
Adaptive Risk Management is an advanced indicator designed to provide traders with a comprehensive risk management tool directly on the chart. Instead of relying on complex manual calculations, the indicator automates all critical steps of trade planning. It dynamically calculates the estimated Entry Price , the Stop Loss location, the required Position Size (Quantity) based on your capital and risk limits, and the three Take Profit targets based on your defined Reward/Risk ratios. The indicator displays all these essential data points clearly and visually on the chart, ensuring you always know the potential risk-reward profile of every trade.
ARM : The A daptive R isk M anagement every trader needs to ARM themselves with.
2. The Critical Importance of Risk Management
Proper risk management is the cornerstone of successful trading. Consistent profitability in the market is impossible without rigorously defining risk limits.
Risk Control: This starts by setting the maximum risk amount you are willing to lose in a single trade (Risk per Trade), and limiting the total capital allocated to the position (Max Capital per Trade).
Defining Boundaries (Stop Loss & Take Profit): It is mandatory to define a technical Stop Loss and a Take Profit target. A fundamental rule of risk management is that the Reward/Risk Ratio (R/R) must be a minimum of 1:1.
3. Core Features, Adaptivity, and Customization
The Adaptive Risk Management indicator is engineered for use across all major trading styles, including Swing Trading, Intraday Trading, and Scalping, providing consistent risk control regardless of the chosen timeframe.
Real-Time Dynamic Adaptivity: The indicator calculates all risk management parameters (Entry, Stop Loss, Quantity) dynamically with every new bar, thus adapting instantly to changing market conditions.
Trend Direction Adjustment: Define the analysis direction (Long/Uptrend or Short/Downtrend).
Intraday Session Data Control: Full control over whether lookback calculations will include data from Extended Trading Hours (ETH), or if the daily calculations will start actively only from the first bar of Regular Trading Hours (RTH).
Status Validation: The indicator performs critical status checks and displays clear Warning Messages if risk conditions are not met.
4. Intuitive Visualization and Real-Time Data
Dynamic Tracking Lines: The Entry Price and Stop Loss lines are updated with every new bar. Crucially, the length of these lines dynamically reflects the calculation's lookback range (e.g., the extent of Lookback Bars or the location of the confirmed Pivot Point), providing a visual anchor for the calculated price.
Risk and Reward Zones: The indicator creates a graphical background fill between Entry and Stop Loss (marked with the risk color) and between Entry and the Reward Targets (marked with the reward color).
Essential Information Labels: Labels are placed at the end of each line, providing critical data: Estimated Entry Price, Stock/Contract Quantity (Quantity), Total Entry Amount, Estimated Stop Loss, Risk per Share, Total Financial Risk (Risk Amount), Exit Amount, Estimated Take Profit 1/2/3, Reward/Risk Ratio 1/2/3, Total Reward 1/2/3, TP Exit Amount 1/2/3.
4.1. Data Window Metrics (16 Full Series)
The indicator displays 16 full data series in the TradingView Data Window, allowing precise tracking of every calculation parameter:
Entry Data: Estimated Entry, Quantity, Entry Amount.
Risk Data (Stop Loss): Estimated Stop Loss, Risk per Share, Risk Amount, Exit Amount.
Reward Data (Take Profit): Estimated Take Profit 1/2/3, Reward/Risk Ratio 1/2/3, Total Reward 1/2/3, TP Exit Amount 1/2/3.
4.2. Instant Tracking in the Status Line
The indicator displays 6 critical parameters continuously in the indicator's Status Line: Estimated Entry, Quantity, Estimated Stop Loss, Estimated Take Profit 1/2/3.
5. Detailed Indicator Inputs
5.1 General
Focused Trend: Defines the analysis direction (Uptrend / Downtrend).
Max Capital per Trade: The maximum amount allocated to purchasing stocks/contracts (in account currency).
Risk per Trade: The maximum amount the user is willing to risk in this single trade (in account currency).
ATR Length: The lookback period for the Average True Range (ATR) calculation.
5.2 Intraday Session Data Control
Regular Hours Limitation : If enabled, all daily lookback calculations (for Entry/Stop Loss anchor points) will begin strictly from the first Regular Trading Hours (RTH) bar. This limits the lookback range to the current RTH session, excluding preceding Extended Trading Hours (ETH) data. Only relevant for Intraday charts. Default: False (Off)
5.3 Entry Inputs
Entry Method: Selects the entry price calculation method:
Current Price: Uses the closing price of the current bar as the estimated entry point (Market Entry).
ATR Real Bodies Margin :
- Uptrend: Calculates the Maximum Real Body over the lookback period + the calculated safety margin.
- Downtrend: Calculates the Minimum Real Body over the lookback period - the calculated safety margin.
ATR Bars Margin :
- Uptrend: Calculates the Maximum High price over the lookback period + the calculated safety margin.
- Downtrend: Calculates the Minimum Low price over the lookback period - the calculated safety margin.
Lookback Bars: The number of bars used to calculate the extremes in the ATR-based entry methods (Relevant only for ATR Real Bodies Margin and ATR Bars Margin methods).
ATR Multiplier (Entry): The multiplier applied to the ATR value. The result of the multiplication is the calculated safety margin used to determine the estimated Entry Price.
5.4 Risk Inputs (Stop Loss)
Risk Method: Selects the Stop Loss price calculation method.
ATR Current Price Margin :
- Uptrend: Entry Price - the calculated safety margin.
- Downtrend: Entry Price + the calculated safety margin.
ATR Current Bar Margin :
- Uptrend: Current Bar's Low price - the calculated safety margin.
- Downtrend: Current Bar's High price + the calculated safety margin.
ATR Bars Margin :
- Uptrend: Lowest Low over lookback period - the calculated safety margin.
- Downtrend: Highest High over lookback period + the calculated safety margin.
ATR Pivot Margin :
- Uptrend: The first confirmed Pivot Low point - the calculated safety margin.
- Downtrend: The first confirmed Pivot High point + the calculated safety margin.
Lookback Bars: The lookback period for finding the extreme price used in the 'ATR Bars Margin' calculation.
ATR Multiplier (Risk): The multiplier applied to the ATR value. The result of the multiplication is the calculated safety margin used to place the estimated Stop Loss. Note: If set to 0, the Stop Loss will be placed exactly at the technical anchor point, provided the Minimum Margin Value is also 0.
Minimum Margin Value: The minimum price value (e.g., $0.01) the Stop Loss margin buffer must be.
Pivot (Left / Right): The number of bars required on either side of the pivot bar for confirmation (relevant only for the ATR Pivot Margin method).
5.5 Reward Inputs (Take Profit)
Show Take Profit 1/2/3: ON/OFF switch to control the visibility of each Take Profit target.
Reward/Risk Ratio 1/ 2/ 3: Defines the R/R ratio for the profit target. Must be ≥1.0.
6. Indicator Status/Warning Messages
In situations where the Stop Loss location cannot be calculated logically and validly, often caused by a mismatch between the configured Focused Trend (Uptrend/Downtrend) and the actual price action, the indicator will display a warning message, explaining the reason and suggesting corrective action.
Status Message 1: Pivot reference unavailable
Condition: The Stop Loss is set to the "ATR Pivot Margin" method, but the anchor point (Pivot) is missing or inaccessible.
Message Displayed: "Pivot reference unavailable. Wait for valid price action, or adjust the Regular Hours Limitation setting or Pivot Left/Right inputs."
Status Message 2: Calculated Stop Loss is unsafe
Condition: The calculated Stop Loss is placed illogically or unsafely relative to the trend direction and the Entry price.
Message Displayed: "Calculated Stop Loss is unsafe for current trend. Wait for valid price action or adjust SL Lookback/Multiplier."
7. Summary
The Adaptive Risk Management (ARM) indicator provides a seamless and systematic approach to trade execution and risk control. By dynamically automating all critical trade parameters—from Entry Price and Stop Loss placement to Position Sizing and Take Profit targets—ARM removes emotional bias and ensures every trade adheres strictly to your predefined risk profile.
Key Benefits:
Systematic Risk Control: Strict enforcement of maximum capital allocation and risk per trade limits.
Adaptivity: Dynamic calculation of prices and quantities based on real-time market data (ATR and Lookback).
Clarity and Trust: Clear on-chart visualization, precise data metrics (16 series), and unambiguous Status/Warning Messages ensure transparency and reliability.
ARM allows traders to focus on strategy and analysis, confident that their execution complies with the core principles of professional risk management.
Important Note: Trading Risk
This indicator is intended for educational and informational purposes only and does not constitute investment advice or a recommendation for trading in any form whatsoever.
Trading in financial markets involves significant risk of capital loss. It is important to remember that past performance is not indicative of future results. All trading decisions are your sole responsibility. Never trade with money you cannot afford to lose.

Gyspy Bot Trade Engine - V1.2B - Alerts - 12-7-25 - SignalLynxGypsy Bot Trade Engine (MK6 V1.2B) - Alerts & Visualization
Brought to you by Signal Lynx | Automation for the Night-Shift Nation 🌙
1. Executive Summary & Architecture
Gypsy Bot (MK6 V1.2B) is not merely a strategy; it is a massive, modular Trade Engine built specifically for the TradingView Pine Script V6 environment. While most tools rely on a single dominant indicator to generate signals, Gypsy Bot functions as a sophisticated Consensus Algorithm.
Note: This is the Indicator / Alerts version of the engine. It is designed for visual analysis and generating live alert signals for automation. If you wish to see Backtest data (Equity Curves, Drawdown, Profit Factors), please use the Strategy version of this script.
The engine calculates data from up to 12 distinct Technical Analysis Modules simultaneously on every bar closing. It aggregates these signals into a "Vote Count" and only fires a signal plot when a user-defined threshold of concurring signals is met. This "Voting System" acts as a noise filter, requiring multiple independent mathematical models—ranging from volume flow and momentum to cyclical harmonics and trend strength—to agree on market direction.
Beyond entries, Gypsy Bot features a proprietary Risk Management suite called the Dump Protection Team (DPT). This logic layer operates independently of the entry modules, specifically scanning for "Moon" (Parabolic) or "Nuke" (Crash) volatility events to signal forced exits, preserving capital during Black Swan events.
2. ⚠️ The Philosophy of "Curve Fitting" (Must Read)
One must be careful when applying Gypsy Bot to new pairs or charts.
To be fully transparent: Gypsy Bot is, by definition, a very advanced curve-fitting engine. Because it grants the user granular control over 12 modules, dozens of thresholds, and specific voting requirements, it is extremely easy to "over-fit" the data. You can easily toggle switches until the charts look perfect in hindsight, only to have the signals fail in live markets because they were tuned to historical noise rather than market structure.
To use this engine successfully:
Visual Verification: Do not just look for "green arrows." Look for signals that occur at logical market structure points.
Stability: Ensure signals are not flickering. This script uses closed-candle logic for key decisions to ensure that once a signal plots, it remains painted.
Regular Maintenance is Mandatory: Markets shift regimes (e.g., from Bull Trend to Crab Range). Gypsy Bot settings should be reviewed and adjusted at regular intervals to ensure the voting logic remains aligned with current market volatility.
Timeframe Recommendations:
Gypsy Bot is optimized for High Time Frame (HTF) trend following. It generally produces the most reliable results on charts ranging from 1-Hour to 12-Hours, with the 4-Hour timeframe historically serving as the "sweet spot" for most major cryptocurrency assets.
3. The Voting Mechanism: How Entries Are Generated
The heart of the Gypsy Bot engine is the ActivateOrders input (found in the "Order Signal Modifier" settings).
The engine constantly monitors the output of all enabled Modules.
Long Votes: GoLongCount
Short Votes: GoShortCount
If you have 10 Modules enabled, and you set ActivateOrders to 7:
The engine will ONLY plot a Buy Signal if 7 or more modules return a valid "Buy" signal on the same closed candle.
If only 6 modules agree, the signal is rejected.
4. Technical Deep Dive: The 12 Modules
Gypsy Bot allows you to toggle the following modules On/Off individually to suit the asset you are trading.
Module 1: Modified Slope Angle (MSA)
Logic: Calculates the geometric angle of a moving average relative to the timeline.
Function: Filters out "lazy" trends. A trend is only considered valid if the slope exceeds a specific steepness threshold.
Module 2: Correlation Trend Indicator (CTI)
Logic: Measures how closely the current price action correlates to a straight line (a perfect trend).
Function: Ensures that we are moving up with high statistical correlation, reducing fake-outs.
Module 3: Ehlers Roofing Filter
Logic: A spectral filter combining High-Pass (trend removal) and Super Smoother (noise removal).
Function: Isolates the "Roof" of price action to catch cyclical turning points before standard moving averages.
Module 4: Forecast Oscillator
Logic: Uses Linear Regression forecasting to predict where price "should" be relative to where it is.
Function: Signals when the regression trend flips. Offers "Aggressive" and "Conservative" calculation modes.
Module 5: Chandelier ATR Stop
Logic: A volatility-based trend follower that hangs a "leash" (ATR multiple) from extremes.
Function: Used as an entry filter. If price is above the Chandelier line, the trend is Bullish.
Module 6: Crypto Market Breadth (CMB)
Logic: Pulls data from multiple major tickers (BTC, ETH, and Perpetual Contracts).
Function: Calculates "Market Health." If Bitcoin is rising but the rest of the market is dumping, this module can veto a trade.
Module 7: Directional Index Convergence (DIC)
Logic: Analyzes the convergence/divergence between Fast and Slow Directional Movement indices.
Function: Identifies when trend strength is expanding.
Module 8: Market Thrust Indicator (MTI)
Logic: A volume-weighted breadth indicator using Advance/Decline and Volume data.
Function: One of the most powerful modules. Confirms that price movement is supported by actual volume flow. Recommended setting: "SSMA" (Super Smoother).
Module 9: Simple Ichimoku Cloud
Logic: Traditional Japanese trend analysis.
Function: Checks for a "Kumo Breakout." Price must be fully above/below the Cloud to confirm entry.
Module 10: Simple Harmonic Oscillator
Logic: Analyzes harmonic wave properties to detect cyclical tops and bottoms.
Function: Serves as a counter-trend or early-reversal detector.
Module 11: HSRS Compression / Super AO
Logic: Detects volatility compression (HSRS) or Momentum/Trend confluence (Super AO).
Function: Great for catching explosive moves resulting from consolidation.
Module 12: Fisher Transform (MTF)
Logic: Converts price data into a Gaussian normal distribution.
Function: Identifies extreme price deviations. Uses Multi-Timeframe (MTF) logic to ensure you aren't trading against the major trend.
5. Global Inhibitors (The Veto Power)
Even if 12 out of 12 modules vote "Buy," Gypsy Bot performs a final safety check using Global Inhibitors.
Bitcoin Halving Logic: Prevents trading during chaotic weeks surrounding Halving events (dates projected through 2040).
Miner Capitulation: Uses Hash Rate Ribbons to identify bearish regimes when miners are shutting down.
ADX Filter: Prevents trading in "Flat/Choppy" markets (Low ADX).
CryptoCap Trend: Checks the total Crypto Market Cap chart for broad market alignment.
6. Risk Management & The Dump Protection Team (DPT)
Even in this Indicator version, the RM logic runs to generate Exit Signals.
Dump Protection Team (DPT): Detects "Nuke" (Crash) or "Moon" (Pump) volatility signatures. If triggered, it plots an immediate Exit Signal (Yellow Plot).
Advanced Adaptive Trailing Stop (AATS): Dynamically tightens stops in low volatility ("Dungeon") and loosens them in high volatility ("Penthouse").
Staged Take Profits: Plots TP1, TP2, and TP3 events on the chart for visual confirmation or partial exit alerts.
7. Recommended Setup Guide
When applying Gypsy Bot to a new chart, follow this sequence:
Set Timeframe: 4 Hours (4H).
Tune DPT: Adjust "Dump/Moon Protection" inputs first. These filter out bad signals during high volatility.
Tune Module 8 (MTI): Experiment with the MA Type (SSMA is recommended).
Select Modules: Enable/Disable modules based on the asset's personality (Trending vs. Ranging).
Voting Threshold: Adjust ActivateOrders to filter out noise.
Alert Setup: Once visually satisfied, use the "Any Alert Function Call" option when creating an alert in TradingView to capture all Buy/Sell/Close events generated by the engine.
8. Technical Specs
Engine Version: Pine Script V6
Repainting: This indicator uses Closed Candle data for all Risk Management and Entry decisions. This ensures that signals do not vanish after the candle closes.
Visuals:
Blue Plot: Buy/Sell Signal.
Yellow Plot: Risk Management (RM) / DPT Close Signal.
Green/Lime/Olive Plots: Take Profit hits.
Disclaimer:
This script is a complex algorithmic tool for market analysis. Past performance is not indicative of future results. Cryptocurrency trading involves substantial risk of loss. Use this tool to assist your own decision-making, not to replace it.
9. About Signal Lynx
Automation for the Night-Shift Nation 🌙
Signal Lynx focuses on helping traders and developers bridge the gap between indicator logic and real-world automation. The same RM engine you see here powers multiple internal systems and templates, including other public scripts like the Super-AO Strategy with Advanced Risk Management.
We provide this code open source under the Mozilla Public License 2.0 (MPL-2.0) to:
Demonstrate how Adaptive Logic and structured Risk Management can outperform static, one-layer indicators
Give Pine Script users a battle-tested RM backbone they can reuse, remix, and extend
If you are looking to automate your TradingView strategies, route signals to exchanges, or simply want safer, smarter strategy structures, please keep Signal Lynx in your search.
License: Mozilla Public License 2.0 (Open Source).
If you make beneficial modifications, please consider releasing them back to the community so everyone can benefit.

Gyspy Bot Trade Engine - V1.2B - Strategy 12-7-25 - SignalLynxGypsy Bot Trade Engine (MK6 V1.2B) - Ultimate Strategy & Backtest
Brought to you by Signal Lynx | Automation for the Night-Shift Nation 🌙
1. Executive Summary & Architecture
Gypsy Bot (MK6 V1.2B) is not merely a strategy; it is a massive, modular Trade Engine built specifically for the TradingView Pine Script environment. While most strategies rely on a single dominant indicator (like an RSI cross or a MACD flip) to generate signals, Gypsy Bot functions as a sophisticated Consensus Algorithm.
The engine calculates data from up to 12 distinct Technical Analysis Modules simultaneously on every bar closing. It aggregates these signals into a "Vote Count" and only executes a trade entry when a user-defined threshold of concurring signals is met. This "Voting System" acts as a noise filter, requiring multiple independent mathematical models—ranging from volume flow and momentum to cyclical harmonics and trend strength—to agree on market direction before capital is committed.
Beyond entries, Gypsy Bot features a proprietary Risk Management suite called the Dump Protection Team (DPT). This logic layer operates independently of the entry modules, specifically scanning for "Moon" (Parabolic) or "Nuke" (Crash) volatility events to force-exit positions, overriding standard stops to preserve capital during Black Swan events.
2. ⚠️ The Philosophy of "Curve Fitting" (Must Read)
One must be careful when applying Gypsy Bot to new pairs or charts.
To be fully transparent: Gypsy Bot is, by definition, a very advanced curve-fitting engine. Because it grants the user granular control over 12 modules, dozens of thresholds, and specific voting requirements, it is extremely easy to "over-fit" the data. You can easily toggle switches until the backtest shows a 100% win rate, only to have the strategy fail immediately in live markets because it was tuned to historical noise rather than market structure.
To use this engine successfully, you must adopt a specific optimization mindset:
Ignore Raw Net Profit: Do not tune for the highest dollar amount. A strategy that makes $1M in the backtest but has a 40% drawdown is useless.
Prioritize Stability: Look for a high Profit Factor (1.5+), a high Percent Profitable, and a smooth equity curve.
Regular Maintenance is Mandatory: Markets shift regimes (e.g., from Bull Trend to Crab Range). Parameters that worked perfectly in 2021 may fail in 2024. Gypsy Bot settings should be reviewed and adjusted at regular intervals (e.g., quarterly) to ensure the voting logic remains aligned with current market volatility.
Timeframe Recommendations:
Gypsy Bot is optimized for High Time Frame (HTF) trend following. It generally produces the most reliable results on charts ranging from 1-Hour to 12-Hours, with the 4-Hour timeframe historically serving as the "sweet spot" for most major cryptocurrency assets.
3. The Voting Mechanism: How Entries Are Generated
The heart of the Gypsy Bot engine is the ActivateOrders input (found in the "Order Signal Modifier" settings).
The engine constantly monitors the output of all enabled Modules.
Long Votes: GoLongCount
Short Votes: GoShortCount
If you have 10 Modules enabled, and you set ActivateOrders to 7:
The engine will ONLY trigger a Buy Entry if 7 or more modules return a valid "Buy" signal on the same closed candle.
If only 6 modules agree, the trade is rejected.
This allows you to mix "Leading" indicators (Oscillators) with "Lagging" indicators (Moving Averages) to create a high-probability entry signal that requires momentum, volume, and trend to all be in alignment.
4. Technical Deep Dive: The 12 Modules
Gypsy Bot allows you to toggle the following modules On/Off individually to suit the asset you are trading.
Module 1: Modified Slope Angle (MSA)
Logic: Calculates the geometric angle of a moving average relative to the timeline.
Function: It filters out "lazy" trends. A trend is only considered valid if the slope exceeds a specific steepness threshold. This helps avoid entering trades during weak drifts that often precede a reversal.
Module 2: Correlation Trend Indicator (CTI)
Logic: Based on John Ehlers' work, this measures how closely the current price action correlates to a straight line (a perfect trend).
Function: It outputs a confidence score (-1 to 1). Gypsy Bot uses this to ensure that we are not just moving up, but moving up with high statistical correlation, reducing fake-outs.
Module 3: Ehlers Roofing Filter
Logic: A sophisticated spectral filter that combines a High-Pass filter (to remove long-term drift) with a Super Smoother (to remove high-frequency noise).
Function: It attempts to isolate the "Roof" of the price action. It is excellent at catching cyclical turning points before standard moving averages react.
Module 4: Forecast Oscillator
Logic: Uses Linear Regression forecasting to predict where price "should" be relative to where it is.
Function: When the Forecast Oscillator crosses its zero line, it indicates that the regression trend has flipped. We offer both "Aggressive" and "Conservative" calculation modes for this module.
Module 5: Chandelier ATR Stop
Logic: A volatility-based trend follower that hangs a "leash" (ATR multiple) from the highest high (for longs) or lowest low (for shorts).
Function: Used here as an entry filter. If price is above the Chandelier line, the trend is Bullish. It also includes a "Bull/Bear Qualifier" check to ensure structural support.
Module 6: Crypto Market Breadth (CMB)
Logic: This is a macro-filter. It pulls data from multiple major tickers (BTC, ETH, and Perpetual Contracts) across different exchanges.
Function: It calculates a "Market Health" percentage. If Bitcoin is rising but the rest of the market is dumping, this module can veto a trade, ensuring you don't buy into a "fake" rally driven by a single asset.
Module 7: Directional Index Convergence (DIC)
Logic: Analyzes the convergence/divergence between Fast and Slow Directional Movement indices.
Function: Identifies when trend strength is expanding. A buy signal is generated only when the positive directional movement overpowers the negative movement with expanding momentum.
Module 8: Market Thrust Indicator (MTI)
Logic: A volume-weighted breadth indicator. It uses Advance/Decline data and Up/Down Volume data.
Function: This is one of the most powerful modules. It confirms that price movement is supported by actual volume flow. We recommend using the "SSMA" (Super Smoother) MA Type for the cleanest signals on the 4H chart.
Module 9: Simple Ichimoku Cloud
Logic: Traditional Japanese trend analysis using the Tenkan-sen and Kijun-sen.
Function: Checks for a "Kumo Breakout." Price must be fully above the Cloud (for longs) or below it (for shorts). This is a classic "trend confirmation" module.
Module 10: Simple Harmonic Oscillator
Logic: Analyzes the harmonic wave properties of price action to detect cyclical tops and bottoms.
Function: Serves as a counter-trend or early-reversal detector. It tries to identify when a cycle has bottomed out (for buys) or topped out (for sells) before the main trend indicators catch up.
Module 11: HSRS Compression / Super AO
Logic: Two options in one.
HSRS: Hirashima Sugita Resistance Support. Detects volatility compression (squeezes) relative to dynamic support/resistance bands.
Super AO: A combination of the Awesome Oscillator and SuperTrend logic.
Function: Great for catching explosive moves that result from periods of low volatility (consolidation).
Module 12: Fisher Transform (MTF)
Logic: Converts price data into a Gaussian normal distribution.
Function: Identifies extreme price deviations. This module uses Multi-Timeframe (MTF) logic to look at higher-timeframe trends (e.g., looking at the Daily Fisher while trading the 4H chart) to ensure you aren't trading against the major trend.
5. Global Inhibitors (The Veto Power)
Even if 12 out of 12 modules vote "Buy," Gypsy Bot performs a final safety check using Global Inhibitors. If any of these are triggered, the trade is blocked.
Bitcoin Halving Logic:
Hardcoded dates for past and projected future Bitcoin halvings (up to 2040).
Trading is inhibited or restricted during the chaotic weeks immediately surrounding a Halving event to avoid volatility crushes.
Miner Capitulation:
Uses Hash Rate Ribbons (Moving averages of Hash Rate).
If miners are capitulating (Shutting down rigs due to unprofitability), the engine flags a "Bearish" regime and can flip logic to Short-only or flat.
ADX Filter (Flat Market Protocol):
If the Average Directional Index (ADX) is below a specific threshold (e.g., 20), the market is deemed "Flat/Choppy." The bot will refuse to open trend-following trades in a flat market.
CryptoCap Trend:
Checks the total Crypto Market Cap chart. If the broad market is in a downtrend, it can inhibit Long entries on individual altcoins.
6. Risk Management & The Dump Protection Team (DPT)
Gypsy Bot separates "Entry Logic" from "Risk Management Logic."
Dump Protection Team (DPT)
This is a specialized logic branch designed to save the account during Black Swan events.
Nuke Protection: If the DPT detects a volatility signature consistent with a flash crash, it overrides all other logic and forces an immediate exit.
Moon Protection: If a parabolic pump is detected that violates statistical probability (Bollinger deviations), DPT can force a profit take before the inevitable correction.
Advanced Adaptive Trailing Stop (AATS)
Unlike a static trailing stop (e.g., "trail by 5%"), AATS is dynamic.
Penthouse Level: If price is at the top of the HSRS channel (High Volatility), the stop loosens to allow for wicks.
Dungeon Level: If price is compressed at the bottom, the stop tightens to protect capital.
Staged Take Profits
TP1: Scalp a portion (e.g., 10%) to cover fees and secure a win.
TP2: Take the bulk of profit.
TP3: Leave a "Runner" position with a loose trailing stop to catch "Moon" moves.
7. Recommended Setup Guide
When applying Gypsy Bot to a new chart, follow this sequence:
Set Timeframe: 4 Hours (4H).
Reset: Turn OFF Trailing Stop, Stop Loss, and Take Profits. (We want to see raw entry performance first).
Tune DPT: Adjust "Dump/Moon Protection" inputs first. These have the highest impact on net performance.
Tune Module 8 (MTI): This module is a heavy filter. Experiment with the MA Type (SSMA is recommended).
Select Modules: Enable/Disable modules 1-12 based on the asset's personality (Trending vs. Ranging).
Voting Threshold: Adjust ActivateOrders. A lower number = More Trades (Aggressive). A higher number = Fewer, higher conviction trades (Conservative).
Final Polish: Re-enable Stop Losses, Trailing Stops, and Staged Take Profits to smooth the equity curve and define your max risk per trade.
8. Technical Specs
Engine Version: Pine Script V6
Repainting: This strategy uses Closed Candle data for all Risk Management and Entry decisions. This ensures that Backtest results align closely with real-time behavior (no repainting of historical signals).
Alerts: This script generates Strategy alerts. If you require visual-only alerts, see the source code header for instructions on switching to "Study" (Indicator) mode.
Disclaimer:
This script is a complex algorithmic tool for market analysis. Past performance is not indicative of future results. Use this tool to assist your own decision-making, not to replace it.
9. About Signal Lynx
Automation for the Night-Shift Nation 🌙
Signal Lynx focuses on helping traders and developers bridge the gap between indicator logic and real-world automation. The same RM engine you see here powers multiple internal systems and templates, including other public scripts like the Super-AO Strategy with Advanced Risk Management.
We provide this code open source under the Mozilla Public License 2.0 (MPL-2.0) to:
Demonstrate how Adaptive Logic and structured Risk Management can outperform static, one-layer indicators
Give Pine Script users a battle-tested RM backbone they can reuse, remix, and extend
If you are looking to automate your TradingView strategies, route signals to exchanges, or simply want safer, smarter strategy structures, please keep Signal Lynx in your search.
License: Mozilla Public License 2.0 (Open Source).
If you make beneficial modifications, please consider releasing them back to the community so everyone can benefit.

RiskCraft - Advanced Risk Management SystemRiskCraft – Risk Intelligence Dashboard
Trade like you actually respect risk
"I know the setup looks good… but how much am I actually risking right now?"
RiskCraft is an open-source Pine Script v6 indicator that keeps risk transparent directly on the chart. It is not a signal generator; it is a risk desk that calculates size, frames volatility, and reminds you when your behaviour drifts away from the plan.
Core utilities
Calculates professional-style position sizing in real time.
Reads volatility and market regime before position size is confirmed.
Adjusts risk based on the trader’s emotional state and confidence inputs.
Maps session risk across Asian, London, and New York hours.
Draws exactly one stop line and one target line in the preferred direction.
Provides rotating education tips plus contextual warnings when risk escalates.
It is intentionally conservative and keeps you in the game long enough for any separate entry logic to matter.
---
Chart layout checklist
Use a clean chart on a liquid symbol (e.g., AMEX:SPY or major FX pairs).
Main RiskCraft dashboard placed on the right edge.
Session Risk box on the left with UTC time visible.
Floating risk badge above price.
Stop/target guide lines enabled.
Education panel visible in the bottom-right corner.
---
1. On-chart components
Right-side dashboard : account risk %, position size/value, stop, target, risk/reward, regime, trend strength, emotional state, behavioural score, correlation, and preferred trade direction.
Session Risk box : highlights active session (Asian, London, NY), current UTC time, and risk label (High/Med/Low) per session.
Floating risk badge : keeps actual account risk percent visible with colour-coded wording from Ultra Cautious to Very Aggressive.
Stop/target lines : exactly one dashed stop and one dashed target aligned with the preferred bias.
Education panel : rotates core principles and AI-style warnings tied to volatility, risk %, and behaviour flags.
---
2. Volatility engine – ATR with context 📈
atr = ta.atr(atrLength)
atrPercent = (atr / close) * 100
atrSMA = ta.sma(atr, atrLength)
volatilityRatio = atr / atrSMA
isHighVol = volatilityRatio > volThreshold
ATR vs ATR SMA shows how wild price is relative to recent history.
Volatility ratio above the threshold flips isHighVol , which immediately trims risk.
An ATR percentile rank over the last 100 bars indicates calm versus chaotic regimes.
Daily ATR sampling via request.security() gives higher time-frame context for intraday sessions.
When volatility spikes the script dials position size down automatically instead of cheering for maximum exposure.
---
3. Market regime radar – Danger or Drift 🌊
ema20 = ta.ema(close, 20)
ema50 = ta.ema(close, 50)
ema200 = ta.ema(close, 200)
trendScore = (close > ema20 ? 1 : -1) +
(ema20 > ema50 ? 1 : -1) +
(ema50 > ema200 ? 1 : -1)
= ta.dmi(14, 14)
Regimes covered:
Danger : high volatility with weak trend.
Volatile : volatility elevated but structure still directional.
Choppy : low ADX and noisy action.
Trending : directional flows without extreme volatility.
Mixed : anything between.
Each regime maps to a 1–10 risk score and a multiplier that feeds the final position size. Danger and Choppy clamp size; Trending restores normal risk.
---
4. Behaviour engine – trader inputs matter 🧠
You provide:
Emotional state : Confident, Neutral, FOMO, Revenge, Fearful.
Confidence : slider from 1 to 10.
Toggle for behavioural adjustment on/off.
Behind the scenes:
Each state triggers an emotional multiplier .
Confidence produces a confidence multiplier .
Combined they form behavioralFactor and a 0–100 Behavioural Score .
High-risk emotions or low conviction clamp the final risk. Calm inputs allow normal size. The dashboard prints both fields to keep accountability on-screen.
---
5. Correlation guardrail – avoid stacking identical risk 📊
Optional correlation mode compares the active symbol to a reference (default AMEX:SPY ):
corrClose = request.security(correlationSymbol, timeframe.period, close)
priceReturn = ta.change(close) / close
corrReturn = ta.change(corrClose) / corrClose
correlation = calcCorrelation()
Absolute correlation above the threshold applies a correlation multiplier (< 1) to reduce size.
Dashboard row shows the live correlation and reference ticker.
When disabled, the row simply echoes the current symbol, keeping the table readable.
---
6. Position sizing engine – heart of the script 💰
baseRiskAmount = accountSize * (baseRiskPercent / 100)
adjustedRisk = baseRiskAmount * behavioralFactor *
regimeAdjustment * volAdjustment *
correlationAdjustment
finalRiskAmount = math.min(adjustedRisk,
accountSize * (maxRiskCap / 100))
stopDistance = atr * atrStopMultiplier
takeProfit = atr * atrTargetMultiplier
positionSize = stopDistance > 0 ? finalRiskAmount / stopDistance : 0
positionValue = positionSize * close
Outputs shown on the dashboard:
Position size in units and value in currency.
Actual risk % back on account after adjustments.
Risk/Reward derived from ATR-based stop and target.
---
7. Intelligent trade direction – bias without signals 🎯
Direction score ingredients:
EMA stack alignment.
Price versus EMA20.
RSI momentum relative to 50.
MACD line vs signal.
Directional Movement (DI+/DI–).
The resulting Trade Direction row prints LONG, SHORT, or NEUTRAL. No orders are generated—this is guidance so you only risk capital when the structure supports it.
---
8. Stop/target guide lines – two lines only ✂️
if showStopLines
if preferLong
// long stop below, target above
else if preferShort
// short stop above, target below
Lines refresh each bar to keep clutter low.
When the direction score is neutral, no lines appear.
Use them as visual anchors, not auto-orders.
---
9. Session Risk map – global volatility clock 🌍
Tracks Asian, London, and New York windows via UTC.
Computes average ATR per session versus global ATR SMA.
Labels each session High/Med/Low and colours the cells accordingly.
Top row shows the active session plus current UTC time so you always know the regime you are trading.
One glance tells you whether you are trading quiet drift or the part of the day that hunts stops.
---
10. Floating risk badge – honesty above price 🪪
Text ranges from Ultra Cautious through Very Aggressive.
Colour matches the risk palette inputs (High/Med/Low).
Updates on the last bar only, keeping historical clutter off the chart.
Account risk becomes impossible to ignore while you stare at price.
---
11. Education engine & warnings 📚
Rotates evergreen principles (risk 1–2%, journal trades, respect plan).
Triggers contextual warnings when volatility and risk % conflict.
Flags when emotional state = FOMO or Revenge.
Highlights sub-standard risk/reward setups.
When multiple danger flags stack, an AI-style warning overrides the tip text so you can course-correct before capital is exposed.
---
12. Alerts – hard guard rails 🚨
Excessive Risk Alert : actual risk % crosses custom threshold.
High Volatility Alert : ATR behaviour signals danger regime.
Emotional State Warning : FOMO or Revenge selected.
Poor Risk/Reward Alert : risk/reward drops below your standard.
All alerts reinforce discipline; none suggest entries or exits.
---
13. Multi-market behaviour 🕒
Intraday (1m–1h): session box and badge react quickly; ideal for scalpers needing constant risk context.
Higher time frames (1D–1W): dashboard shifts slowly, supporting swing planning.
Asset classes confirmed in validation: crypto majors, large-cap equities, indices, major FX pairs, and liquid commodities.
Risk logic is price-based, so it adapts across markets without bespoke tuning.
15. Key inputs & recommended defaults
Account Size : 10,000 (modify to match actual account; min 100).
Base Risk % : 1.0 with a Maximum Risk Cap of 2.5%.
ATR Period : 14, Stop Multiplier 2.0, Target Multiplier 3.0.
High Vol Threshold : 1.5 for ATR ratio.
Behavioural Adjustment : enabled by default; disable for fixed risk.
Correlation Check : optional; default symbol AMEX:SPY , threshold 0.7.
Display toggles : main dashboard, risk badge, session map, education panel, and stop lines can be individually disabled to reduce clutter.
16. Usage notes & limits
Indicator mode only; no automated entries or exits.
Trade history panel intentionally disabled (requires strategy context).
Correlation analysis depends on additional data requests and may lag slightly on illiquid symbols.
Session timing uses UTC; adjust expectations if you trade localized instruments.
HTF ATR sampling uses daily data, so bar replay on lower charts may show brief data gaps while HTF loads.
What does everyone think RISK really means?

Universal Lot Size Calculator (Forex, Index, Metals)Multi-functional lot size calculator with support for various instruments
🎯 MAIN FEATURES:
Universal — works with Forex, indices, metals, and custom instruments
Auto-detect — automatically detects instrument type by ticker
Precise position sizing - considering risk and currency conversions
Currency conversion — automatic conversion between deposit currencies
Advanced visualization — entry, stop-loss, take-profit lines
Smart table — convenient display of all parameters
⚙️ SETTINGS GROUPS:
📈 Instrument Settings
Instrument Type — selection: Auto, Forex, Index, Metals, Custom
Custom Contract Size — manual contract size configuration
Use Manual Exchange Rate — manual rate for currency conversion
💰 Account & Risk Settings
Deposit Currency — account currency (USD, EUR, GBP, CHF, JPY)
Account Size — deposit amount
Risk in % — risk percentage from deposit
🎯 Price Levels
Entry Price — entry price
Stop Price — stop-loss price
Target Price — take-profit price
Color settings for each line
📊 Risk/Reward Settings
Manual Target Price — manual TP setting
Show R Levels — display profit levels in R multiples
Show only last R level — show only the last R level
Number of R Levels — number of R levels (1-10)
🎨 Line Styles & Table Appearance
Line style settings (solid, dashed, dotted)
Line width
Table position and size
Color schemes
📈Supported instrument types:
Forex — standard lot 100,000
Indices — E-mini futures (US100=20, SP500=50, US30=5, DAX=25)
Metals — Gold=100 oz, Silver=5000 oz
Custom — user-defined contract size
📱 KEY FEATURES:
- Auto instrument detection:
Indices: US100, SP500, US30, DAX
Metals: XAUUSD (Gold), XAGUSD (Silver)
Forex: all currency pairs
- Smart table with key parameters:
Instrument type and contract size
Account size and risk
Entry/exit prices
Calculated lot size
- Visual elements:
Dynamic level lines
Labels with profit/loss calculations
R-levels for target prices
- Currency conversion:
Automatic rate fetching
Support for USD, EUR, GBP, CHF, JPY
Manual rate setting when needed
⚠️ IMPORTANT NOTES:
Contract sizes may vary between brokers
For CFD brokers use Custom type with Contract Size = 1
During weekends currency rates may be unavailable — use manual rate
When trading in different currencies verify conversion accuracy
🚀 HOW TO USE:
Select instrument type (Auto for auto-detection)
Set deposit size and account currency
Define risk percentage (1-100%)
Specify prices for entry, stop-loss, and take-profit
Use calculated lot to open positions
⚠️ RESETTING CALCULATIONS:
To reuse the calculator with new price levels, you need to:
Right-click on the indicator's table/chart
Select "Reset Points" from the context menu
OR manually update all three price levels (Entry, Stop Loss, Take Profit) in the settings

Multi-Account Lot Calculator (@JP7FX)Multi-Account Lot Calculator (JP7FX)
Multi-Account Lot Calculator shows a single trade idea across multiple accounts and currencies. It builds a panel on the chart that displays risk per account and the lot size needed for a chosen stop distance and R multiple.
Trade and asset settings
You define the shared trade settings once: direction (long or short), stop loss distance in pips, risk to reward, and entry price or use close.
The script supports Forex, stock, crypto, XAU/USD and index/CFD, with automatic or manual pip size and contract size. It also includes inputs for index point size and value per point when using index or CFD symbols.
Entry, SL and TP visuals
The script plots entry, stop loss and take profit lines on the chart.
Labels can show the exact prices and the R multiple for the take profit.
Optional zones between entry and SL, and entry and TP, can be drawn on the right side of the chart.
A lock feature lets you freeze the trade window and price levels manually or when price touches entry. When locked, the script can keep zones visible using line fills and can auto extend the right edge as new bars print.
Multi account panel
Up to six accounts can be configured at the same time.
For each account you can set:
• a custom name
• account balance
• account currency (USD, EUR, GBP, AUD, NZD, CAD, CHF, JPY)
• risk mode (percent or cash)
• preset risk percent or fixed cash risk
The panel calculates, per account:
• risk amount in that account’s currency
• lot size for the given stop loss distance
Currency conversion
Risk and lot sizing use the symbol’s quote currency and convert it into each account currency with request.currency_rate.
A fallback conversion rate can be set if live data is not available.
Table layout and style
The on-chart table shows columns for Account, CCY, Balance, Mode, R%, Risk Amt and Lot.
You can choose the panel position, border width, title and subheader colours, row colours and optional zebra rows.
Use cases
This tool is intended for traders who run several accounts or prop firm accounts in different currencies and want a single view of position size per account for the same trade idea.
