Aura Volumetrics [Pineify]Aura Volumetrics - Dynamic Volume-Weighted Sentiment Visualization
The Aura Volumetrics indicator transforms traditional volume analysis into a dynamic, visual representation of market sentiment and trading intensity. By combining volume delta analysis, volume surprise detection, and volatility-adjusted bands, this indicator creates a "breathing" aura around price that reveals the true strength and exhaustion of market movements in real-time.
Key Features
Dynamic Aura Bands that expand and contract based on volume intensity and market volatility
Color-coded sentiment analysis distinguishing bullish (green), bearish (red), and neutral (gray) market conditions
Peak Activity Level (PAL) markers identifying significant institutional order flow
Volume Surprise detection highlighting when market participation exceeds normal levels
Volatility-adjusted width calculation ensuring the aura adapts to different market conditions
Custom candle coloring for high-volume bars providing instant visual confirmation
How It Works
The Aura Volumetrics indicator employs a multi-layered approach to volume analysis:
1. Buying and Selling Pressure Calculation
The indicator analyzes each candle's closing position relative to its high and low to determine whether volume represents buying or selling pressure. When a candle closes in the upper half of its range, volume is attributed to buyers; when it closes in the lower half, volume is attributed to sellers. The net difference (delta) reveals the true directional pressure behind price movement.
2. Volume Surprise Detection
By comparing current volume to a 20-period simple moving average, the indicator calculates a volume ratio that identifies when market participation significantly exceeds normal levels. This "volume surprise" mechanism helps traders spot moments when institutional players or significant market events are driving unusual activity.
3. Dynamic Aura Width Calculation
The width of the aura is determined by combining the Average True Range (ATR) with the volume surprise ratio. This creates a volatility-adjusted band that expands during high-volume, high-volatility periods and contracts during quiet market conditions. The mathematical relationship uses a square root function to smooth the expansion rate, preventing excessive band width during extreme volume spikes.
4. Sentiment Smoothing
To reduce noise and provide clearer directional signals, the raw volume delta is smoothed using a 5-period Exponential Moving Average. This creates a more stable sentiment reading while still responding quickly to genuine shifts in market pressure.
Trading Ideas and Insights
The Pulsing Aura Effect
The width of the colored cloud around price acts as a real-time gauge of trading intensity. A widening aura signals that a "Volume Surprise" is occurring—market participants are entering with force. This often precedes significant price movements or indicates the continuation of strong trends. Conversely, a narrowing aura suggests declining participation and potential exhaustion.
Color-Based Sentiment Analysis
Green (Bullish) Aura: Net money flow is driven by buyers, indicating demand exceeds supply
Red (Bearish) Aura: Sellers are aggressive, with supply overwhelming demand
Gray (Neutral) Aura: Balanced buying and selling pressure, often seen during consolidation
Aura Boundary Rejections
When price reaches the outer boundary of the aura and volume begins to dry up (indicated by the aura narrowing), traders should watch for potential reversals or mean-reversion back to the midline. This is similar to how price reacts to traditional support and resistance levels, but with the added dimension of volume confirmation.
Peak Activity Levels (PAL)
Small circles appearing on the midline represent moments when volume exceeds 2.5 times the average. These Peak Activity Levels often mark areas where significant "meta-orders" (large institutional trades) have been executed, creating potential long-term support or resistance zones that persist across multiple timeframes.
How Multiple Indicators Work Together
The Aura Volumetrics indicator synthesizes four distinct analytical methods into a cohesive visualization:
Volume Delta Analysis provides the directional component, determining whether pressure is bullish or bearish
Volume Surprise Detection adds the intensity dimension, showing when participation exceeds normal levels
ATR-Based Volatility Adjustment ensures the aura scales appropriately across different instruments and market conditions
EMA Smoothing filters out noise while maintaining responsiveness to genuine sentiment shifts
These components work synergistically: the volume delta determines color, the volume surprise and ATR determine width, and the smoothing ensures stability. The result is a single, intuitive visualization that would otherwise require monitoring multiple separate indicators.
Unique Aspects
Unlike traditional volume indicators that display volume as bars below the chart, Aura Volumetrics integrates volume analysis directly into the price action overlay. The "breathing" metaphor is particularly apt: calm markets take shallow breaths (narrow aura), while excited or panicked markets take deep, powerful breaths (wide aura), revealing exhaustion or strength.
The indicator's use of gradient fills creates a visual hierarchy where the most intense volume activity appears closest to the midline, while the outer edges fade toward transparency. This design choice makes it immediately clear where the core of market activity is concentrated.
The Peak Activity Level markers serve a dual purpose: they identify significant volume events in real-time and create a historical record of institutional activity zones that traders can reference for future support and resistance analysis.
How to Use
Trend Confirmation: Look for a widening aura in the direction of the trend (green for uptrends, red for downtrends) to confirm trend strength
Reversal Signals: Watch for price reaching the outer aura boundary followed by aura contraction, suggesting exhaustion
Breakout Validation: Genuine breakouts should be accompanied by a widening aura; narrow auras during breakouts suggest false moves
Support/Resistance Zones: Use Peak Activity Level markers to identify areas where institutional orders were placed
Consolidation Recognition: A consistently narrow, neutral-colored aura indicates low conviction and range-bound conditions
Customization
The indicator offers several customization options to suit different trading styles and instruments:
Volume Average Lookback (default: 20): Adjust this to change the baseline for volume surprise detection. Lower values make the indicator more sensitive to short-term volume changes; higher values focus on longer-term volume trends
Aura Sensitivity (default: 2.0): This ATR multiplier controls how wide the aura expands. Increase for more prominent bands on volatile instruments; decrease for subtler visualization on stable markets
Show Peak Activity Signals (default: true): Toggle the display of Peak Activity Level markers if you prefer a cleaner chart
Color Scheme: Customize the bullish, bearish, and neutral aura colors to match your chart theme or personal preferences
Conclusion
Aura Volumetrics represents a paradigm shift in volume analysis by transforming abstract volume data into an intuitive, visual representation of market sentiment and intensity. By combining volume delta, volume surprise detection, and volatility-adjusted bands, this indicator provides traders with a comprehensive view of market dynamics that would otherwise require multiple separate tools.
The "breathing market" metaphor makes complex volume relationships immediately understandable, while the Peak Activity Level markers create a lasting record of institutional activity zones. Whether you're a day trader seeking confirmation of intraday moves or a swing trader looking to validate trend strength, Aura Volumetrics offers a unique perspective on the forces driving price action.
Note: This indicator works best when combined with price action analysis and other technical tools. Volume analysis should be one component of a comprehensive trading strategy, not used in isolation.
Volumedelta

Volumetric Spectrogram [by Oberlunar]Volumetric Spectrogram is a binned volume “spectrogram” that separates buy/sell pressure above vs below the current price and summarises it with two oscillators. Includes optional multi-feed (broker/exchange) aggregation, delta-based colouring, and a sideways compression marker.
Full Description
Most volume displays are either vertical bars or horizontal profiles that do not clearly tell you how pressure differs above vs below the current price. Volumetric Spectrogram builds a binned volume map over a lookback window and splits activity into two regions : bins above price (overhead pressure) and bins below price (support pressure). It then converts the regional buy/sell imbalance into two oscillators (Upper Oscillator and Lower Oscillator) so you can quickly analyse volumetric synchronisation, divergence, and compression.
For volume multi-source confirmation, the script can aggregate up to five broker/exchange feeds of the same market into a consolidated delta bias. Weighting can be Equal , Last Volume , or Adaptive (volume-weighted with an adaptive Supertrend-aligned penalty when a feed’s delta conflicts with its local regime). A small 3-lane strip displays Equal/Last/Adaptive biases side by side, and optional overlay candles can colour the main chart according to the selected mode.
Finally a Sideways Interceptor highlights low-energy phases using oscillator compression plus a volatility gate and a short entry/exit confirmation, drawing a band during compressed conditions (see the yellow bands).
How to
Set Volume Period and Volume Bins to balance stability vs responsiveness.
In Multi-Broker Volume Configuration, pick up to five broker/exchange symbols for the same market and select Weighting (Equal / Last Volume / Adaptive).
Enable Color bars and lane for delta visuals, and Overlay candles if you want candle coloring on the main chart.
Enable Sideways Interceptor to mark compression regimes; increase confirmation bars to reduce flicker.
Structural evidence
When pronounced volumetric spikes appear (up or down), the trend often reverses sharply. In the figure, the circles highlight the spikes; once the spike subsides (reversion toward baseline), the oscillator turns bullish. The double confirmation of two consecutive minimum spikes acts as support for a possible ensuing up-move, with fill colours confirming direction.
Sideways evidence and breakout
After the volumetric compression, it is possible to expect a breakout, such as shown in the following figure:
In this case, the bars to trigger the sideways interceptor are fixed to 1.
Neutral band bias
The Neutral band (|bias| ≤) setting acts as a deadband for the consolidated delta bias. It is useful when a market has a persistent underlying bullish or bearish tilt, and you want to reduce low-level “flicker” around the midpoint.
With a small Neutral band (near zero), the bias reacts to most changes in pressure:
With a larger Neutral band, only stronger pressure events are highlighted. In this mode, the three lanes (Equal / Last Volume / Adaptive) also make it easier to see whether there is cross-feed consensus:
Limitations & Risks
Buy/sell volume is approximated from candle direction, not true bid/ask delta. Broker/exchange feeds can differ in pricing and volume reporting, so aggregation should be treated as a consensus view. Sideways detection is heuristic and may not catch every transition.
by Oberlunar ★ 👁

QuantaStrike Delta HeatmapFinally a deeper understanding of what actually moves the markets.
The delta heat map will show you relevant zones based on actual buying/selling pressure.

RealEdgeFX VolumeMapPresentation
RealEdgeFX VolumeMap is an intraday order-flow companion built to highlight aggressive participation using TradingView’s intrabar Volume Delta estimation. Instead of guessing “who hit the market,” VolumeMap tags candles where delta activity is statistically significant and adds a simple, practical classifier to help you read what that aggression likely meant (breakout, absorption, trap, or just raw aggression).
It’s designed to stay clean: session-based plotting, a short history window, and compact badges with optional heatmap strength.
Description
VolumeMap works by requesting intrabar Volume Delta from a lower timeframe (e.g., 1m) and comparing the current candle’s delta against a dynamic baseline using one of three methods:
- xAvg (multiple of the average absolute delta)
- Z-Score (statistical deviation vs mean)
- Percentile (relative rank vs lookback distribution)
When a candle exceeds the selected threshold, VolumeMap classifies it into one of four buckets:
- BRK (Breakout/Displacement)
- ABS (Absorption)
- TRAP (Trap / failed stop-run)
- AGG (Aggression only)
The result is a fast “at-a-glance” read of where meaningful order-flow showed up, inside your active trading sessions.
Tools
- Aggression Badges (Volume Delta spikes): Marks candles where intrabar delta is unusually large vs your chosen baseline.
- Classifier (BRK / ABS / TRAP / AGG): Adds context to the aggression event so you can interpret intent, not just intensity.
- Session Filter (clean intraday focus): Plots only inside your active sessions (two default sessions included).
- Heatmap Strength: Badges fade/brighten based on how far the event is beyond threshold (relative strength).
- History Window: Limits plotting to the last N days to reduce clutter and load.
Classifier logic (what the tags mean)
- BRK = Breakout / Displacement
Aggression + strong range vs ATR + close near the extreme → suggests “real displacement” (follow-through intent).
- ABS = Absorption
Aggression is present, but price progress is weak (or EVR is elevated) → suggests absorption/defense at that level.
- TRAP = Trap / Failed stop-run
Sweeps a recent high/low with delta aligned to the sweep, but closes against it → suggests a failed run / trapped side.
- AGG = Aggression
Aggression passed the threshold, but didn’t meet BRK/ABS/TRAP conditions.
What can you customize?
- Timezone + History Days
- Sessions (2 default windows) and session enable toggles
- Intrabar timeframe (LTF) used to estimate delta
- Detection Method (xAvg / ZScore / Percentile)
- Threshold parameters (lengths, multipliers, percentile)
- Badge text (Signed Delta vs Absolute Delta)
- Heatmap on/off and intensity behavior
- Colors + label size for buy/sell badges
How to use properly
- Use intraday charts (1–15m) and set Intrabar timeframe to 1m for best sensitivity.
- Keep the session filter enabled so the indicator focuses on the periods you actually trade.
- Use the classifier as context, not as a standalone entry system:
- BRK can support continuation scenarios
- ABS can support rejection/defense scenarios
- RAP can support reversals after a sweep
- Pair it with your structure/levels: VolumeMap tells you where the participation is, your model decides what to do with it.
Notes / limitations
- Volume Delta is an estimate derived from lower timeframe data; results can vary with the selected LTF and symbol data quality.
- Symbols without meaningful volume data may not behave as expected.
Terms and Conditions
Purpose and no advice : This indicator is provided for informational and educational purposes only and does not constitute financial, investment, or trading advice. Past performance is not indicative of future results.
User responsibility : You are solely responsible for all trading decisions and outcomes.
Access and use : This script is publicly available on TradingView, but the source code is private (closed-source). You may use it for personal charting purposes. Redistribution, copying, resale, decompiling, or any attempt to reverse engineer the script is prohibited. The author may update, restrict, suspend, or remove access to the script at any time, at their sole discretion, including discontinuing it without prior notice, subject to TradingView’s platform rules and policies.
Acceptance and updates : By using this tool, you agree to these Terms and Conditions. They may be updated over time; continued use constitutes acceptance of the revised terms.

Vector Volume Delta Candles [Capitalize Labs]Vector Volume Delta Candles is a visual market analysis indicator designed to highlight relative volume activity directly on price candles. The indicator classifies candles based on volume intensity and price range expansion compared to recent historical data and applies color coding for visual context only.
This indicator functions strictly as a candle-coloring overlay. It does not generate trade signals, entries, exits, alerts, forecasts, or predictions. No automated trading decisions are made or implied.
How it works
Evaluates current candle volume relative to a moving average of recent volume
Optionally incorporates a volume × price range comparison to identify unusually active candles
Classifies candles as:
Climactic when volume activity is significantly above recent norms
Elevated when volume is above average but not climactic
Applies configurable colors to candles based on classification and candle direction
Includes optional color customization and the ability to revert candle coloring
Uses historical data only and does not repaint or reference future bars
Intended use
This indicator is intended for educational and analytical purposes only. It may be used as a visual reference alongside other tools or discretionary analysis methods. All interpretations are subjective and must be evaluated independently by the user.
No assumptions are made regarding market direction, probability, or outcome.
Disclaimer and Risk Notice
This indicator is provided strictly for educational and informational purposes. It is not intended to constitute financial advice, investment recommendations, or an offer or solicitation to buy or sell any financial instrument or security.
Financial markets involve substantial risk, and trading decisions can result in losses that exceed initial expectations. Market conditions can change rapidly due to volatility, liquidity constraints, economic events, or other external factors. No representation is made that the use of this indicator will result in profitable outcomes or that any interpretation of its output will be accurate or complete in all market conditions.
This indicator does not take into account individual financial circumstances, objectives, or risk tolerance. Users are solely responsible for evaluating the suitability of any analysis or methodology derived from this tool and for managing their own risk, position sizing, and execution decisions.
All calculations are based on historical price and volume data. Historical or simulated behavior should not be interpreted as a guarantee or prediction of future performance. The absence of repainting or lookahead logic does not imply predictive capability.
By using this indicator, the user acknowledges that all trading decisions are made at their own discretion and risk, and that the creator assumes no responsibility or liability for any losses, damages, or outcomes arising from its use.

Volumen Critico XVolumen Critico X
Critico
Critico
Volumen Critico X
Volumen Critico X
Volumen Critico X

BT Cumulative Delta ContextBT CDC — Cumulative Delta Change (Volume Momentum)
Overview
BT CDC (Cumulative Delta Change) measures the rate of change in volume participation , not raw volume or cumulative delta itself.
In simple terms, CDC answers one question:
“Is buying or selling pressure accelerating, decelerating, or stalling?”
Where CVD shows who is holding inventory , CDC shows whether that inventory is still being added to . This distinction is critical in professional trading.
---
Inputs Summary
• Delta Source – Determines how volume imbalance is estimated
• Smoothing / Lookback – Controls sensitivity to short-term vs sustained momentum shifts
• Normalization (if enabled) – Allows comparison across sessions or assets
Default settings are designed to balance responsiveness with stability for intraday futures.
---
Visual Elements
• Color-coded histogram or waveform
– Positive values indicate increasing buying pressure
– Negative values indicate increasing selling pressure
• Zero line reference
– Above zero: positive participation momentum
– Below zero: negative participation momentum
Visual emphasis is placed on changes in slope and peaks , not just crossings.
---
How Traders Use CDC Effectively
CDC is best used to identify advantageous periods for trading , not individual entries.
Common professional-style uses include:
• Pressing trades only when CDC supports continuation
• Avoiding breakouts when CDC is decaying
• Fading moves when CDC spikes fail to convert into sustained momentum
• Standing down during flat CDC environments (low participation)
CDC is especially effective during:
• Session opens
• Volatility regime changes
• Trend transitions
• Range-to-trend or trend-to-range shifts
---
How CDC Relates to Professional Trading Desks
Professional trading desks rarely make decisions based on absolute volume or delta alone. Instead, they focus on:
• Changes in participation
• Acceleration vs exhaustion of pressure
• Whether initiative activity is increasing or fading
CDC is a retail-accessible approximation of what institutional desks refer to as:
• Order flow acceleration
• Liquidity-taking rate changes
• Participation momentum
Directional systematic funds, CTAs, and intraday macro traders use similar concepts to determine when markets are in trend-permissive states versus balanced or rotational states.
CDC is not used as a “buy/sell trigger.” It is used as a permission filter that determines whether directional trades should be pressed, faded, or avoided.
---
What CDC Signals
Rising CDC
• Participation is accelerating
• Initiative activity is increasing
• Directional continuation is more likely
• Pullback trades have higher expectancy
Flattening CDC
• Participation is no longer expanding
• Inventory is being digested or distributed
• Breakouts become fragile
• Range behavior becomes more likely
Falling CDC
• Momentum is decaying
• Exhaustion risk increases
• Fades and mean reversion gain edge
CDC is most powerful when read alongside price location (VWAP, ranges, structure) and cumulative delta (CVD).
---
Who Uses Similar Tools & Methods
While CDC is not a standardized retail indicator, its logic is widely used by:
• Directional systematic futures funds
• CTA-style intraday and swing traders
• Macro desks trading index futures
• Volatility and regime-based strategies
---
Important Notes
• CDC is a context and regime tool , not a signal generator
• Best used in combination with CVD, VWAP, structure, and volatility
• Most valuable when aligned with time-of-day and session behavior
CDC helps traders align with periods when professional participation is expanding—and avoid trading when it is not.

Institutional Flow X-Ray [Blk0ut]Introduction
In the world of quantitative trading, volume is often described as the "fuel" of the market. However, standard volume bars have a major flaw: they show you how much changed hands, but they don't tell you who was in control.
The Institutional Flow X-Ray is designed to solve this opacity problem. It looks "under the hood" of every candle to visualize the intent of the Smart Money participants. By combining Volume Price Analysis (VPA), Wyckoff Logic, and Volatility Compression into a single interface, this tool helps traders identify when institutions are quietly accumulating positions (Absorption) before a major expansion occurs.
How It Works: The Logic
This indicator is not a simple moving average crossover. It aggregates four distinct quantitative models into one composite view:
1. Institutional Flow (The Histogram) Instead of just looking at whether price closed up or down, we calculate the "Intra-Bar Delta." We measure where the price closed relative to the high-low range of that specific candle, weighted by the volume.
• The Result: A smoothed momentum oscillator that reveals the internal strength of the trend.
• Gradient Coloring: The bars use a 4-color gradient system. Bright Green/Red indicates accelerating momentum, while Darker Green/Red indicates exhaustion or a pullback is likely.
2. Stealth Absorption (The "Gold" Signal) This is based on Wyckoff’s Law of Effort vs. Result. The script scans for a specific anomaly: Volume is significantly higher than average (>2.0x), but Price Range is significantly lower than average.
• Why this matters: When you see high volume but no price movement, it often means a large entity is absorbing all available liquidity (Iceberg Orders). These bars are painted GOLD.
3. Volatility Compression (The "Squeeze" Dots) Markets move in cycles of Expansion and Compression. This module compares the width of Bollinger Bands against Keltner Channels.
• The Logic: When the Bollinger Bands contract inside the Keltner Channels, the market is like a coiled spring. This measures potential energy.
4. Relative Strength (The Alpha Line) Institutional capital rarely flows into underperforming assets. The script automatically compares your current ticker against a benchmark (SPY for Stocks, BTC for Crypto, DXY for Forex).
• The Logic: If the benchmark is dropping, but your ticker is holding steady (Rising Blue Line), it shows Relative Strength, a key footprint of institutional support.
________________________________________
Visual Guide & Usage
The Histogram (Flow & Signals)
• Green Gradients: Buyers are in control.
• Red Gradients: Sellers are in control.
• GOLD Bars (Absorption): Be alert. A major player is active. If this happens at Support, it is a high-probability Accumulation setup.
• WHITE Bars (Alpha Signal): The "Triple Confluence." This occurs when we have (1) Absorption + (2) Bullish Flow + (3) Relative Strength all activating at once. This is the strongest signal in the system.
The Volatility Map (Center Dots) The dots running along the zero line tell you the state of market energy:
• 🔴 Red (Extreme Squeeze): Ratio < 0.7. Massive energy build-up. Expect an explosive move soon.
• 🟠 Orange (Squeeze): Ratio < 1.0. Standard pre-breakout compression.
• ⚪ Gray (Normal): Standard volatility.
• 🔵 Blue (Expansion): The move is underway. Volatility is expanding.
The Heads-Up Dashboard A professional table in the corner provides real-time quantitative data so you don't have to guess:
• Inst. Flow: The raw score (0-100).
• Volatility: Tells you exactly which phase the market is in (Squeeze vs. Expansion).
• Rel. Strength: Tells you if you are "Outperforming" or "Lagging" the benchmark.
________________________________________

Volume Flow and Delta Analysis [MarkitTick]💡This comprehensive technical indicator is designed for traders who require a granular view of market participation that goes beyond standard volume bars. By leveraging the advanced "Intrabar Analysis" capabilities of Pine Script, this tool deconstructs every single price candle on your chart into its constituent lower-timeframe components. It effectively "X-rays" the market to determine whether the volume inside a bar was primarily driven by aggressive buying or aggressive selling, providing a definitive read on market sentiment and institutional control.
● Originality and Utility
Most standard volume indicators display a simple aggregate total—a single block of volume that fails to distinguish between buying pressure and selling pressure. A high-volume candle could represent a strong breakout, or it could represent a "selling tail" where buyers were absorbed. This script solves that ambiguity. It is not a standard oscillator; it is a quantitative flow analyzer. It reconstructs the "Delta" (the net difference between buying and selling volume) by querying lower-timeframe data (e.g., analyzing 1-minute data inside a 60-minute bar). This allows traders to spot "Hidden Accumulation" (where price is flat but Delta is rising) or "Exhaustion" (where price rises but Delta falls), offering a significant edge in identifying reversals and trend continuations.
● Methodology
The script operates through a sophisticated three-stage quantitative process:
• Intrabar Data Acquisition
The script uses the security_lower_tf function to fetch granular price and volume data from a lower timeframe (automatically detected or user-defined). This allows the script to see what happened "inside" the current chart's bar.
• Directional Flow Distribution
For every lower-timeframe interval, the script assigns volume to either "Bullish Flow" or "Bearish Flow." If the close is higher than the open on the lower timeframe, the volume is credited to buyers. If the close is lower, it is credited to sellers. This logic is far more accurate than simple "Up/Down" tick data, as it respects price action.
• Statistical Volatility Normalization
To filter out noise, the script calculates a dynamic baseline using an Exponential Moving Average (EMA) of the absolute Delta values. It then compares the current bar's Delta against this baseline. This generates an "Intensity Score" (measured in Sigma or Standard Deviations). This ensures that a "High Volume" signal is relevant to the current market volatility, rather than relying on fixed, arbitrary thresholds.
● How to Use
This tool is designed to be a complete decision-support system. Here is how to interpret its various components:
• The Volume Histogram
The background histogram displays Total Volume, while the foreground bars show the split between Buying (Teal) and Selling (Red) flow. Use this to gauge the "quality" of a move. A price rally accompanied by high Teal volume is healthy; a rally on low volume or high Red volume is suspect.
• The Delta Histogram
This plots the net difference.
Strong Positive (Green) Delta: Indicates aggressive market buy orders are hitting the ask.
Strong Negative (Red) Delta: Indicates aggressive market sell orders are hitting the bid.
Divergence: If Price makes a New High but the Delta Histogram makes a Lower High, this is a classic signal of exhaustion and potential reversal.
• The Heads-Up Display (HUD)
A dashboard table pinned to the chart provides real-time metrics:
Session Delta: The cumulative buy/sell pressure for the current trading day.
Flow Regime: Clearly states if the market is in "ACCUMULATION" or "DISTRIBUTION."
Intensity: Shows how statistically significant the current volume is (e.g., "2.5x" means the volume is 2.5 times the standard deviation, indicating an anomaly).
• Visual Signals
The script plots triangle markers on top of the chart when the Delta Intensity exceeds the user-defined threshold.
Up Triangle (Green): Signals strong institutional buying pressure (Delta > Threshold).
Down Triangle (Red): Signals strong institutional selling pressure (Delta < Threshold).
● Inputs and Configuration
Lower Timeframe: By default, the script auto-selects the best resolution (e.g., 1-minute data for hourly charts). Users can override this to fine-tune the granularity.
Volume MA Length: Defines the lookback period for the volume moving average.
Delta Volatility Threshold (Sigma): This is the sensitivity filter for signals. A higher value (e.g., 2.0) results in fewer but more significant signals. A lower value (e.g., 1.0) provides more frequent alerts.
Visual Logic: Users can toggle the Dashboard, Delta Histogram, and Moving Averages on or off to suit their charting aesthetic.
● Disclaimer
All provided scripts and indicators are strictly for educational exploration and must not be interpreted as financial advice or a recommendation to execute trades. I expressly disclaim all liability for any financial losses or damages that may result, directly or indirectly, from the reliance on or application of these tools. Market participation carries inherent risk where past performance never guarantees future returns, leaving all investment decisions and due diligence solely at your own discretion.

Delta Volume EMA Strategy
================================================================================
DELTA VOLUME EMA STRATEGY - STRATEGY GUIDE 📊
================================================================================
💡 COLLABORATION & SUPPORT
---------------------------
If you want to collaborate, have an idea for a strategy, or need help writing
or customizing code, send an email to burdytrader@gmail.com or send me a
message. Suggestions, ideas, and comments are always welcome! 🤝
================================================================================
⚠️ IMPORTANT: INSTRUMENT SELECTION 📈
-------------------------------------
This strategy performs BEST with instruments that have a centralized data flow,
such as Futures contracts. Centralized markets provide more accurate and
reliable volume data, which is essential for Volume Delta analysis to work
effectively.
Why Futures? 🎯
- Centralized exchange = Accurate volume data
- All trades flow through a single exchange
- Volume reflects true buying/selling pressure
- Better correlation between volume and price movements
While the strategy can work with other instruments (stocks, forex, etc.),
volume data quality may vary, which can affect the reliability of Volume Delta
signals. For optimal performance, use Futures contracts or other instruments
with centralized, high-quality volume data.
================================================================================
WHAT DOES THIS STRATEGY DO? 🎯
---------------------------
This strategy uses Volume Delta analysis combined with Exponential Moving
Averages (EMA) to identify high-probability trading opportunities. The Volume
Delta measures the difference between buying and selling pressure, helping to
identify when strong institutional or smart money movements occur. The strategy
automatically enters trades when volume delta reaches extreme levels, indicating
potential trend continuation or reversal points.
HOW IT WORKS? ⚙️
---------------
1. VOLUME DELTA CALCULATION 📈
The strategy calculates the Volume Delta using the following formula:
- Volume Ratio (v) = Current Volume / Previous Volume
- EMA of Close (mac) = EMA(Close, MA Length) × Volume Ratio
- EMA of Open (mao) = EMA(Open, MA Length) × Volume Ratio
- Volume Delta (vd) = mac - mao
The Volume Delta shows:
- Positive values (green) = Buying pressure (buyers are more active)
- Negative values (red) = Selling pressure (sellers are more active)
2. VOLUME DELTA MOVING AVERAGE 📊
The strategy calculates an EMA of the Volume Delta (vdma) to smooth out
fluctuations and identify the overall trend of buying/selling pressure:
- vdma = EMA(Volume Delta, EMA Length)
- When vdma is above zero = Overall buying pressure
- When vdma is below zero = Overall selling pressure
3. PERCENTILE-BASED ENTRY CONDITIONS 🎲
Instead of using fixed thresholds, the strategy uses percentile analysis to
identify extreme volume delta movements:
For LONG entries:
- Analyzes seller volumes (negative volume delta) over the lookback period
- Calculates the percentile threshold (default: 80th percentile)
- Enters LONG when volume delta becomes positive AND exceeds the threshold
- This indicates a strong shift from selling to buying pressure
For SHORT entries:
- Analyzes buyer volumes (positive volume delta) over the lookback period
- Calculates the percentile threshold (default: 80th percentile)
- Enters SHORT when volume delta becomes negative AND exceeds the threshold
- This indicates a strong shift from buying to selling pressure
4. POSITION SIZING 💰
The strategy offers two position sizing methods:
a) RISK VALUE (Fixed Risk in Dollars):
- Calculates position size based on a fixed dollar risk amount
- Formula: Position Size = Risk Amount / (Entry Price × Stop Loss %)
- Ensures consistent risk per trade regardless of price level
b) LOTS SIZE:
- Uses a fixed lot size for all trades
- Simple and straightforward approach
- Useful when you want consistent position sizes
5. TAKE PROFIT & STOP LOSS SETTINGS 🎯
The strategy offers flexible TP/SL configuration in three modes:
a) PERCENTAGE (%):
- TP/SL calculated as a percentage of entry price
- Example: 2% TP means entry price × 1.02 (for LONG) or × 0.98 (for SHORT)
- Adapts automatically to different price levels
b) CURRENCY:
- TP/SL set as a fixed currency amount
- Example: $100 TP means entry price + $100 (for LONG) or - $100 (for SHORT)
- Useful for instruments with consistent price movements
c) PIPS:
- TP/SL set as a fixed number of pips
- Automatically converts pips to price using the instrument's minimum tick
- Ideal for forex and other pip-based instruments
6. AUTOMATIC TRADE EXECUTION ⚡
When entry conditions are met:
- Opens a position (LONG or SHORT) at market price
- Automatically sets Take Profit and Stop Loss based on selected mode
- Sends an alert with all trade information
- Only one position at a time (waits for current position to close)
AVAILABLE PARAMETERS ⚙️
----------------------
1. MA LENGTH (Default: 10)
- Length of the Exponential Moving Average used for close and open prices
- Lower values = More sensitive to recent price action
- Higher values = More smoothed, less sensitive
2. EMA LENGTH (Default: 20)
- Length of the EMA applied to Volume Delta
- Controls the smoothing of the volume delta signal
- Lower values = Faster signals, more trades
- Higher values = Slower signals, fewer but potentially more reliable trades
3. POSITION SIZE MODE
- "Risk Value": Calculate position size based on fixed dollar risk
- "Lots Size": Use fixed lot size for all trades
4. FIXED RISK IN $ (Default: 50)
- Only used when Position Size Mode = "Risk Value"
- The dollar amount you're willing to risk per trade
- Strategy calculates position size automatically
5. LOT SIZE (Default: 0.01)
- Only used when Position Size Mode = "Lots Size"
- Fixed lot size for all trades
6. TAKE PROFIT MODE
- "%": Percentage of entry price
- "Currency": Fixed currency amount
- "Pips": Fixed number of pips
7. STOP LOSS MODE
- "%": Percentage of entry price
- "Currency": Fixed currency amount
- "Pips": Fixed number of pips
8. TAKE PROFIT / STOP LOSS VALUES
- Different input fields appear based on selected mode
- Configure TP and SL independently
9. VOLUME LOOKBACK PERIOD (Default: 20)
- Number of bars used to calculate percentile thresholds
- Lower values = More sensitive, adapts faster to recent conditions
- Higher values = More stable, uses longer-term statistics
10. PERCENTILE THRESHOLD (Default: 80%)
- The percentile level used to identify extreme volume delta movements
- 80% means: only enter when volume delta exceeds 80% of recent values
- Higher values = Fewer but potentially stronger signals
- Lower values = More frequent signals
VISUALIZATION 📊
---------------
The strategy displays on the chart:
1. VOLUME DELTA COLUMNS
- Green columns = Positive volume delta (buying pressure)
- Red columns = Negative volume delta (selling pressure)
- Height represents the magnitude of buying/selling pressure
2. VOLUME DELTA MA AREA
- Two overlapping area plots showing the smoothed volume delta
- Black area (base layer) for overall visualization
- Green area (when positive) = Overall buying pressure trend
- Red area (when negative) = Overall selling pressure trend
- Helps identify the dominant market sentiment
3. ZERO LINE
- Horizontal line at zero
- Helps visualize when buying/selling pressure crosses the neutral point
ALERTS 🔔
--------
When enabled, the strategy sends alerts when a trade is opened. The alert
message includes:
- Direction: "Buy" for LONG positions or "Sell" for SHORT positions
- Entry Price: The price at which the position was opened
- TP (Take Profit): The target profit price
- SL (Stop Loss): The stop loss price
Example alert message:
"Buy | Entry: 1.2050 | TP: 1.2250 | SL: 1.1950"
Alerts can be configured in TradingView to send notifications via email,
SMS, webhooks, or other platforms.
RECOMMENDED SETTINGS 🎯
-----------------------
To get started, you can use these settings:
STRATEGY PARAMETERS:
- MA Length: 10 (default)
- EMA Length: 20 (default)
- Volume Lookback Period: 20 (default)
- Percentile Threshold: 80% (default)
POSITION SIZING:
- Position Size Mode: "Risk Value" (for risk management)
- Fixed Risk in $: Adjust based on your account size (e.g., 1-2% of account)
- OR use "Lots Size" with 0.01 lots for small accounts
TAKE PROFIT & STOP LOSS:
- TP Mode: "%" (recommended for most instruments)
- SL Mode: "%" (recommended for most instruments)
- Take Profit (%): 2.0% (adjust based on your risk/reward preference)
- Stop Loss (%): 1.0% (adjust based on your risk tolerance)
For Forex:
- Consider using "Pips" mode for TP/SL
- Typical values: 20-50 pips TP, 10-30 pips SL
For Stocks/Indices:
- Use "%" mode for TP/SL
- Typical values: 2-5% TP, 1-2% SL
PRACTICAL EXAMPLE 📝
-------------------
Scenario: LONG Entry on EUR/USD
1. Market conditions:
- Price: 1.1000
- Volume Delta becomes strongly positive
- Volume Delta exceeds 80th percentile of recent seller volumes
2. Strategy calculates:
- Entry Price: 1.1000 (current close)
- Position Size Mode: "Risk Value"
- Fixed Risk: $50
- Stop Loss Mode: "%"
- Stop Loss: 1.0%
- Position Size = $50 / (1.1000 × 0.01) = 4.55 lots
3. Strategy opens position:
- Direction: LONG (Buy)
- Entry: 1.1000
- Take Profit: 1.1220 (2% above entry)
- Stop Loss: 1.0890 (1% below entry)
- Alert sent: "Buy | Entry: 1.1000 | TP: 1.1220 | SL: 1.0890"
4. Outcome scenarios:
- If price rises to 1.1220 → Take Profit hit (profit)
- If price falls to 1.0890 → Stop Loss hit (loss limited to $50)
IMPORTANT NOTE ⚠️
-----------------
This strategy is a technical analysis tool based on volume delta analysis.
Like all trading strategies, it does NOT guarantee profits. Trading involves
significant risks and you can lose money, including your entire investment.
Past performance does not guarantee future results.
Always:
- Use appropriate risk management
- Never risk more than you can afford to lose
- Test the strategy on historical data (backtesting) before using real money
- Start with small position sizes or paper trading
- Understand that no strategy works 100% of the time
- Consider market conditions, news events, and other factors
- Keep a trading journal to learn and improve
The author and contributors are NOT responsible for any losses incurred from
using this strategy. Trading decisions are your own responsibility. Profits
are NOT guaranteed, and losses are possible.
LICENSE 📄
---------
This code is open source and available for modification. You are free to use,
modify, and distribute this strategy. If you republish or share a modified
version, please kindly mention the original author.
================================================================================

12M Cumulative Volume Delta12M of CVD Data for those who need to detect major Divergences or whatever is in your needs

Smart Impulse PRO v1.0Smart Impulse PRO (Invite‑Only) — Comprehensive Guide for TradingView
***
## English Version
Smart Impulse PRO (Invite‑Only) — Comprehensive Guide for TradingView
Strategy Concept & Uniqueness
Smart Impulse PRO is a trend‑following impulse continuation strategy built specifically for volatile crypto pairs . It uses a custom price×volume impulse signal normalized with Z‑score , then filters these impulses through multi‑timeframe trend conditions and a layered guard system that blocks structurally weak trades (flat, overextension, exhaustion).
Backtest Summary (Crypto Pairs)
Smart Impulse PRO was backtested on several volatile crypto perpetual pairs (including ETHUSDT, BTCUSDT and other majors/alts) on 1h charts in the period 01 Jan 2023 – 26 Dec 2025. On this sample, typical results were:
- Total trades per pair : ≈100–130
- Win rate range : ≈ 90–94%
- Profit factor range : ≈ 3.0–3.9
These values are historical backtest metrics on specific symbols and settings and do not guarantee similar performance in the future .
Why It’s Special
✅ Custom price×volume impulse model (Z‑score‑based) : Measures how unusual each bar’s move is in its recent context, not just simple MA/RSI crossovers
✅ 15+ Exhaustion & Structure Guards : Automatically block bad contexts (flat, low vol, overextended candles, climax volume)
✅ Dynamic TP Grid : Take‑profit levels adapt to current impulse strength |Z|
✅ Visual Transparency : Bubbles show exactly why signals were blocked
✅ Invite‑Only Logic : The concrete impulse model and guard interactions are proprietary and therefore published as invite‑only with protected source, as allowed by TradingView’s script rules.
***
### 1. What the Script Does (User View)
Smart Impulse PRO acts as an automated decision engine for volatile crypto pairs (e.g., ETHUSDT, BTCUSDT) on intraday and swing timeframes (15m–4h). It:
- Generates Long/Short entries only when both trend and impulse conditions align.
- Manages exits with a multi‑level TP grid, breakeven logic, optional trailing stop and time‑based exit.
- Visually shows both taken trades and blocked signals , including a short text reason for rejection.
This lets users trade crypto trends with a clear explanation of when and why the strategy chooses to act or stay out.
***
Entry Rules
Long (Buy):
Price is above EMA200 (long‑term trend is up)
Z‑score impulse > Z_threshold (e.g., 1.5)
Volume above recent average
ADX > Min ADX (e.g., 25)
ATR regime OK (ATR > ATR_floor and not in volatility squeeze)
All active guards pass (no overextended candle, no extreme wick against direction, no climax volume lock, no distance violation vs EMA200/VWAP, no Z‑streak lock)
Short (Sell):
Price is below EMA200 (long‑term trend is down)
Z‑score impulse > Z_threshold
Volume above recent average
ADX > Min ADX
ATR regime OK
All active guards pass (same checks, mirrored for shorts)
Logic:
The script first checks that the market is trending (EMA200 side + ADX + volatility filters), then validates that the current bar is a statistically strong price×volume impulse, and finally makes sure the bar is not an exhaustion spike or overextended move according to the guard system. Only if all three layers agree, a trade is opened.
Exit Rules
Stop‑Loss:
Initial stop‑loss is placed at a user‑defined distance (percent or ATR‑based), and position size is calculated so that a full stop equals Max Risk per Trade (%).
Take‑Profit grid:
Up to 10 TP levels.
Step type: Percent, ATR% or Hybrid.
Optional “Breathing grid”: TP distances are increased in proportion to |Z‑score| at entry (capped), so stronger impulses receive wider, more ambitious targets.
TP Profile (Equal / Aggressive / Balanced / Defensive) decides how much size is closed at each level.
Breakeven and Trailing:
Optional breakeven: after TP1 is hit, stop can be moved to entry price plus a small offset.
Optional ATR‑based trailing stop activates only after TP3 to avoid being shaken out too early by noise.
Time‑based Exit:
If enabled, any open trade that does not hit TP or SL within the chosen time limit (bars or minutes) is closed at market, to avoid very long, stagnant positions.
### 2. How the Script Works (Internals)
2.1 Impulse Engine (Custom Z‑Score Model)
At the core is a price×volume impulse series with Z‑score normalisation:
- Raw impulse:
`delta_impulse = (close - close ) * volume`
- Normalisation over N bars (default N = 20):
`zscore = (delta_impulse - avg(delta_impulse, N)) / stdev(delta_impulse, N)`
A bar becomes an impulse candidate only when:
- `abs(zscore) > Z_threshold` (default 1.5), and
- volume is above its recent average.
This is a custom implementation of a price×volume impulse model based on Z‑score; the exact combination of inputs, window, thresholds and how this signal feeds guards and exits is part of the proprietary logic.
2.2 Trend & Volatility Context — Why the Mashup Exists
The strategy combines several classic tools, but each covers a specific failure mode. The mashup is intentional:
| Component | What it checks | Why it is needed |
|----------|----------------|------------------|
| EMA200 | Long‑term bias (price above/below) | Prevents counter‑trend trading |
| EMA200 slope | Steepness of EMA over K bars | Filters flat/ranging phases even above/below EMA |
| VWAP | Distance of price from volume‑weighted fair value | Avoids entering when price is far from value (overextension) |
| ADX | Trend strength | Disables signals in low‑trend, choppy markets |
| ATR vs AvgATR50 | Current volatility vs recent average | Detects volatility squeezes and abnormally calm regimes |
| ATR% floor (Anti‑Flat Gate) | ATR as % of price | Hard “no‑trade” mode in ultra‑tight ranges |
An impulse alone is not sufficient in crypto; only impulses inside a suitable trend and volatility context are allowed to become trades.
2.3 Guard System (Exhaustion & Overextension)
Above trend filters, Smart Impulse PRO adds a guard layer designed from typical crypto problems (late entries, news spikes, “buying the top”):
- Max body / ATR : Rejects abnormally large real bodies (e.g., body > 3× ATR), often at the end of a move.
- Max range / ATR : Blocks extremely long high‑low bars.
- Upper/lower wick filters :
- Longs blocked when upper wick dominates (rejection from above).
- Shorts blocked when lower wick dominates (rejection from below).
- Z‑streak guard : After several consecutive impulse bars in the same direction, new entries in that direction are disabled to avoid chasing.
- Climax volume + cool‑off : When volume spikes above a multiple of its recent average, new trades are paused for N bars.
- Distance guards : Excessive distance (in ATR multiples) from EMA200 and VWAP can block trades.
These checks interact with the impulse model so that the final decision reflects a coherent risk framework rather than a loose collection of filters.
2.4 Dynamic TP Grid (Exit Logic)
- Up to 10 TP levels; step type: Percent, ATR% or Hybrid.
- With Breathing grid , TP spacing is increased by a factor of `k * abs(zscore)` (capped) at entry.
- Stronger impulses (higher |z|) → wider distances between TP levels; weaker impulses → tighter TP spacing.
- TP profiles (Equal / Aggressive / Balanced / Defensive) control how much position size is allocated to early vs late targets.
- Optional breakeven: move SL to entry (plus offset) after TP1.
- Optional trailing: ATR‑based trailing stop activates after TP3.
This links entry strength and exit geometry using the same impulse signal.
***
### 3. How to Use the Script (Practical Guide)
3.1 Quick Start
1. Add Smart Impulse PRO to a volatile crypto pair (e.g., ETHUSDT, BTCUSDT) on 15m–4h.
2. Keep the default preset and observe executed trades and blocked bubbles.
3. Use the dashboard to see which filters are active and which ones are blocking most trades (e.g., ADX, Flat, Exhaust).
4. If there are too few trades, gradually lower Z_threshold or Min ADX , or slightly relax guard limits — change one parameter at a time .
5. Set Max Risk per Trade (%) , stop distance, TP count/profile and optional trailing in line with your risk tolerance.
3.2 Example Profiles
- Aggressive intraday (15m)
- Z‑threshold 1.2
- Min ADX 20
- ATR% floor 0.2%
- Some exhaustion guards disabled (e.g., less strict wick limits).
- Conservative swing (1h–4h)
- Z‑threshold 1.5
- Min ADX 25–30
- ATR% floor 0.3–0.4%
- All guards enabled, higher‑timeframe filters ON.
3.3 Risk Management & Position Sizing
- Max Risk per Trade (%) — percentage of equity at risk if the full stop‑loss is hit.
- Position size is computed automatically from Max Risk %, stop distance and instrument price.
- Breakeven and trailing can be enabled to reduce open risk after partial profit is taken.
- Time‑based exit closes trades that stay open beyond a user‑defined duration without reaching TP or SL.
3.4 Alerts
Alerts use `strategy.order.alert_message` to send JSON containing side (long/short), entry, stop and TP levels. This allows users to connect the strategy with external bots or dashboards without exposing internal code.
***
### 4. Why This Script Is Invite‑Only (Originality Justification)
TradingView asks invite‑only scripts to explain why their logic is original and why source protection is justified. Smart Impulse PRO does that by:
- Implementing a custom price×volume impulse model based on Z‑score normalisation and integrating it with exits through the breathing TP grid.
- Using a coordinated guard framework that explicitly targets typical crypto issues (late chase entries, overextension vs VWAP/EMA200, volatility squeezes, volume spikes).
- Providing a structured indicator mashup where EMA200, VWAP, ADX, ATR and Anti‑Flat Gate each address different dimensions (trend, volatility, structure) and are designed to work together as a context gate for the impulse signal.
On ETHUSDT, BTCUSDT and a group of other volatile crypto pairs, Smart Impulse PRO showed approximately 90–94% win rate and profit factor above 3.0 in 2023–2025 backtests under default risk and filter settings. These numbers are illustrative only and do not promise or guarantee similar live results.
Risk Disclaimer
Trading cryptocurrencies involves substantial risk. Backtests are hypothetical and assume perfect execution without additional slippage, liquidity constraints or exchange issues. Always test the strategy on your own symbols and timeframes and keep risk per trade at a level you are comfortable with.
FAQ
Q: Does the strategy guarantee profit?
A: No. It is a rule‑based decision engine; all results depend on market conditions, parameters and execution, and backtests do not guarantee future performance.
Q: Can I use it on any crypto pair?
A: The logic is designed for volatile crypto pairs. It has been backtested on ETHUSDT, BTCUSDT and several other majors/alts, but each symbol should be tested and, if needed, re‑tuned by the user.
Q: Which timeframe is best?
A: The engine is intended for intraday and swing charts between 15m and 4h. Lower timeframes will generally produce more signals and more noise; higher ones will produce fewer, slower signals.
Q: Can I disable some filters or guards?
A: Yes. Trend filters, the Anti‑Flat Gate and most exhaustion guards can be turned on or off. It is recommended to change one setting at a time and monitor how it affects blocked signals and the equity curve.
Q: How are alerts meant to be used?
A: Alerts send a JSON payload with side, entry, stop and TP levels via strategy.order.alert_message, so users can connect the strategy to external bots or dashboards if they wish.
***
## Русская версия
Smart Impulse PRO (по приглашению) — Полное руководство для TradingView
Концепция и уникальность
Smart Impulse PRO — стратегия продолжения импульсов, разработанная под волатильные криптовалютные пары . В ней используется пользовательская модель импульса “цена×объём”, нормализованная через Z‑score , после чего такие импульсы проходят фильтрацию по тренду на разных таймфреймах и через каскад гардов, блокирующих слабые и рискованные сетапы (флэт, перетянутость, истощение).
Сводка тестов (крипто‑пары)
Стратегия тестировалась на нескольких волатильных крипто‑парах (перпетуальные контракты, включая ETHUSDT, BTCUSDT и ряд других мейджоров/альтов) на часовом таймфрейме за период 01.01.2023 – 26.12.2025. Типичные значения по этим тестам:
- Количество сделок на пару : ≈100–130
- Диапазон винрейта : ≈ 90–94%
- Диапазон фактора прибыли : ≈ 3.0–3.9
Это результаты тестов на истории по конкретным инструментам и настройкам и не гарантируют такой же доходности в будущем .
Почему она оригинальная
✅ Пользовательская модель импульса цена×объём (Z‑score) : измеряет “редкость” бара в его статистическом окружении, а не просто пересечение стандартных индикаторов
✅ 15+ гардов : системно защищают от догоняния, пампов, торговли в “пиле” и на перетянутых уровнях
✅ “Дышащая” TP‑сетка : цели автоматически подстраиваются под силу текущего импульса |Z|
✅ Прозрачность : пузырьки показывают причины каждого отказа от сделки
✅ Формат по приглашению : логика импульса и взаимодействие гардов публикуются как закрытый скрипт с Invite‑Only доступом, что соответствует правилам TradingView.
***
### 1. Что делает скрипт (для пользователя)
Smart Impulse PRO выступает как движок принятия решений для торговли волатильными крипто‑парами (ETHUSDT, BTCUSDT и др.) на таймфреймах от 15 минут до 4 часов:
- Открывает лонги/шорты только при одновременном совпадении трендовых и импульсных условий.
- Управляет выходом через многоуровневую сетку TP, безубыток, по желанию — трейлинг‑стоп и тайм‑стоп.
- Отображает как реальные сделки , так и отклонённые сигналы с короткой подписью причины блокировки.
Задача — структурировать трендовую торговлю криптой и сделать логику решений максимально понятной.
***
### 2. Как работает скрипт (внутренняя логика)
2.1 Импульсное ядро (кастомная модель на Z‑score)
В основе лежит ряд дельта×объём :
- Сырой импульс:
`delta_impulse = (close - close ) * volume`
- Нормализация по окну N баров (по умолчанию 20):
`zscore = (delta_impulse - среднее(delta_impulse, N)) / стд(delta_impulse, N)`
Бар считается кандидатом на импульс , только если:
- `abs(zscore) > Z_threshold` (по умолчанию 1.5);
- объём выше своей недавней средней.
Это собственная реализация импульсного сигнала цена×объём , нормализованного по Z‑score; выбор входных данных, окна, порогов и связка с гардами и выходами формируют проприетарную часть стратегии.
2.2 Зачем нужен “мэшап” индикаторов (тренд и волатильность)
Комбинация EMA200, VWAP, ADX, ATR и Anti‑Flat Gate собрана так, чтобы каждый компонент покрывал отдельный вид риска:
| Компонент | Что проверяет | Зачем нужен |
|----------|---------------|------------|
| EMA200 | Долгосрочный уклон (цена выше/ниже) | Защита от контртрендовых входов |
| Наклон EMA200 | Наклон за K баров | Отсекает участки со слабым трендом (флэт) |
| VWAP | Удалённость цены от “центра объёма” | Не даёт входить в явной перетянутости от справедливой цены |
| ADX | Силу тренда | Запрещает торговлю в пиле и боковике |
| ATR vs AvgATR50 | Текущую волатильность к средней | Находит режимы сжатия и аномально низкой волатильности |
| ATR% пол (Anti‑Flat Gate) | ATR в % от цены | Жёсткий запрет торговли в очень узком диапазоне |
Импульс может быть сильным, но без нормального тренда и адекватной волатильности сделка не допускается.
2.3 Система гардов (истощение, перетянутость)
- Макс тело/ATR : слишком большая свеча относительно ATR трактуется как возможное окончание движения.
- Макс диапазон/ATR : блокирует экстремальные по размеру бары.
- Фильтры по хвостам :
- Лонги блокируются при доминирующем верхнем хвосте (отторжение сверху).
- Шорты — при доминирующем нижнем хвосте.
- Z‑streak : после серии импульсных баров в одну сторону новые входы по этому направлению отключаются.
- Climax‑объём + пауза : при объёме выше кратности к средней входы на несколько баров ставятся на паузу.
- Дистанционные гарды : чрезмерное удаление цены от EMA200 и VWAP в ATR‑мультипликаторах может блокировать вход.
Эти условия работают совместно с импульсным ядром и трендовыми фильтрами, формируя связанную модель риска.
2.4 Динамическая TP‑сетка
- До 10 тейк‑профитов; шаг — в %, ATR% или гибридный.
- При включённой опции “Breathing grid” шаг между TP увеличивается пропорционально `|zscore|` (в пределах лимита).
- Сильные импульсы → более широкая сетка и шанс забрать длинное движение, слабые → более плотная сетка.
- Профили TP (равный / агрессивный / сбалансированный / защитный) задают распределение объёма между ближними и дальними целями.
- Можно включить перевод стопа в безубыток после TP1 и трейлинг‑стоп по ATR после TP3.
***
### 3. Как использовать стратегию (практика)
3.1 Быстрый старт
1. Откройте график волатильной крипто‑пары (ETHUSDT, BTCUSDT и т.п.) на ТФ 15m–4h и добавьте стратегию.
2. Оставьте настройки по умолчанию и наблюдайте маркеры сделок и пузырьки отклонённых сигналов.
3. Через дашборд смотрите, какие фильтры чаще всего блокируют сделки (ADX, Flat, Exhaust и др.).
4. Если сделок мало, по шагу снижайте порог Z‑score или ADX либо ослабляйте некоторые гарды — всегда меняйте только один параметр за раз.
5. Настройте Max Risk per Trade , размер стопа, количество и профиль TP, а также при необходимости безубыток и трейлинг‑стоп.
3.2 Типовые профили
- Агрессивный скальпинг (15m)
- Z‑порог 1.2
- ADX min 20
- ATR% пол 0.2%
- Несколько гардов истощения отключены.
- Консервативный свинг (1h–4h)
- Z‑порог 1.5
- ADX min 25–30
- ATR% пол 0.3–0.4%
- Все гарды включены, HTF‑фильтры активны.
3.3 Риск и размер позиции
- Max Risk per Trade (%) задаёт долю капитала, которую допускается потерять при полном срабатывании стоп‑лосса.
- Стратегия рассчитывает размер позиции из риска, стопа и цены инструмента.
- Можно включить перевод стопа в безубыток после TP1 и трейлинг‑стоп после TP3.
- Тайм‑стоп закрывает сделки, которые слишком долго остаются открытыми без достижения TP/SL.
3.4 Алерты
Алерты формируют JSON‑строку с направлением, ценой входа, стопом и всеми TP‑уровнями через `strategy.order.alert_message`. Это позволяет подключать внешние боты и панели без раскрытия кода.
***
### 4. Почему скрипт по приглашению (обоснование оригинальности)
Стратегия не сводится к “набору индикаторов на графике”. Формат Invite‑Only обоснован тем, что в коде реализованы:
- Пользовательская модель импульса цена×объём на базе Z‑score и использование этого же сигнала для адаптивной TP‑геометрии.
- Связанный набор гардов , построенный вокруг реальных проблем крипто‑торговли (поздние входы после пампов, перетянутость от VWAP/EMA200, режимы сжатия, всплески объёма).
- Логика мэшапа : EMA200, VWAP, ADX, ATR и Anti‑Flat Gate работают согласованно как фильтр контекста для импульса, а не как независимые визуальные индикаторы.
На ETHUSDT, BTCUSDT и ряде других крипто‑пар Smart Impulse PRO показывала ≈90–94% винрейт и фактор прибыли выше 3.0 в тестах 2023–2025 годов при стандартных настройках фильтров и риска. Эти значения служат иллюстрацией поведения стратегии в прошлом и не являются обещанием аналогичных результатов в реальной торговле.
Предупреждение о рисках
Торговля криптовалютами связана с повышенным риском. Результаты бэктестов гипотетичны и предполагают идеальное исполнение без дополнительного проскальзывания и проблем с ликвидностью. Перед использованием стратегии на реальном счёте протестируйте её на своих инструментах и выбирайте риск на сделку в соответствии с личной толерантностью к убыткам.
FAQ
В: Гарантирует ли стратегия прибыль?
О: Нет. Это набор правил для принятия решений; результат зависит от рынка, настроек и исполнения. Любые бэктесты не гарантируют такую же доходность в будущем.
В: Можно ли использовать её на любой крипто‑паре?
О: Логика рассчитана на волатильные криптовалютные пары. Стратегия тестировалась на ETHUSDT, BTCUSDT и нескольких других мейджорах/альтах, но для каждого инструмента параметры желательно проверить и при необходимости подстроить.
В: Какой таймфрейм предпочтителен?
О: Стратегия рассчитана на внутридневную и свинговую торговлю в диапазоне 15m–4h. На младших ТФ сигналов больше и шума выше; на старших — сигналов меньше, но они формируются медленнее.
В: Можно ли отключать отдельные фильтры и гарды?
О: Можно. Трендовые фильтры, Anti‑Flat Gate и большинство гардов истощения включаются и выключаются отдельно. Рекомендуется менять настройки по одной и смотреть, как это влияет на заблокированные сигналы и кривую капитала.
В: Для чего нужны алерты?
О: Алерты отправляют JSON‑сообщение с направлением, ценой входа, стопом и уровнями TP через strategy.order.alert_message, что позволяет при желании подключать внешних ботов и панели управления риском.

Delta Volume Bubble [Quant Z-Score] by tncylyvDelta/Volume Bubble by tncylyv
This indicator is a quantitative order flow tool designed to visualize statistically significant volume and delta anomalies directly on the price chart. By moving away from raw, noisy volume numbers and utilizing Z-Score (Standard Score) statistics, this tool adapts to changing market volatility to highlight areas of heavy institutional interest or exhaustion.
It combines statistical analysis with Price Action concepts (Effort vs. Result) to detect "Absorption"—market conditions where high volume occurs with very little price movement.
1. Core Concepts & Methodology
A. Adaptive Z-Score (The "Quant" Logic)
Raw volume data is often difficult to interpret because volume fluctuates wildly between sessions (e.g., the Asian session typically has lower volume than the New York Open).
Instead of using a fixed volume threshold (e.g., "Alert me if volume > 1000"), this script calculates the Z-Score.
It measures how many Standard Deviations (
σ
) the current volume is from the historical average.
Significance: A Z-Score of +2.0 or higher puts the current candle in the top 5% of statistical occurrences, filtering out noise and highlighting true anomalies.
B. Absorption Detection (Effort vs. Result)
This feature identifies "Trapped Traders."
The Logic: If the Z-Score indicates extremely high volume (High Effort), but the price candle has a very small body (Low Result), it implies that aggressive market orders are being absorbed by passive limit orders.
Visual: These specific anomalies can be highlighted with a unique halo effect, signaling a potential reversal or stop-hunt area.
C. Intra-Bar True VWAP (Smart Placement)
Standard indicators usually plot symbols at the High, Low, or Close of a candle.
This script utilizes request.security_lower_tf to analyze the Lower Timeframe (LTF) structure of the specific bar.
It calculates the exact Volume Weighted Average Price (VWAP) of that single candle.
Benefit: The bubble is drawn exactly where the heaviest volume occurred inside the candle, providing a more accurate level for future Support/Resistance tests.
2. Key Features
Dual Data Modes: Switch seamlessly between Volume Delta (Buying vs. Selling pressure) or standard Total Volume.
Dynamic Sizing: Bubble sizes (Small, Medium, Large) scale automatically based on the intensity of the Z-Score.
Absorption Logic: Automatically flags candles where volume is high but price progression is stalled.
Adaptive Visuals: Colors and opacity can fade dynamically based on the strength of the signal, or remain solid based on user preference.
Alert System: Fully configurable alerts for Z-Score breakouts and Absorption detection.
3. How to Use
This tool is best used to identify Reversals and Breakout Validation.
Trend Exhaustion (Climax):
If price is trending up and a large "Bullish" bubble appears at the highs with a long upper wick or small body (Absorption), it may indicate buying exhaustion and passive selling.
Breakout Confirmation:
If price breaks a key support/resistance level accompanied by a Large Bubble (High Z-Score), it confirms institutional backing for the move.
Support/Resistance Defense:
The "True VWAP" location of the bubble often acts as a re-test level. If price retraces to the center of a previous large bubble, observe for a reaction.
4. Settings Guide
Data Settings
Calculation Source: Choose between Volume Delta (Up/Down tick analysis) or Regular Volume.
Lower TF Granularity: The timeframe used to calculate the specific "True VWAP" location inside the bar (e.g., 1S or 1M).
Statistical Lookback: The number of bars used to calculate the baseline Average and Standard Deviation (Default: 60).
Quant Logic
Calculation Mode:
Adaptive (Z-Score): Triggers based on relative statistical anomalies (Recommended).
Fixed: Triggers based on raw volume numbers.
Z-Score Threshold: The sensitivity level. 2.0 is standard; higher values (e.g., 3.0) will show fewer, more extreme signals.
Absorption Logic
Detect Absorption: Enables the calculation for small-bodied high-volume candles.
Absorption Ratio: Defines how "small" the body must be relative to the average to qualify as absorption (0.1 to 1.0).
Visuals
Theme: Switch between Dark (Mint/Coral) and Light (Royal/Sunset) themes.
Scale Size: If enabled, bubbles grow larger as the Z-Score increases.
Glow Effect: Adds a neon glow for better visibility on dark backgrounds.
________________________________________
Risk Disclaimer:
This indicator is for informational and educational purposes only. Volume and Delta analysis are subjective interpretation methods. Past performance, or statistical anomalies shown by this script, do not guarantee future results. Always manage your risk appropriately.

Rolling Cumulative Volume Delta (N bars)Rolling CVD, not anchored to a date and reset after anchor+period reached

Cumulative Volume Delta [Pro] v1.0Volume Delta is the X-Ray machine for a candle.While a standard volume bar tells you how much activity happened, it keeps the participants anonymous.
It doesn't tell you if the buyers were in control or if the sellers were dumping.Volume Delta peels back the skin of the candle to reveal the Aggressive Intent.
1The Mechanics (How it Works)Every trade requires a Buyer and a Seller. However, for price to move, one side must be Aggressive (using Market Orders) and the other side must be Passive (using Limit Orders).Ask Volume (Buying):
Traders hitting the "Buy" button at market price. They are impatient and demand liquidity.Bid Volume (Selling): Traders hitting the "Sell" button at market price. They are dumping inventory.
How to Read It (The Cantillon Lens)1. Positive Delta (+)What it means: Aggressive buyers overwhelmed sellers.
2The Narrative: "First Receivers" or eager retail traders are lifting the offer. Demand is real.2. Negative Delta (-)
What it means: Aggressive sellers overwhelmed buyers.
The Narrative: Someone is offloading inventory or shorting aggressively. Supply is dominant.
3. The Anomaly (The "Trap")
This is the most powerful signal.Example: Price makes a massive Green Candle (Price UP), but the Delta is Negative.Translation: This is a "Limit Order Absoption." Retail traders are aggressively buying (Market Buys), but a massive Institutional Seller is sitting there with a Limit Sell wall absorbing all of it.Result: The move is fake.
Price is about to reverse.Why It Matters In the Cantillon Terminal, we use Delta to distinguish between a Trend and a Trap.
Trend: Price is moving UP, and Delta is consistently Positive (Aggression matches Price).
Trap: Price is moving UP, but Delta is Flat or Negative (Price is floating up on thin air, waiting to be swatted down).

Big Notional Volume Bubbles (Lower-TF Order Flow Approximation)Big Notional Volume Bubbles (Lower-TF Order Flow Approximation)
### Overview
This indicator visualizes large notional trading activity by scanning lower-timeframe candles inside each chart bar and highlighting periods where unusually high traded value (volume × price) occurs.
This script is intended to help short-term traders and scalpers identify bursts of aggressive activity, potential absorption zones, and areas of heightened participation, using standard OHLCV data.
Important: This indicator does not access true market order tape or DOM data. It is an approximation based on lower-timeframe OHLCV data provided by TradingView.
What the Indicator Shows
Each bubble represents a lower-timeframe candle where traded notional value exceeds a user-defined threshold.
Bubble size scales with the notional value of that candle.
Green bubbles indicate the lower-timeframe candle closed higher (buy-side pressure approximation).
Red bubbles indicate the lower-timeframe candle closed lower (sell-side pressure approximation).
Bubbles can be plotted at candle closes or wick extremes for contextual analysis.
How It Works
1. Lower-timeframe OHLCV data is requested using `request.security_lower_tf`.
2. Notional value is calculated as volume × price for each micro-candle.
3. The script selects the largest notional events per bar that exceed the minimum threshold.
4. These events are rendered as bubbles on the main price chart.
Intended Use Cases
Scalping and short-term trading
Momentum ignition and continuation analysis
Absorption and failed breakout detection
Effort versus result analysis
Confirmation at key structural levels
Recommended Settings
Lower timeframe: Start with 1 (1 minute). Seconds-based timeframes may not be supported on all feeds.
Minimum notional (USD/USDT):
BTC / ETH: 25,000 – 250,000
Mid-cap assets: 5,000 – 50,000
Adjust based on liquidity and volatility
Max bubbles per bar: 3–8 to avoid visual clutter
Limitations
This indicator does not display individual market orders or aggressor-side execution.
Buy/sell classification is inferred from candle direction, not bid/ask data.
Lower-timeframe data availability depends on the selected symbol and exchange feed.
This tool should not be used as a standalone signal generator.
Best Practices
Use in conjunction with market structure, VWAP, and key price levels.
Focus on price behavior after a bubble appears rather than the bubble itself.
Interpret bubbles as areas of interest, not directional guarantees.

CVD Divergence Background By HKOverview This indicator visualizes Delta Divergences (also known as Absorption) directly on your main chart. It highlights candles where the price direction contradicts the underlying net volume flow (CVD). This is a powerful method to spot "traps," limit order absorption, and potential reversals.
How it Works The script calculates the Intrabar Volume Delta based on price action relative to the candle's range. It then compares this Delta with the candle's color (Open vs. Close).
Bearish Divergence (Absorption Top):
Scenario: The candle is GREEN (Price closed higher), but the Volume Delta is NEGATIVE (Net Selling).
Visual: Red Background.
Meaning: Sellers are aggressively absorbing the buying pressure via limit orders. Price struggled to rise despite the volume.
Bullish Divergence (Absorption Bottom):
Scenario: The candle is RED (Price closed lower), but the Volume Delta is POSITIVE (Net Buying).
Visual: Green Background.
Meaning: Buyers are aggressively absorbing the selling pressure via limit orders. Price struggled to fall despite the volume.
Features
Background Highlighting: Instantly spot divergences without checking a separate oscillator window.
Seamless Integration: Works perfectly behind your price candles and other indicators (like Big Trade detectors).
Customizable: You can adjust the colors and transparency to fit your chart theme.
Use Case Use this to identify exhausted moves. If you see a green candle with a red background at a resistance level, it suggests that buyers are running into a wall of sellers, increasing the probability of a reversal.

CVD & Big Trade Detector By HKOverview The CVD & Big Trade Detector By HK offers a unique perspective on Cumulative Volume Delta (CVD). This indicator utilizes Floating Bars (Candles) to visualize the cumulative buying and selling pressure. This design allows you to clearly see the net delta of each specific candle relative to the cumulative trend.
Additionally, it integrates the "Big Trade" algorithm to highlight statistically significant volume anomalies (Whale activity) directly on the CVD bars.
How it Works Since standard volume data does not always provide buy/sell splitting, this script estimates intrabar pressure using price action logic:
Buying Pressure: Calculated based on the push from the Low to the Close.
Selling Pressure: Calculated based on the push from the High to the Close.
The indicator then calculates the Delta (Buy Vol - Sell Vol) and accumulates it.
Floating Bars: Instead of plotting from the zero-line, each bar opens at the previous CVD value and closes at the new cumulative value.
Teal/Green Bar: Net buying in the current period (CVD increased).
Maroon/Red Bar: Net selling in the current period (CVD decreased).
Key Features
Floating CVD Structure: Prevents the "barcode effect" common in histogram CVDs. It provides a clean, candle-like view of momentum accumulation.
Whale Detection:
The script calculates the moving average and standard deviation (Sigma) of the buying/selling volume.
Green Dots: Appear when buying volume exceeds the statistical threshold (Signifying a "Big Buy").
Red Dots: Appear when selling volume exceeds the statistical threshold (Signifying a "Big Sell").
Precise Positioning: Whale markers are plotted exactly at the closing value of the CVD bar, showing you exactly where the volume spike impacted the delta.
How to Use
Divergences: Look for situations where Price makes a Higher High, but the CVD Bars fail to make a new high (bearish divergence).
Absorption: If you see a Large Whale Dot on a very small CVD bar (doji-like), it indicates massive volume fighting for direction with little net result—often a sign of absorption or a pending reversal.
Trend Confirmation: Strong floating bars in the direction of the trend, accompanied by Whale Dots, confirm smart money participation.
Settings
Lookback Period: Defines the baseline for the statistical volume calculation (default: 50).
Sensitivity (Sigma): Adjusts how strict the "Whale" detection is (default: 3.0). Higher values = fewer, more significant signals.
Colors: Fully customizable colors for Up/Down bars and Buy/Sell markers.
Built with Pine Script™ v6

Order Flow Pro - CVD - Alphaomega18═══════════════════════════════════════════════════════════════════════════════
ORDER FLOW CVD SIMPLE - TRADINGVIEW PUBLICATION
Created by Alphaomega18
═══════════════════════════════════════════════════════════════════════════════
📝 COMPLETE DESCRIPTION
═══════════════════════════════════════════════════════════════════════════════
🎯 FOLLOW INSTITUTIONAL TREND AT A GLANCE
Order Flow CVD is an ultra-simple and ultra-effective indicator that displays CVD (Cumulative Volume Delta) with a colored fill zone to instantly identify order flow trend.
No complexity, no clutter: just 2 lines and 1 colored zone to know if you should HOLD or EXIT your trade.
🔥 THE GOLDEN RULE OF TRADING
The secret of professional traders:
→ "Let your winners run, cut your losses"
But how do you know WHEN to hold and WHEN to exit?
**The answer: CVD (Cumulative Volume Delta)**
As long as institutional flow goes your way, HOLD the trade.
As soon as flow changes, EXIT.
This is exactly what this indicator does: it shows you the flow in real-time with ultra-clear visualization.
📊 HOW IT WORKS
🔷 **2 SIMPLE LINES**
**WHITE Line** = CVD (Cumulative Volume Delta)
→ Cumulative sum of volume delta
→ Rises when buying > selling
→ Falls when selling > buying
**YELLOW Line** = CVD Moving Average (20 periods default)
→ Smooths CVD to see trend
→ Filters noise
→ Reference for trend
🔷 **COLORED FILL ZONE**
🟢 **GREEN ZONE** = White CVD ABOVE yellow CVD
→ BULLISH trend
→ Institutions are BUYING
→ HOLD your LONG trades
→ Avoid SHORT
🔴 **RED ZONE** = White CVD BELOW yellow CVD
→ BEARISH trend
→ Institutions are SELLING
→ HOLD your SHORT trades
→ Avoid LONG
⚡ **CROSSOVER** = Zone changes color
→ Trend change
→ Exit or reverse position
→ Clear and sharp signal
🎯 USAGE RULES
📌 **RULE #1: HOLD A LONG TRADE**
You're in a LONG:
→ ✅ As long as ZONE IS GREEN → HOLD
→ ❌ As soon as ZONE TURNS RED → EXIT
Real example:
```
LONG entry: 16,500
Zone stays green for 2 hours
Price climbs to 16,650 (+150 points)
Zone turns red → EXIT
You pocket +150 points instead of giving back 50 points!
```
📌 **RULE #2: HOLD A SHORT TRADE**
You're in a SHORT:
→ ✅ As long as ZONE IS RED → HOLD
→ ❌ As soon as ZONE TURNS GREEN → EXIT
Real example:
```
SHORT entry: 16,500
Zone stays red for 1 hour
Price drops to 16,350 (-150 points)
Zone turns green → EXIT
You pocket +150 points!
```
📌 **RULE #3: DON'T ENTER COUNTER-TREND**
Green zone visible:
→ ❌ Do NOT enter SHORT
→ ✅ Look for LONG setups only
Red zone visible:
→ ❌ Do NOT enter LONG
→ ✅ Look for SHORT setups only
📌 **RULE #4: CROSSOVERS = CHANGE**
White CVD crosses yellow CVD:
→ Zone changes color
→ Institutional flow reverses
→ Exit or reverse position
💡 REAL USE CASES
📊 **CASE 1: MNQ Scalping 5min**
Setup:
→ Price breaks resistance
→ CVD zone is GREEN
→ You enter LONG
Management:
→ Price rises, pulls back, rises again
→ Zone STAYS GREEN → You hold
→ +30 points, +40 points, +50 points...
→ Zone turns RED → You exit at +52 points
Without CVD:
→ You would have exited at +15 points out of fear
→ You lose 37 points of gain!
📊 **CASE 2: ES Day Trading 15min**
Setup:
→ Price in range
→ CVD zone RED for 1 hour
→ Price touches top of range
→ You enter SHORT
Management:
→ Zone STAYS RED during decline
→ Price makes -20 points, -30 points, -40 points
→ Zone turns GREEN → You exit at +42 points
Without CVD:
→ You would have exited at +20 points (fear)
→ Or held too long and gave back gains
📊 **CASE 3: Avoid Losing Trade**
Perfect technical setup:
→ Triangle breakout
→ Supportive VWAP
→ FVG below
BUT... CVD zone is RED!
Decision:
→ You DON'T ENTER LONG
→ Price rises 10 points then collapses -30 points
→ Losing trade avoided thanks to CVD!
⚙️ CUSTOMIZABLE PARAMETERS
🔧 **CVD Moving Average Length** (default: 20)
→ Yellow moving average length
→ Shorter (10-15) = More reactive, more signals
→ Longer (30-50) = Smoother, fewer false signals
Recommendations by style:
• Scalping (1-5min): 10-15
• Day Trading (15min-1H): 20 (default)
• Swing Trading (4H-Daily): 30-50
🎨 **Show Fill Between CVD and MA** (On/Off)
→ Show/hide colored zone
→ OFF = Just 2 lines
→ ON = Lines + green/red zone
🎨 **Bullish Fill Color** (Customizable)
→ Bullish zone color
→ Default: Transparent green (80%)
→ Change to blue, cyan, or other
🎨 **Bearish Fill Color** (Customizable)
→ Bearish zone color
→ Default: Transparent red (80%)
→ Change to orange, pink, or other
💡 **Transparency Tip:**
→ 90% transparent = Very subtle
→ 80% transparent = Balanced (recommended)
→ 60% transparent = Well visible
→ 40% transparent = Very visible
📊 RECOMMENDED CONFIGURATIONS
**Scalping (1-5min) - Reactive**
```
CVD MA Length: 10
Show Fill: ✅ ON
Bullish Color: Green 70% transparent
Bearish Color: Red 70% transparent
```
**Day Trading (15min-1H) - Balanced** ⭐
```
CVD MA Length: 20
Show Fill: ✅ ON
Bullish Color: Green 80% transparent
Bearish Color: Red 80% transparent
```
**Swing Trading (4H-Daily) - Smooth**
```
CVD MA Length: 30
Show Fill: ✅ ON
Bullish Color: Green 85% transparent
Bearish Color: Red 85% transparent
```
**Minimalist - Lines only**
```
CVD MA Length: 20
Show Fill: ❌ OFF
(Just white and yellow, no zone)
```
💡 MARKETS AND TIMEFRAMES
✅ **ALL markets compatible:**
• Futures (ES, NQ, YM, RTY, MNQ, MES, etc.)
• Forex (EUR/USD, GBP/USD, USD/JPY, etc.)
• Crypto (BTC, ETH, altcoins)
• Stocks (Tesla, Apple, Nvidia, etc.)
• Indices (S&P 500, Nasdaq, Dow Jones)
✅ **All timeframes:**
• Scalping: 1min, 5min
• Day Trading: 15min, 30min, 1H ⭐ (optimal!)
• Swing Trading: 4H, Daily
Note: More reliable with real volume data
→ TradingView Premium recommended
🏆 UNIQUE ADVANTAGES
✅ **Ultimate simplicity**: 2 lines, 1 zone, 1 rule
✅ **Instant vision**: Green = hold LONG, Red = hold SHORT
✅ **Hold trades longer**: Maximize your gains
✅ **Avoid counter-trend**: Don't trade against flow
✅ **Customizable**: Colors and transparency of choice
✅ **Ultra-light**: Optimized code, no lag
✅ **No repaint**: Reliable signals
✅ **Works everywhere**: All markets, all TF
🎓 QUICK INTERPRETATION
**When zone is GREEN:**
→ Institutions buying
→ Bullish momentum
→ Hold LONG, avoid SHORT
→ Look for buy setups
**When zone is RED:**
→ Institutions selling
→ Bearish momentum
→ Hold SHORT, avoid LONG
→ Look for sell setups
**When zone CHANGES color:**
→ Institutional flow reverses
→ Trend changes
→ EXIT position
→ Or reverse if new setup
**White line volatile:**
→ White CVD zigzags a lot
→ Market indecisive or range
→ Wait for clear zone before trade
💪 TRADER PSYCHOLOGY
What THIS indicator solves:
❌ "I'm afraid, I exit too early" → Green/red zone says WHEN to exit
❌ "I hold my losses too long" → Zone changes = EXIT
❌ "I trade counter-trend" → Zone tells which direction to trade
❌ "I don't know if trend continues" → Green/red zone = answer
Result:
✅ You hold your gains longer
✅ You exit at right time
✅ You avoid counter-trend trades
✅ You trade with institutions
🔗 PERFECT COMPLEMENT
Use with:
• **Order Flow Signals** → Precise signals (💎▲🚀)
• **VWAP** → Institutional price levels
• **Fair Value Gaps** → Inefficiency zones
• **Market Profile** → POC/VPOC
**CVD Simple** tells you WHEN to hold/exit
**Technical analysis** tells you WHERE to enter
⚠️ DISCLAIMER
Technical indicators are decision support tools. No indicator guarantees profits. Always use:
• Appropriate risk management
• Stop loss on every trade
• Proper position sizing
• Demo account testing first
Order Flow CVD improves your trade management but doesn't replace a complete strategy.
🚀 INSTALLATION
1. Copy the Pine Script code
2. Open Pine Editor in TradingView
3. Paste the code
4. Click "Add to Chart"
5. Indicator displays in separate pane (below)
6. Configure colors to your preferences
7. Apply golden rule: Green = LONG, Red = SHORT!
💡 PRO TIP
**CVD Discipline:**
Create this mental rule:
→ "I NEVER exit a position until zone changes color"
This simple discipline will:
✅ Multiply your gains (you hold longer)
✅ Reduce your losses (you exit when flow changes)
✅ Eliminate emotional exits
✅ Align you with institutions
📞 CONTACT AND SUPPORT
Created by Alphaomega18
For questions, bugs or suggestions:
Find my other indicators:
• Order Flow Signals (precise signals on chart)
• Order Flow Dashboard (CVD oscillator + pressures)
• VWAP Multi-Timeframe Pro
• Fair Value Gap Detector

Ultimate Institutional Order Flow Pro [Pointalgo]Ultimate Institutional Order Flow (UIOF Pro)
Ultimate Institutional Order Flow (UIOF Pro) is a multi-component market analysis indicator designed to study order flow behavior, liquidity interaction, volatility structure, and session-based participation.
It integrates several commonly used market structure and order-flow concepts into a single visual framework.
This script focuses on context and alignment, not on isolated signals.
Core Objective
The indicator aims to identify areas where price, volume, liquidity, and structure appear aligned in the same direction.
It does this by combining:
VWAP behavior
Volume participation
Cumulative delta analysis
Liquidity pool interaction
Order blocks and fair value gaps
Market structure shifts
Session and higher-timeframe confirmation
VWAP & Volatility Framework
Calculates VWAP using session, weekly, or monthly anchors.
Optional VWAP standard-deviation bands visualize price dispersion.
VWAP slope and price position are used to classify directional bias.
VWAP is treated as a dynamic equilibrium reference rather than a signal.
Cumulative Volume Delta (CVD)
Estimates buy and sell pressure based on intrabar price movement.
Tracks cumulative delta and a smoothed delta average.
Uses delta change normalization to highlight abnormal activity.
Detects potential delta divergences when price and participation differ.
CVD is used to assess whether participation supports or contradicts price movement.
Liquidity Zones & Sweeps
Identifies recent swing highs and lows as potential liquidity pools.
Tracks buy-side and sell-side liquidity areas.
Flags conditions where price sweeps liquidity beyond recent extremes.
Liquidity interaction is treated as context, not prediction.
Order Blocks
1. Detects potential bullish and bearish order blocks using:
Candle structure
Volatility thresholds
Volume confirmation
2.Highlights areas where strong participation followed opposing price movement.
Order blocks are visual reference zones and do not imply guaranteed reactions.
Fair Value Gaps (FVG)
Identifies imbalance zones where price moves without overlapping structure.
Filters gaps using ATR-based size conditions.
Visual shading is used to highlight imbalance areas.
These zones may represent inefficient price movement requiring further interaction.
Volume Profile & Point of Control (POC)
Builds a simplified volume profile over a configurable lookback window.
Determines the price level with the highest traded volume (POC).
POC is used as a reference for acceptance or rejection behavior.
Market Structure
Evaluates recent highs and lows to identify structure breaks.
Classifies directional structure as bullish, bearish, or neutral.
Structure is used as a directional filter rather than a trigger.
Multi-Timeframe Confirmation
Optional higher-timeframe confirmation aligns lower-timeframe behavior with broader context.
Prevents analysis from relying on isolated timeframe conditions.
Session Filtering
1. Allows analysis to be limited to specific trading sessions.
2. Helps reduce signals during low-participation periods.
3. Session logic affects signal eligibility, not calculations.
Signal Logic
Signals are generated only when multiple independent conditions align, including:
Liquidity interaction
Order block presence
VWAP bias
Delta confirmation
Structure alignment
Volume participation
Optional higher-timeframe confirmation
Active trading session
Strong continuation conditions are also highlighted when price, volume, and participation remain aligned.
Signals represent confluence states, not trade instructions.
Dashboard Summary
A real-time dashboard summarizes:
VWAP bias and slope
CVD strength and direction
Delta behavior
Market structure state
Higher-timeframe context
Volume conditions
Liquidity pool counts
Session activity
This provides a high-level snapshot of market conditions without manual calculation.
Alerts are available for:
Institutional alignment conditions
Strong continuation pressure
Liquidity sweeps
Delta divergences
Alerts are informational and reflect internal indicator states only.
Usage Notes
Designed for analytical interpretation and market study.
Best used alongside price action and risk management methods.
Performance depends on instrument liquidity and volume quality.
All visual elements can be individually enabled or disabled.
Disclaimer
This script is provided for educational and analytical purposes only.
It does not provide financial, investment, or trading advice.
All outputs should be independently verified before making trading decisions.

Delta Strength (True TV Delta)Description
Delta Strength measures the intensity of aggressive trading activity using TradingView’s native Volume Delta engine (ta.requestVolumeDelta).
Volume Delta shows which side is aggressive (buyers or sellers).
Delta Strength answers a different question:
How strong is that aggression compared to recent market behavior?
This indicator converts true per-bar volume delta into a relative strength ratio, helping identify institutional participation, initiative moves, absorption, and potential traps at key price locations.
No candle-based approximation is used. The calculation relies on TradingView’s internal bid-ask volume classification from lower timeframes.
How It Is Calculated
• Per-bar delta is derived from the difference between cumulative delta at bar close and bar open
• Absolute delta is averaged over a user-defined lookback period
• Current delta is compared against this average to produce a normalized strength value
This makes the indicator adaptive across instruments, volatility regimes, and sessions.
How to Read Delta Strength
• Values below the lower threshold indicate normal or low-quality activity
• Rising values show increasing professional participation
• Very high values indicate strong imbalance or aggressive initiative orders
• Extreme values without price follow-through often signal absorption or trapping
Delta Strength measures intensity only, not direction.
How to Use (Important)
Always combine Delta Strength with price location and structure.
Best locations include:
• VWAP and VWAP bands
• Previous Day High / Low
• Session highs and lows
• Range boundaries or value edges
Interpretation logic:
• Strong delta with price acceptance supports continuation
• Strong delta with price rejection suggests absorption or exhaustion
What This Indicator Is NOT
• Not a directional signal
• Not a standalone entry tool
• Not a trend indicator
Using Delta Strength without context can lead to false conclusions.
Intended Use
This indicator is designed for:
• Order Flow Analysis
• Market microstructure study
• Institutional activity confirmation
• Advanced discretionary trading workflows
It works best when combined with Volume Delta, VWAP, and structure-based analysis.
Summary
Delta shows who is aggressive.
Delta Strength shows how aggressive they are.
Price reaction shows whether that aggression is accepted or absorbed.
Used together, they provide insight into market intent rather than just price movement.

Consolidation Zones Volume Delta | Flux ChartsGENERAL OVERVIEW:
The Consolidation Zones Volume Delta | Flux Charts indicator is designed to identify and visualize consolidation zones on the chart. Rather than only outlining areas of sideways price movement, the indicator analyzes volume activity occurring inside each consolidation zone. This is done by aggregating lower-timeframe volume data into the higher-timeframe consolidation range, allowing users to see how buying and selling activity evolves while price remains in a range.
What is the theory behind the indicator?:
The indicator is built around three core analytical concepts that guide how consolidation zones are detected and evaluated.
1. Consolidation as a structural phase
Periods of consolidation are characterized by reduced directional movement and compressed price ranges. During these phases, price action often alternates within a defined high–low boundary, creating a structure that can be objectively measured and tracked over time.
2. Volume behavior inside consolidation
While price may appear balanced within a consolidation range, volume activity inside that range can vary. The indicator evaluates volume contributions occurring within the vertical boundaries of the consolidation zone by using lower-timeframe data and weighting each candle’s volume based on its overlap with the zone. This produces an internal volume delta profile that reflects how buying and selling volume accumulates throughout the consolidation.
Delta behavior inside a zone may show:
Persistent dominance of buying or selling volume
Alternating shifts between buyers and sellers
Periods of relatively balanced participation
3. Markets consolidate in multiple ways, one detection method is not enough
Markets do not consolidate in a single, uniform way. To account for this, the indicator includes three distinct consolidation detection methods. Each method is calculated objectively, does not repaint, and targets a different type of sideways or low-expansion price behavior:
Candle Compression
ADX Low Trend Strength
Visual Range Boundaries
CONSOLIDATION ZONES VOLUME DELTA FEATURES:
The Consolidation Zones Volume Delta indicator includes 4 main features:
Consolidation Zones
Volume Delta
Standard Deviation Bands
Alerts
CONSOLIDATION ZONES:
🔹What is a Consolidation Zone?
A consolidation zone is a defined price range where market movement becomes compressed and price remains contained within clear upper and lower boundaries for a sustained period of time. During this phase, price does not establish a strong directional trend and instead oscillates within a relatively narrow range.
🔹Consolidation Zone Detection
The indicator automatically detects consolidation zones using three independent, rule-based methods. Each method evaluates a different market condition and can be selected individually depending on how you want consolidation to be defined. Regardless of the method used, all zones are calculated objectively and finalized once confirmed.
◇ Candles (Candle Compression)
The Candles method identifies consolidation by detecting periods of candle compression and reduced range expansion. A candle is considered part of a consolidation sequence when:
The candle body is small relative to its total range
The candle’s high–low range is smaller than the short-term Average True Range (ATR)
ATR is calculated using a 4-period average true range and is used as a volatility reference. If consecutive candles continue to meet these compression conditions, the indicator increments an internal count.
Under the Consolidation Candles section in the settings, you’ll find two controls.
Min. Consolidation Candles setting
This defines how many consecutive compressed candles are required before a consolidation zone is confirmed. Candle compression is determined using candle structure and short-term ATR, ensuring that only periods of reduced range expansion are counted. Once the minimum threshold is reached, the indicator creates a consolidation zone using the highest high and lowest low formed during the compressed sequence.
Mark Consolidation Candles
When enabled, the indicator highlights candles that meet the compression criteria, making it easy to visually identify which candles contributed to the formation of the consolidation zone.
◇ ADX (Low Trend Strength)
The ADX method identifies consolidation based on weak or declining trend strength rather than candle structure. This method uses the Average Directional Index (ADX) to determine when directional movement is reduced.
ADX is calculated using directional movement values that are smoothed over time. When ADX remains below a user-defined threshold, price is treated as being in a low-trend market. While this condition persists, the indicator tracks the highest high and lowest low formed during the low-trend period.
Under the ADX Settings section in the settings, you’ll find the following controls.
ADX Length
Defines the lookback period used to calculate directional movement for ADX.
ADX Smoothing
Controls the smoothing applied to the ADX calculation.
ADX Threshold
Sets the level below which ADX must remain for the market to be considered consolidating.
Consolidation Strength
Defines how many consecutive candles’ ADX must stay below the threshold before a consolidation zone is confirmed. Once this requirement is met, the indicator creates a consolidation zone using the accumulated high and low from the low-trend window.
Mark Candles Below Threshold
When enabled, the indicator highlights candles where ADX remains below the threshold.
◇ Visual Range
The Visual Range method identifies consolidation by detecting clearly defined horizontal price ranges where price remains contained for a sustained period of time. The indicator continuously tracks the rolling highest high and lowest low across recent candles. When price remains inside the same high–low boundaries without breaking above or below the range, an internal counter advances.
Under the Visual Range section in the settings, you’ll find the following control.
Min. Candles in Range
Defines how many consecutive candles must remain fully contained within the same high–low range before a consolidation zone is confirmed. Once this requirement is met, the indicator creates a consolidation zone using the established range boundaries.
🔹Consolidation Zone Settings
◇ Invalidation Method
Users can choose how Consolidation Zones are invalidated, selecting between Close Break or Wick Break.
Close Break: A Consolidation Zone is invalidated when a candle closes above/below the zone.
Wick Break: A Consolidation Zone is invalidated when a candle’s wick goes above/below the zone.
◇ Merge Overlapping Zones
When enabled, overlapping Consolidation Zones are automatically combined into one unified zone.
◇ Show Last
This setting determines how many Consolidation Zones are displayed on your chart. For example, setting this to 5 will display the 5 most recent zones.
VOLUME DELTA:
Delta Volume visualizes how buying and selling volume accumulates inside each consolidation zone. Instead of using the full candle volume, the indicator isolates only the volume that occurs within the vertical boundaries of the zone. This allows you to see whether bullish or bearish volume is dominating while price remains range-bound. The visualization updates in real time while the zone is active and reflects cumulative participation rather than individual candles.
🔹How Volume Delta is Calculated
Delta Volume is calculated using lower-timeframe data and applied to the higher-timeframe consolidation zone.
Each candle’s volume is split into bullish or bearish volume based on candle direction.
Lower-timeframe candles are pulled using the selected delta timeframe.
For each lower-timeframe candle, only the portion of volume that vertically overlaps the consolidation zone is counted.
Volume is weighted by the amount of overlap between the candle’s range and the zone’s range.
Bullish and bearish volume are accumulated over time to form a running, cumulative delta profile for the zone.
🔹Volume Delta Settings
◇ Enable
Turns the Delta Volume visualization on or off. Consolidation zones continue to plot when disabled.
◇ Show Delta %
Displays the percentage breakdown of bullish versus bearish volume inside the consolidation zone. Percentages are derived from cumulative volume totals.
◇ 3D Visual
When enabled, the delta blocks are extended diagonally using a depth offset derived from the instrument’s daily ATR. This creates visible side faces and top faces for the delta blocks, simulating depth without altering any calculations. The 3D effect is purely visual. It does not change how volume is calculated, weighted, or accumulated.
Users can control the intensity of the 3D effect choosing a value between 1 and 5. Increasing this value increases:
The horizontal offset of the delta blocks
The vertical depth projection applied to the volume faces
Higher values produce a more pronounced 3D appearance by pushing the delta visualization further away from the consolidation box. Lower values keep the visualization flatter and closer to the box boundaries. The depth scaling is normalized using ATR, so the effect adapts proportionally to the instrument’s volatility.
◇ Volume Delta Display Style
Controls how bullish and bearish volume are displayed inside the Consolidation Zone:
Horizontal: Volume is split top-to-bottom within the zone
Vertical: Volume is split left-to-right across the zone
◇ Timeframe
Defines the lower timeframe used for Volume Delta calculations. When a timeframe is selected, the indicator pulls lower-timeframe price and volume data and maps it into the higher-timeframe consolidation zone. Each lower-timeframe candle is evaluated individually. Only the portion of its volume that vertically overlaps the consolidation zone is included, and that volume is weighted based on the candle’s overlap with the zone’s price range. If the Timeframe field is left empty, the indicator defaults to using the chart’s current timeframe for delta calculations.
Using a lower timeframe increases the granularity of the delta calculation, allowing volume changes inside the zone to be measured more precisely. Using a higher timeframe produces a smoother, less granular delta profile.
Please Note: Delta rendering is automatically limited to available lower-timeframe data to prevent incomplete or distorted visuals when historical lower-timeframe volume is unavailable due to TradingView data limits.
STANDARD DEVIATION BANDS:
Standard Deviation Bands project measured price distance away from a confirmed consolidation zone using the size of that zone as the reference unit. Rather than calculating volatility from historical price dispersion, the bands are derived directly from the height of the consolidation range itself. Each band represents a fixed multiple of the consolidation zone’s height and is plotted symmetrically above and below the zone.
🔹How the bands are calculated
Once a consolidation zone is finalized, the indicator calculates the zone height as:
Zone Height = Zone High − Zone Low
This value becomes the base measurement for all deviation calculations. For each enabled band:
Upper bands are placed above the consolidation zone’s high
Lower bands are placed below the consolidation zone’s low
The distance of each band from the zone is calculated by multiplying the zone height by the selected band multiplier. These band levels are fixed relative to the consolidation zone and do not recalculate based on future price movement.
🔹Standard Deviation Band Settings
◇ Band 1
Enables the first deviation band above and below the consolidation zone. The Band 1 multiplier defines how far the band is placed from the zone in terms of zone height. For example, a multiplier of 1 plots the band one full zone height above and below the consolidation range.
◇ Band 2
Enables a second deviation band at a greater distance from the consolidation zone. Band 2 uses its own multiplier and is calculated independently of Band 1, allowing multiple expansion levels to be displayed simultaneously.
◇ Fill Bands
When enabled, the area between the consolidation zone and each deviation band is filled with a semi-transparent color. Upper fills apply to bands above the zone, and lower fills apply to bands below the zone. Fills are static and tied directly to the consolidation zone boundaries.
◇ Color Customization
Each deviation band has independent color controls for:
Upper band lines and fills
Lower band lines and fills
This allows users to visually distinguish between bullish and bearish extensions as well as between multiple deviation levels.
ALERTS:
Users can create alerts for the following:
New Consolidation Zone Formed
Consolidation Zone Break
UNIQUENESS:
This indicator combines multiple consolidation detection methods with lower-timeframe volume delta analysis inside each consolidation zone. It visualizes bullish and bearish volume using weighted overlap logic and optional 3D rendering for improved clarity. Users can choose how volume is displayed, apply structure-based deviation bands, and enable alerts for new zones and zone breaks. All features are rule-based, configurable, and designed to work together within a single framework.
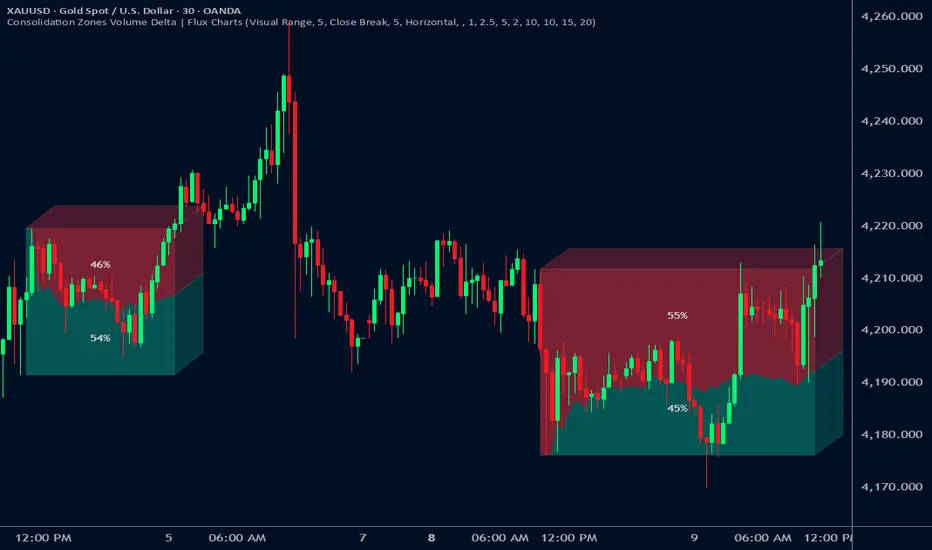
Rolling VWAP Structure [MTF]Core Logic: Rolling VWAP & MTF**
* **Rolling VWAP (Volume-Weighted Average Price):** Unlike a simple Moving Average, this centerline weighs price by volume. It represents the true "Institutional Cost Basis" over the rolling period (default 20).
* **MTF (Multi-Timeframe) Capability:** The indicator is locked to the **Daily (1D)** timeframe by default. This acts as a stable "Lighthouse," ensuring that intraday noise does not distort the major structural levels.
* *Stepped Lines:* On lower timeframes, the lines appear stepped. This is intentional. It shows that the structural value remains constant throughout the day until the daily close shifts the calculation.
**3. Market Profile Logic: Balance vs. Imbalance**
This indicator visually decodes the market cycle using Auction Market Theory:
* **Orange Zone (Squeeze) = Balance:** When the bands contract (and turn Orange), the market is in equilibrium. This is a high-volume node where price is accepted. **Note:** Historical Orange Zones often act as strong Support/Resistance upon retest.
* **Grey Cloud (Expansion) = Imbalance:** When price breaks into the Grey "Highway" (1.0 - 2.0 StdDev), the market enters Price Discovery mode (Trending).
**4. Key Features & Settings**
* **Fixed Timeframe:** Select the timeframe you want to monitor (e.g., "1D" for Daily structure, "1W" for Weekly).
* **Clean Visuals:** The bottom signal dots have been removed for a cleaner chart.
* **Squeeze Toggle:** You can now **hide the Orange Squeeze color** in the settings if you prefer a unified Grey look for strictly structural analysis.
---
### **中文说明**
核心逻辑:Rolling VWAP 与 跨周期 (MTF)**
* **Rolling VWAP (滚动成交量加权均价):** 与简单移动平均线不同,中轨根据成交量对价格进行加权。它代表了滚动周期内(默认20)真实的“机构持仓成本”。
* **MTF (跨周期) 能力:** 指标默认锁定在 **日线 (1D)** 周期。这就像一座稳定的“灯塔”,确保日内的短期噪音不会扭曲主要的结构性点位。
* *阶梯状线条:* 在小周期图表上,轨道呈现阶梯状。这是有意设计的,代表当天的结构价值是固定的,不会随秒级波动而改变。
**3. 市场轮廓逻辑:平衡与失衡**
本指标利用拍卖市场理论可视化解码市场周期:
* **橙色区域 (挤压) = 平衡 (Balance):** 当布林带收缩(并变橙色)时,市场处于均衡状态。这是筹码密集的高成交量区。**注意:** 历史上的橙色区域在未来回踩时往往起到强力的 支撑/阻力 作用。
* **灰色云带 (扩张) = 失衡 (Imbalance):** 当价格突破进入灰色“高速公路”(1.0 - 2.0 标准差)时,市场进入价格发现模式(趋势)。
**4. 主要功能与设置**
* **Fixed Timeframe (锁定时间框架):** 选择你想要监控的周期(例如 "1D" 看日线结构,"1W" 看周线结构)。
* **视觉净化:** 移除了底部的信号圆点,让主图背景更加纯粹干净。
* **Squeeze Toggle (挤压色开关):** 你现在可以在设置中**隐藏橙色挤压显示**。如果你更偏向纯粹的结构分析,可以选择让通道始终保持灰色。
